Enable / Disable Workspace
Workspaces can be enabled or disabled based on requirements.
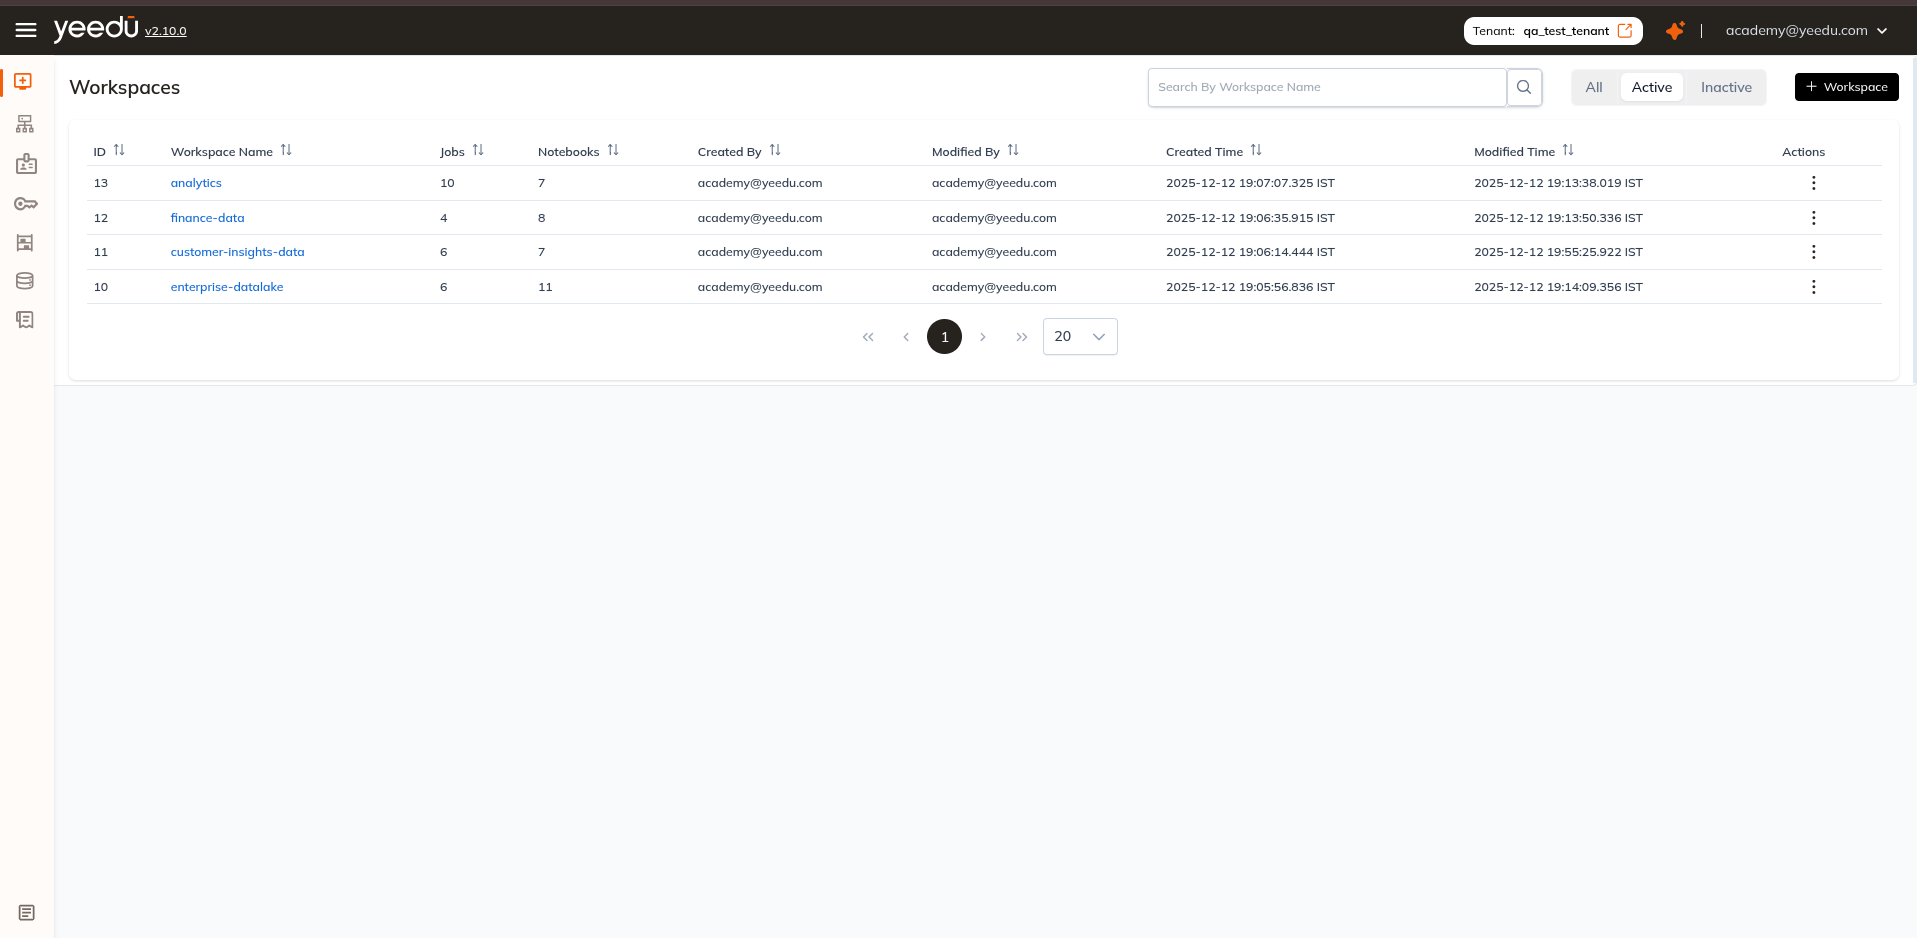
The Workspace Dashboard provides flexible controls to view, manage, and update workspace states.
Workspace Dashboard Filters
At the top of the Workspace Dashboard, users can toggle between the following filters:
- All – Displays both active and inactive workspaces.
- Active – Shows only workspaces currently in active state.
- Inactive – Lists workspaces that have been disabled.
These filters enable users to quickly navigate and manage workspace availability.
Disable (Inactivate) a Workspace
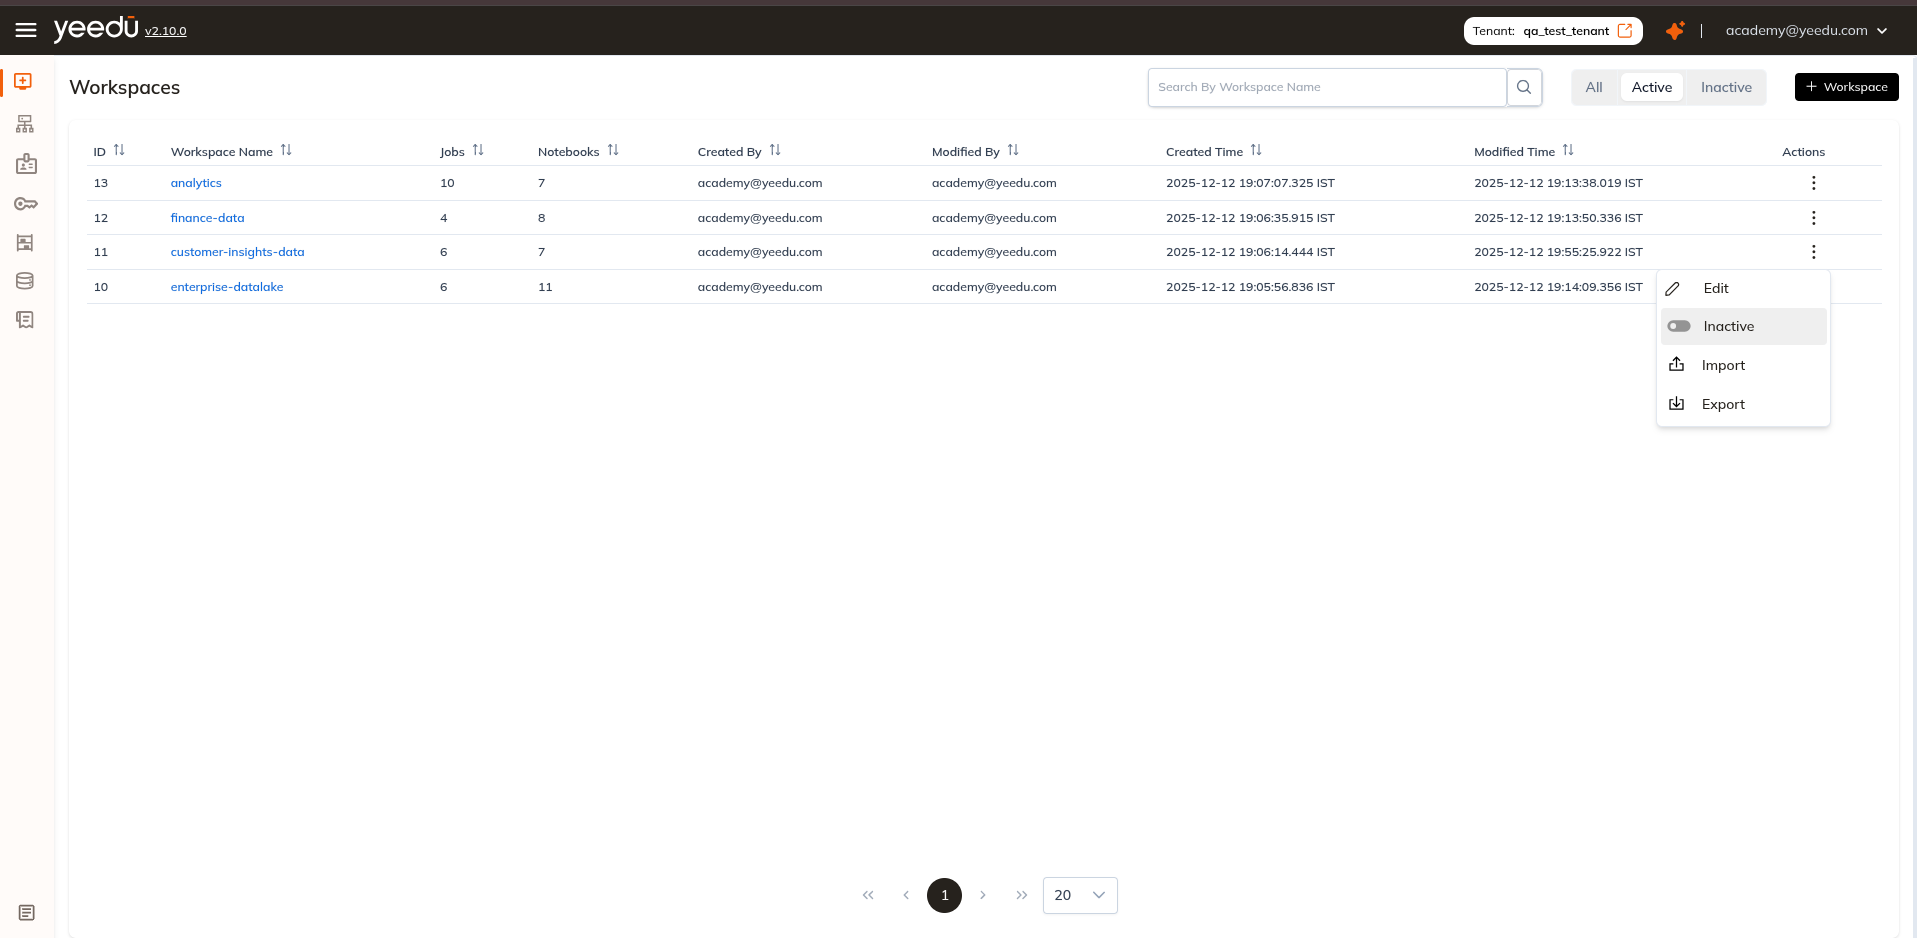
To disable a workspace:
-
Navigate to the workspace you want to disable.
-
Click the Actions button corresponding to that workspace.
-
Select Inactive from the menu.
-
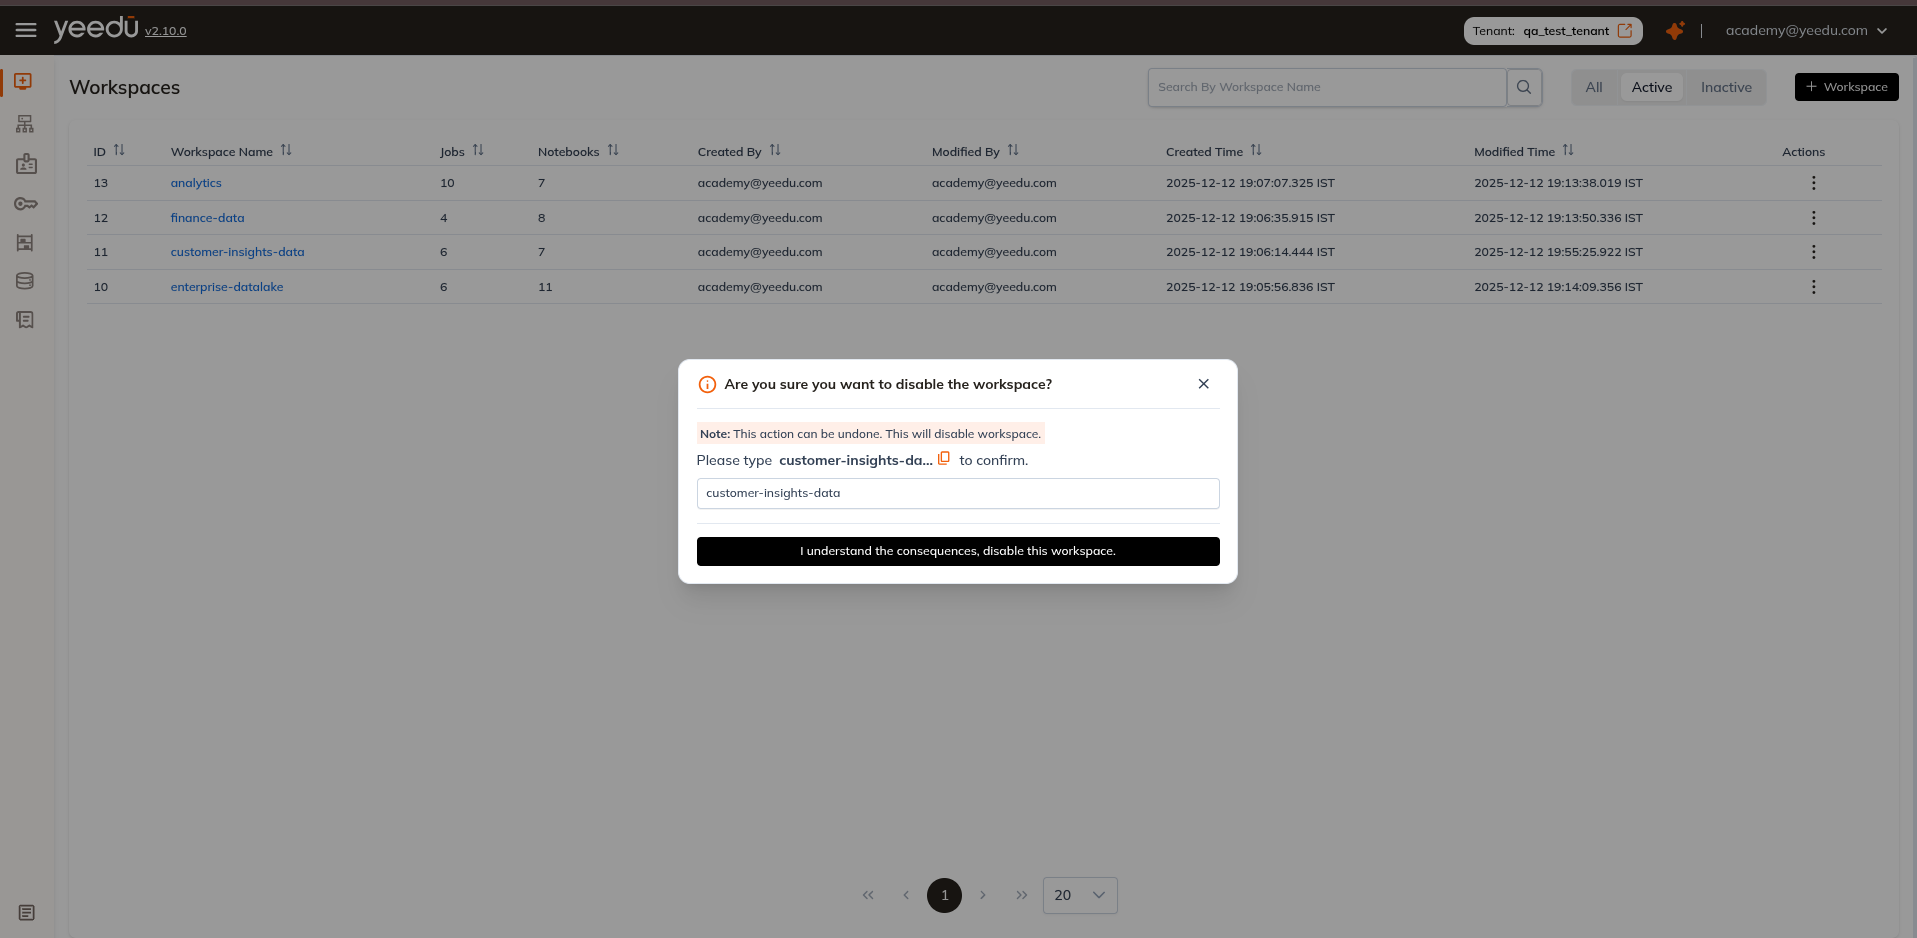
A confirmation dialog will appear, prompting:
"Are you sure you want to disable the workspace?"
Please type<workspace_name>to confirm. -
Enter the exact workspace name and click Confirm.
Once confirmed, the workspace status is updated to Inactive, and it will appear under the Inactive tab.
Enable (Activate) a Workspace
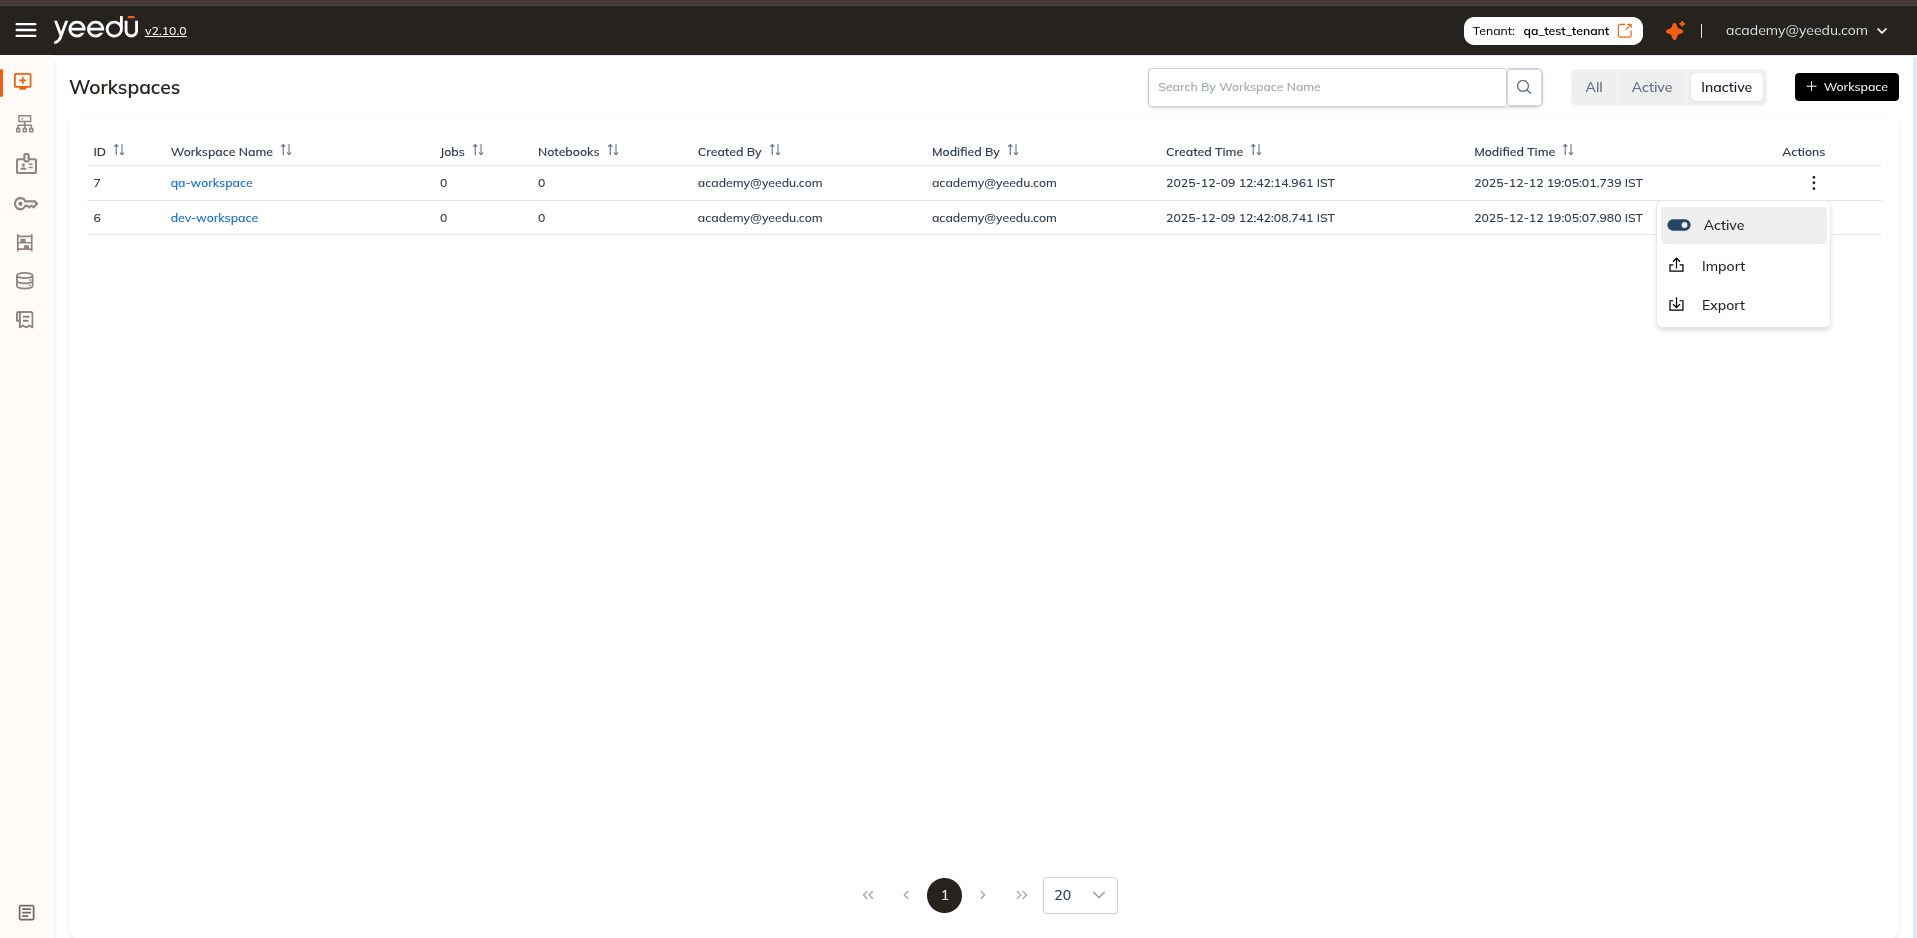
To reactivate a previously disabled workspace:
- Switch to the Inactive tab on the Workspace Dashboard.
- Click the Actions button for the desired workspace.
- Select Active.
- The workspace will immediately switch back to active status and appear under the Active tab.
Workspace Permission Matrix
| Ability | Can Manage | Can Edit | Can Run | Can View |
|---|---|---|---|---|
| Workspace Access Management | ✔ | ✖ | ✖ | ✖ |
| Activate or Inactivate the Job, Notebook, Workspace | ✔ | ✔ | ✖ | ✖ |
| Create or Update Job or Notebook Configurations | ✔ | ✔ | ✖ | ✖ |
| Run or Stop the Job or Notebook | ✔ | ✔ | ✔ | ✖ |
| Read All Job or Notebook Configurations and Runs | ✔ | ✔ | ✔ | ✔ |