Files in Workspaces
The Files in Workspaces feature enhances workspace functionality by enabling users to manage files efficiently. Users can now seamlessly upload, delete, edit, and create files directly from the UI, facilitating job execution and notebook workflows.
Navigating to Files in Workspaces
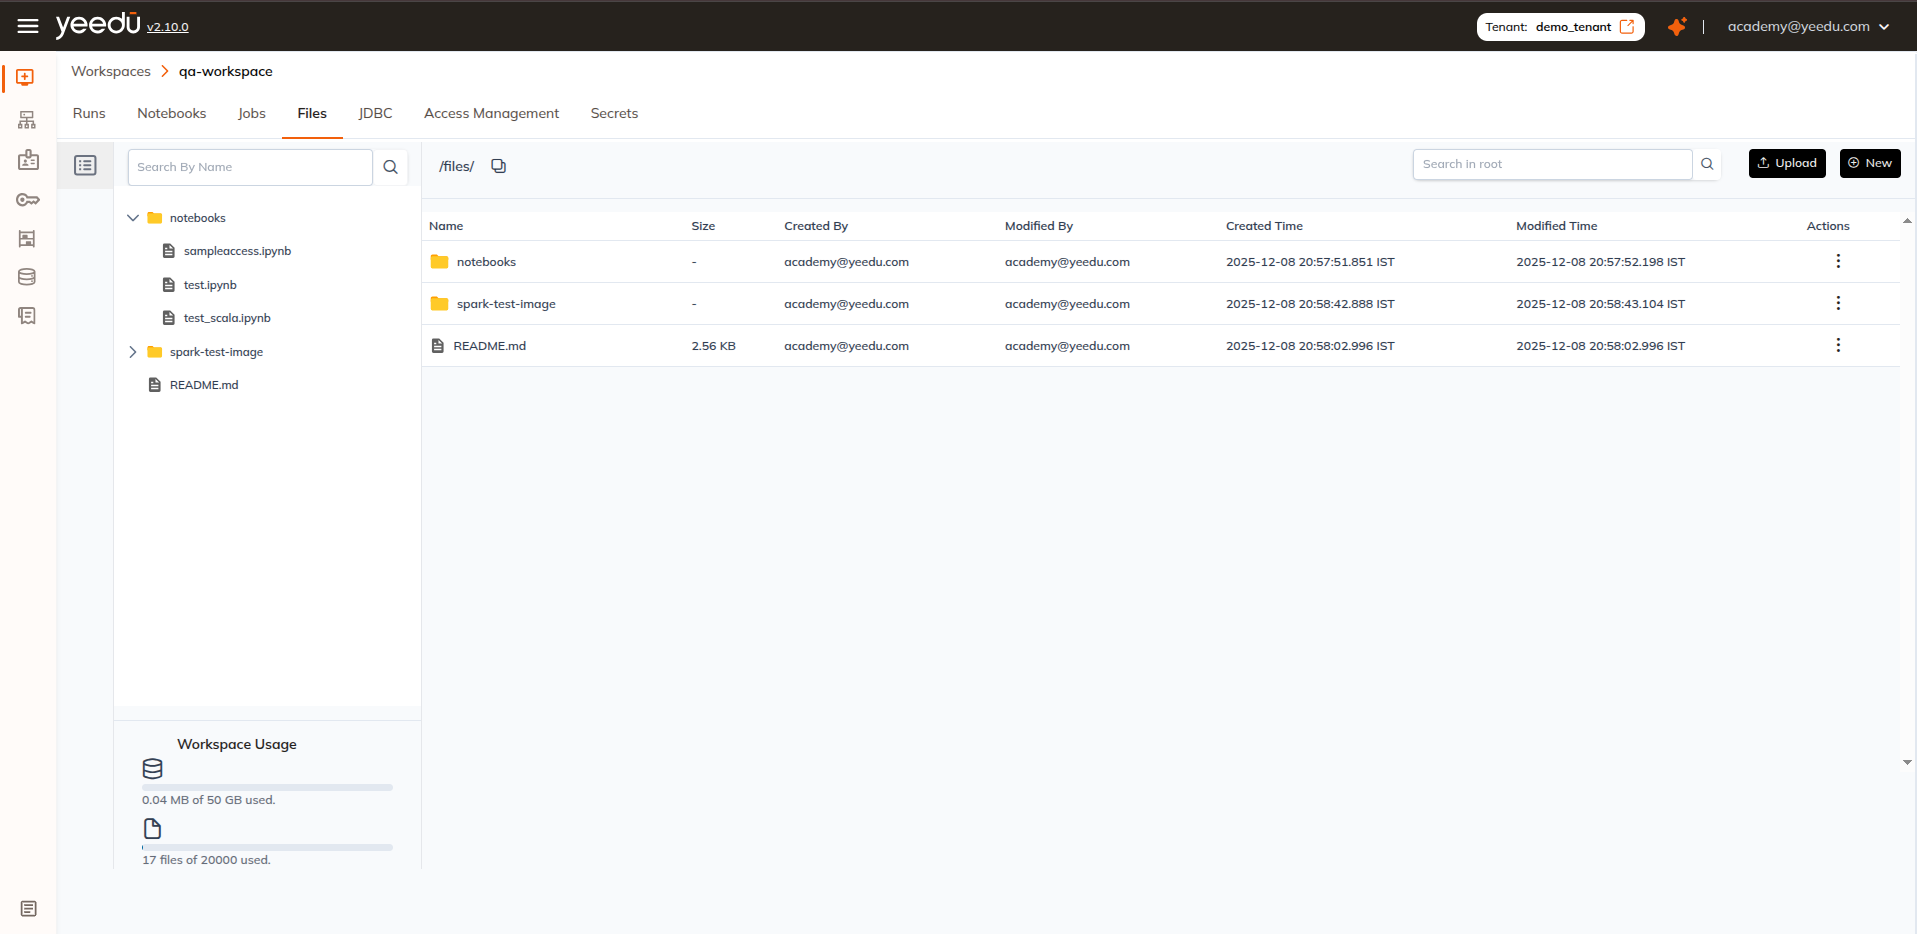
To access the Files in Workspaces feature, follow these steps:
- Navigate to the Workspaces tab.
- Click on Files in Workspaces.
- The file management interface will be displayed, allowing to interact with files and folders.
File Management Operations
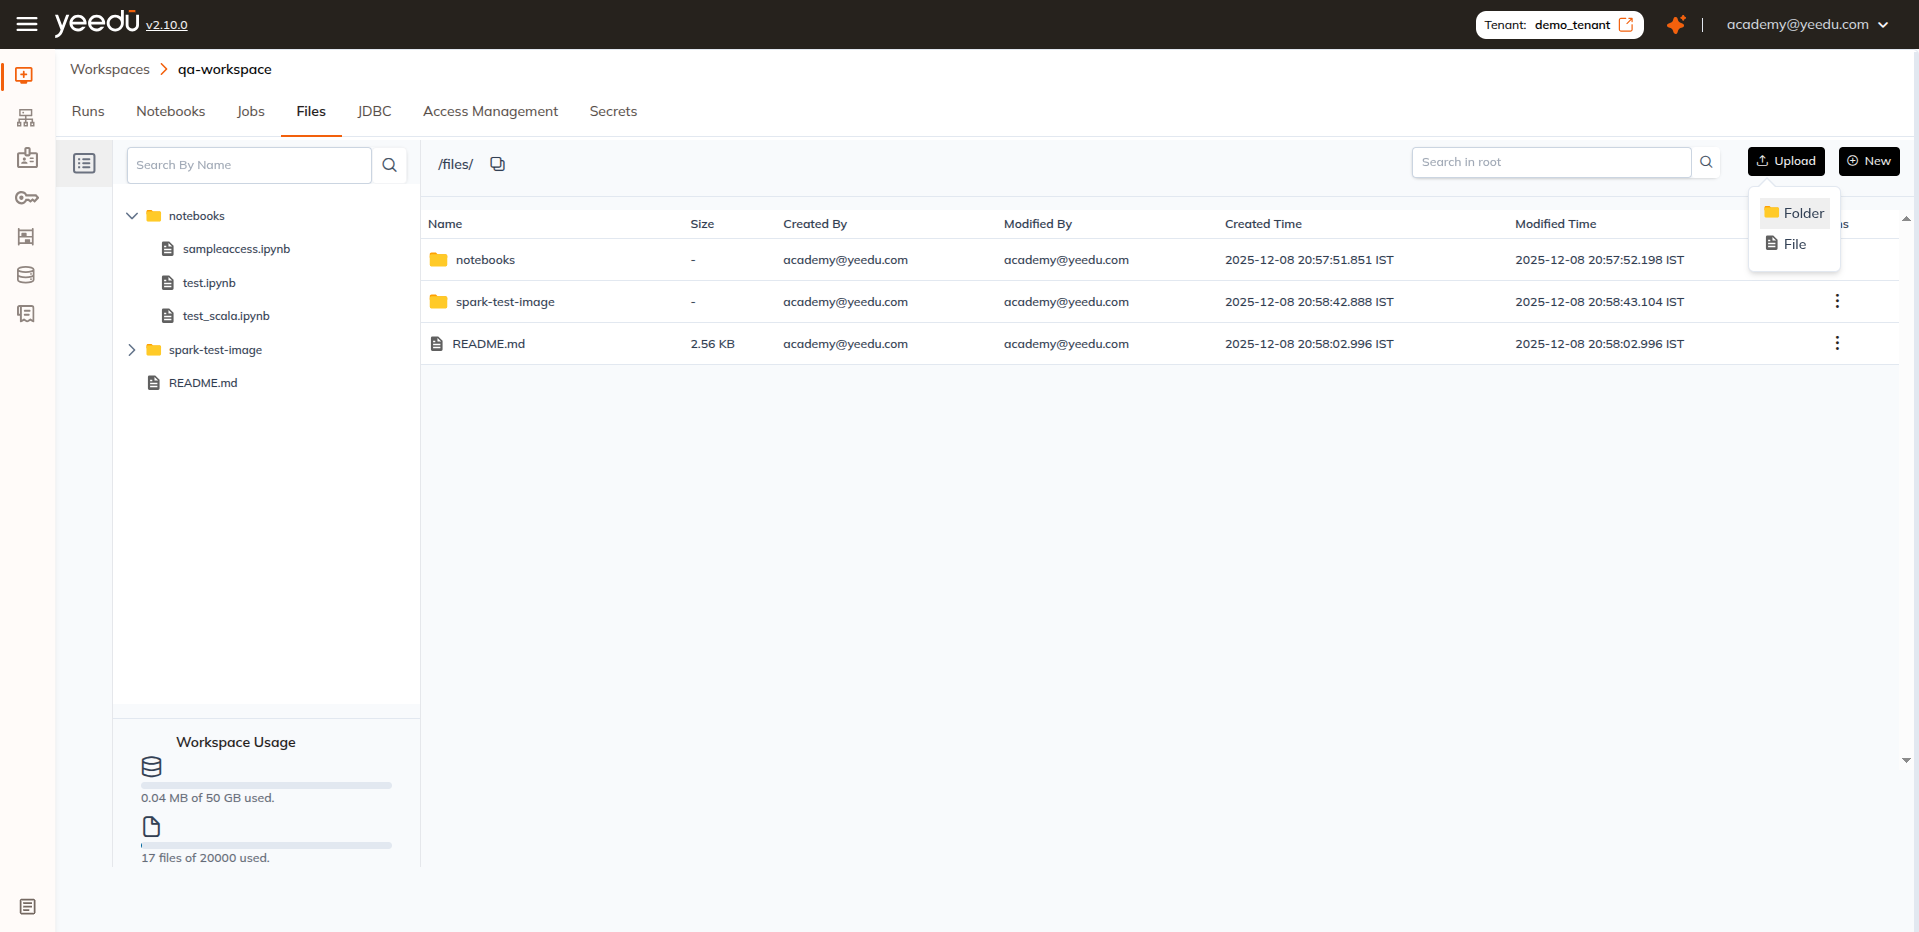
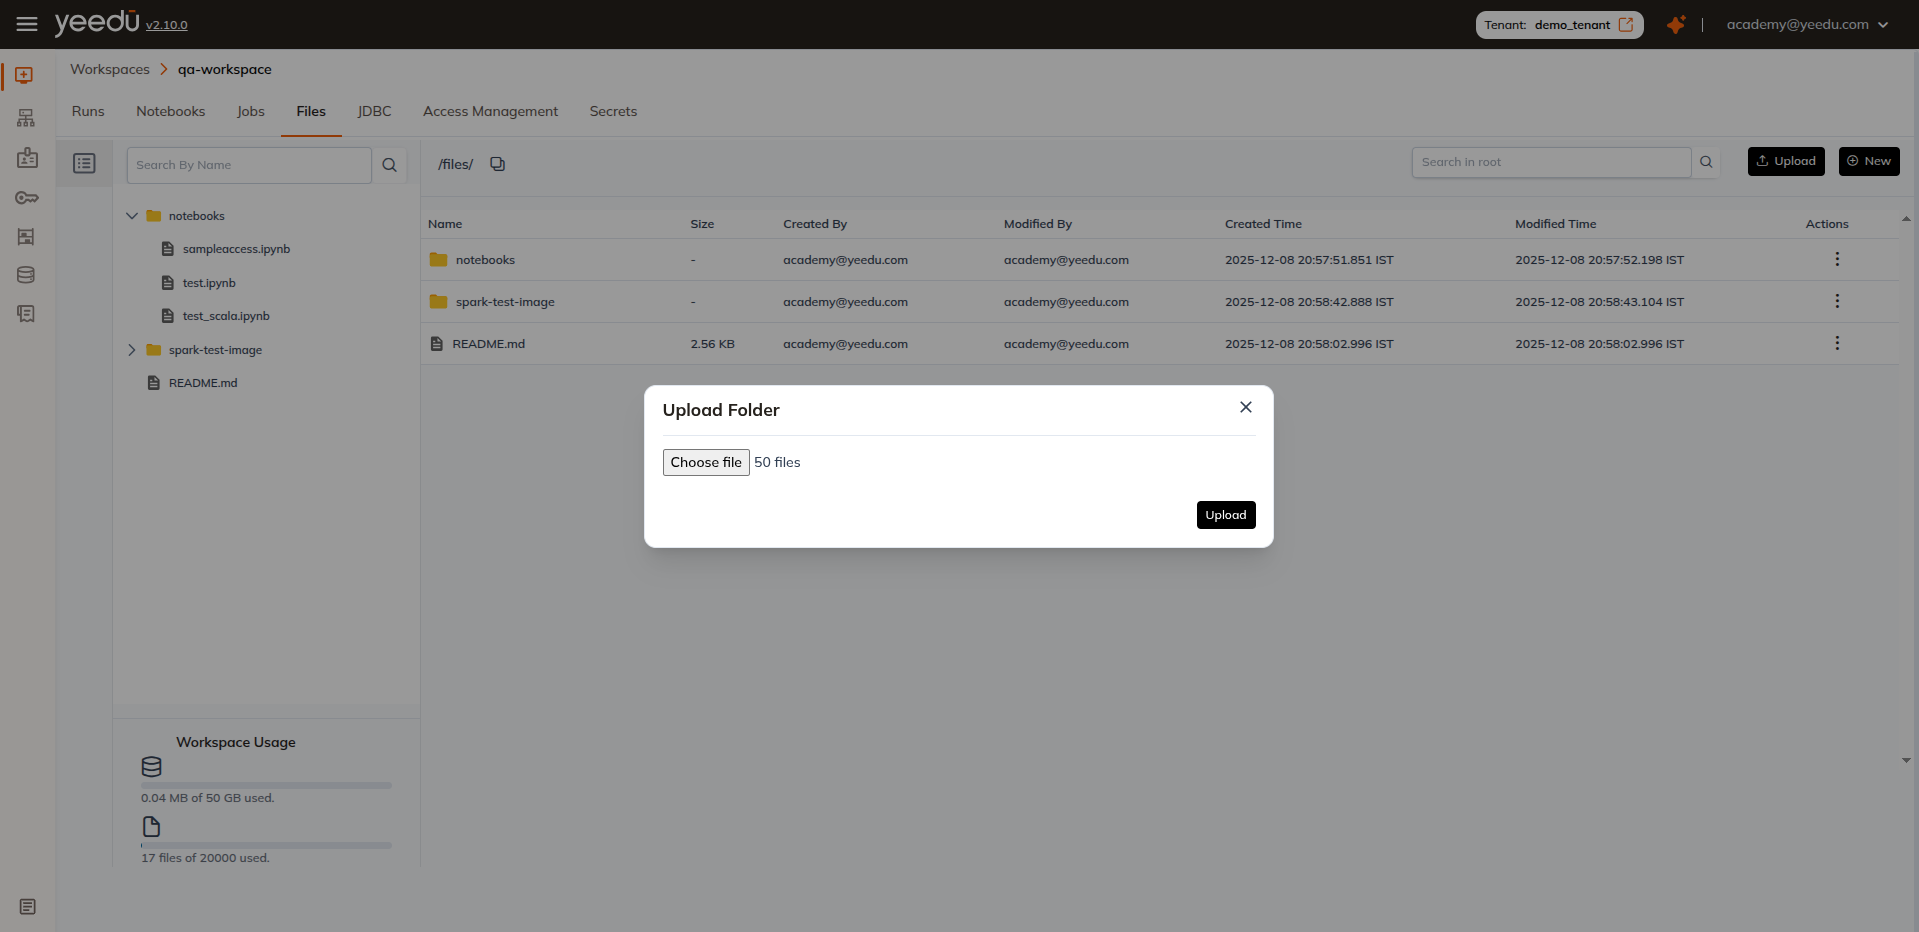
Uploading a File/Folder
- Click the Upload button in the top-right corner.
- Select the file from your system and click Open.
- The file will be uploaded to the selected workspace.
Creating a New File / Folder / Notebook
To create anything new in the workspace:
Click the + New button
Located at the top-right corner of the workspace UI.
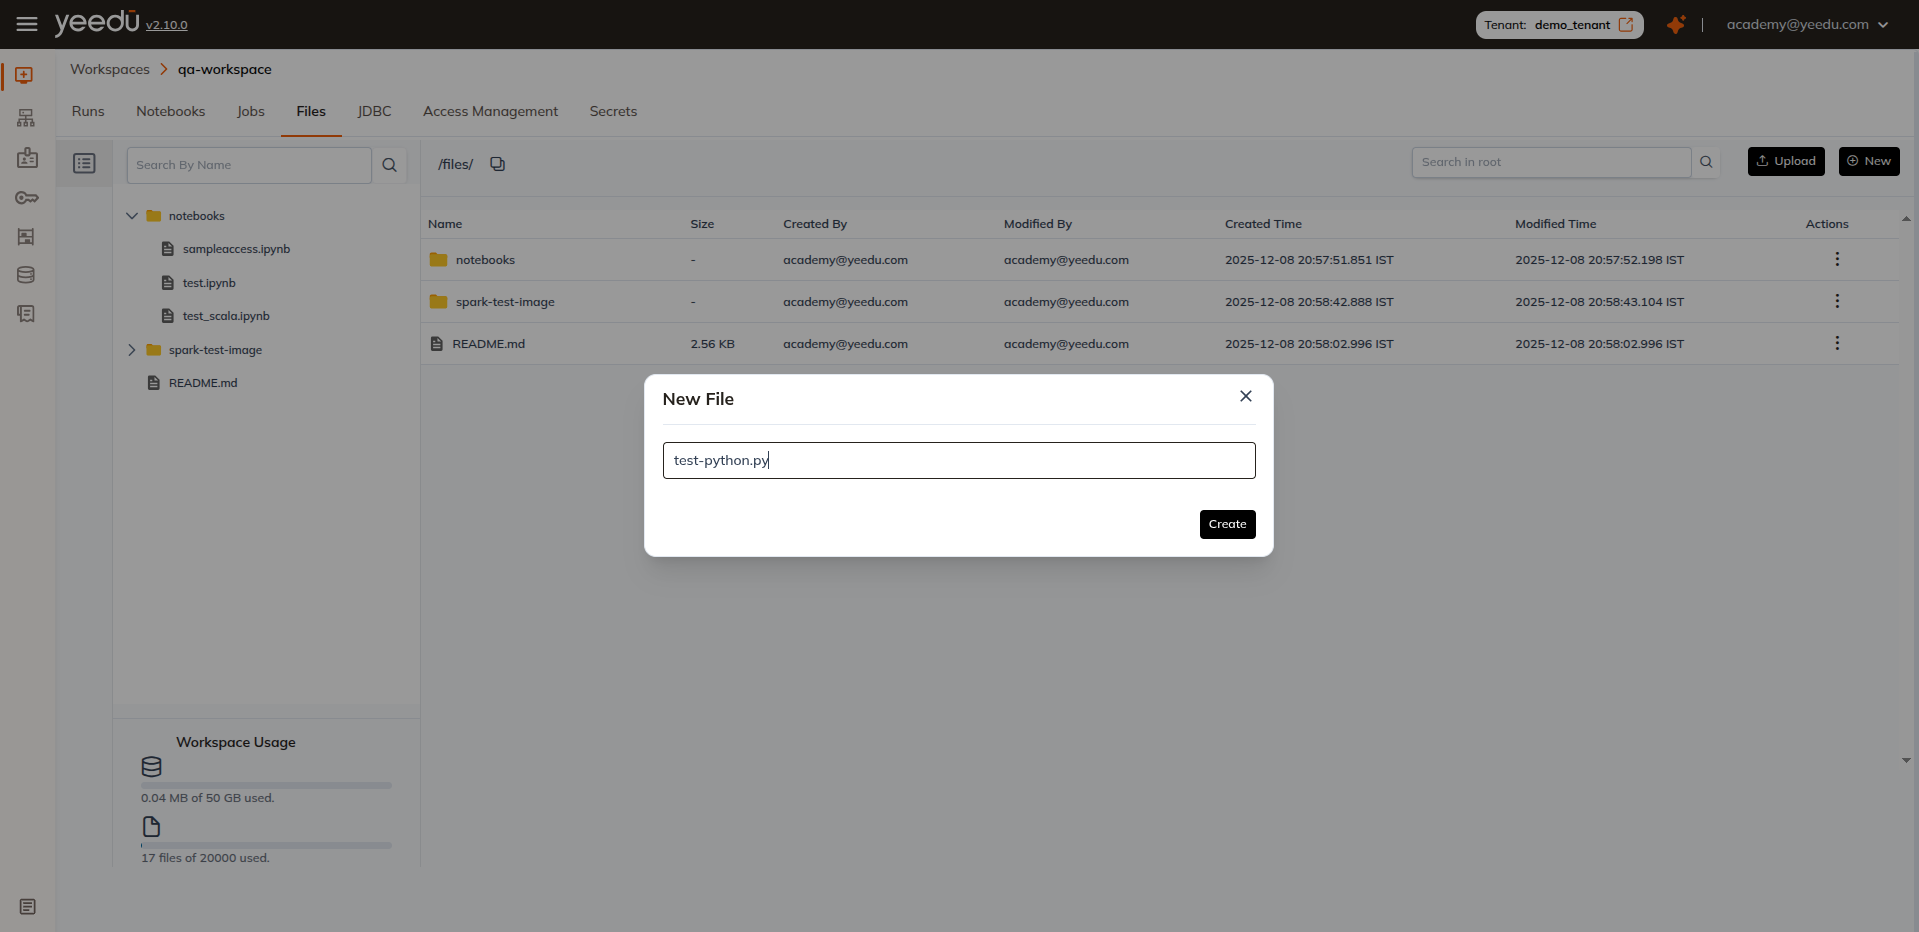
1. Create a File
- Choose File from the type selector.
- Enter a file name.
- Start editing in the workspace editor.
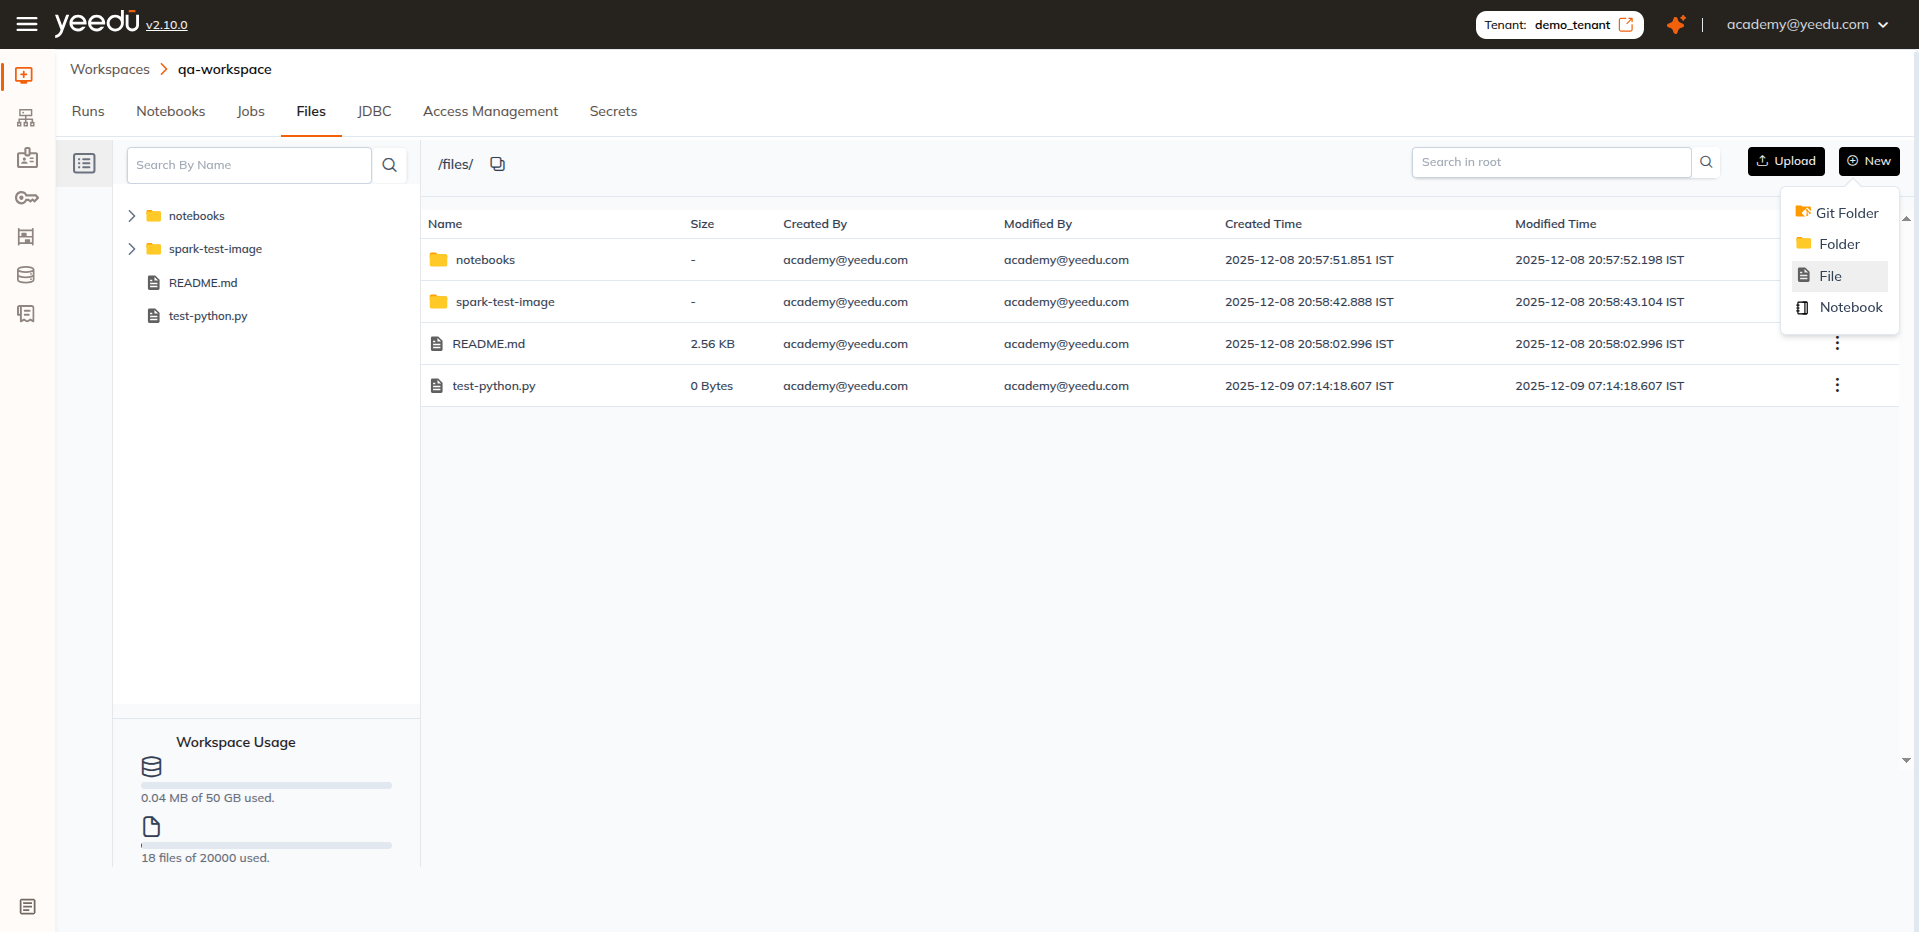
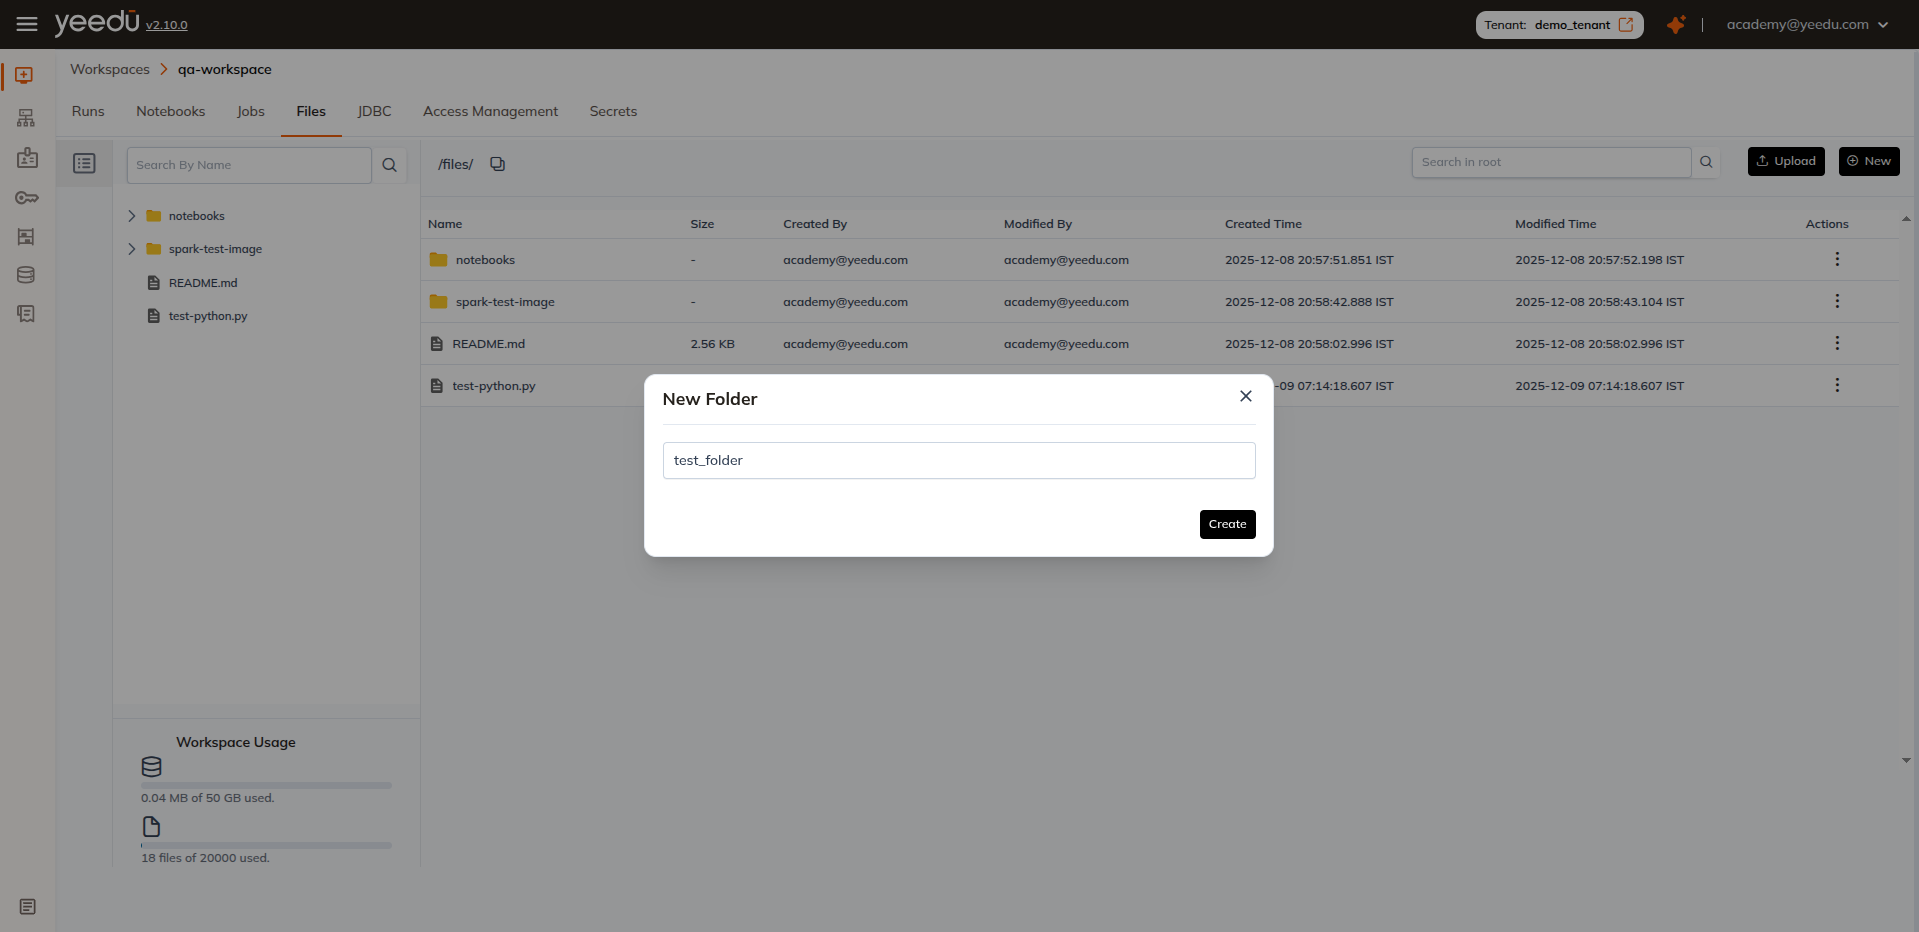
2. Create a Folder
- Choose Folder as the type.
- Enter a folder name.
- The folder is created instantly and ready for use.
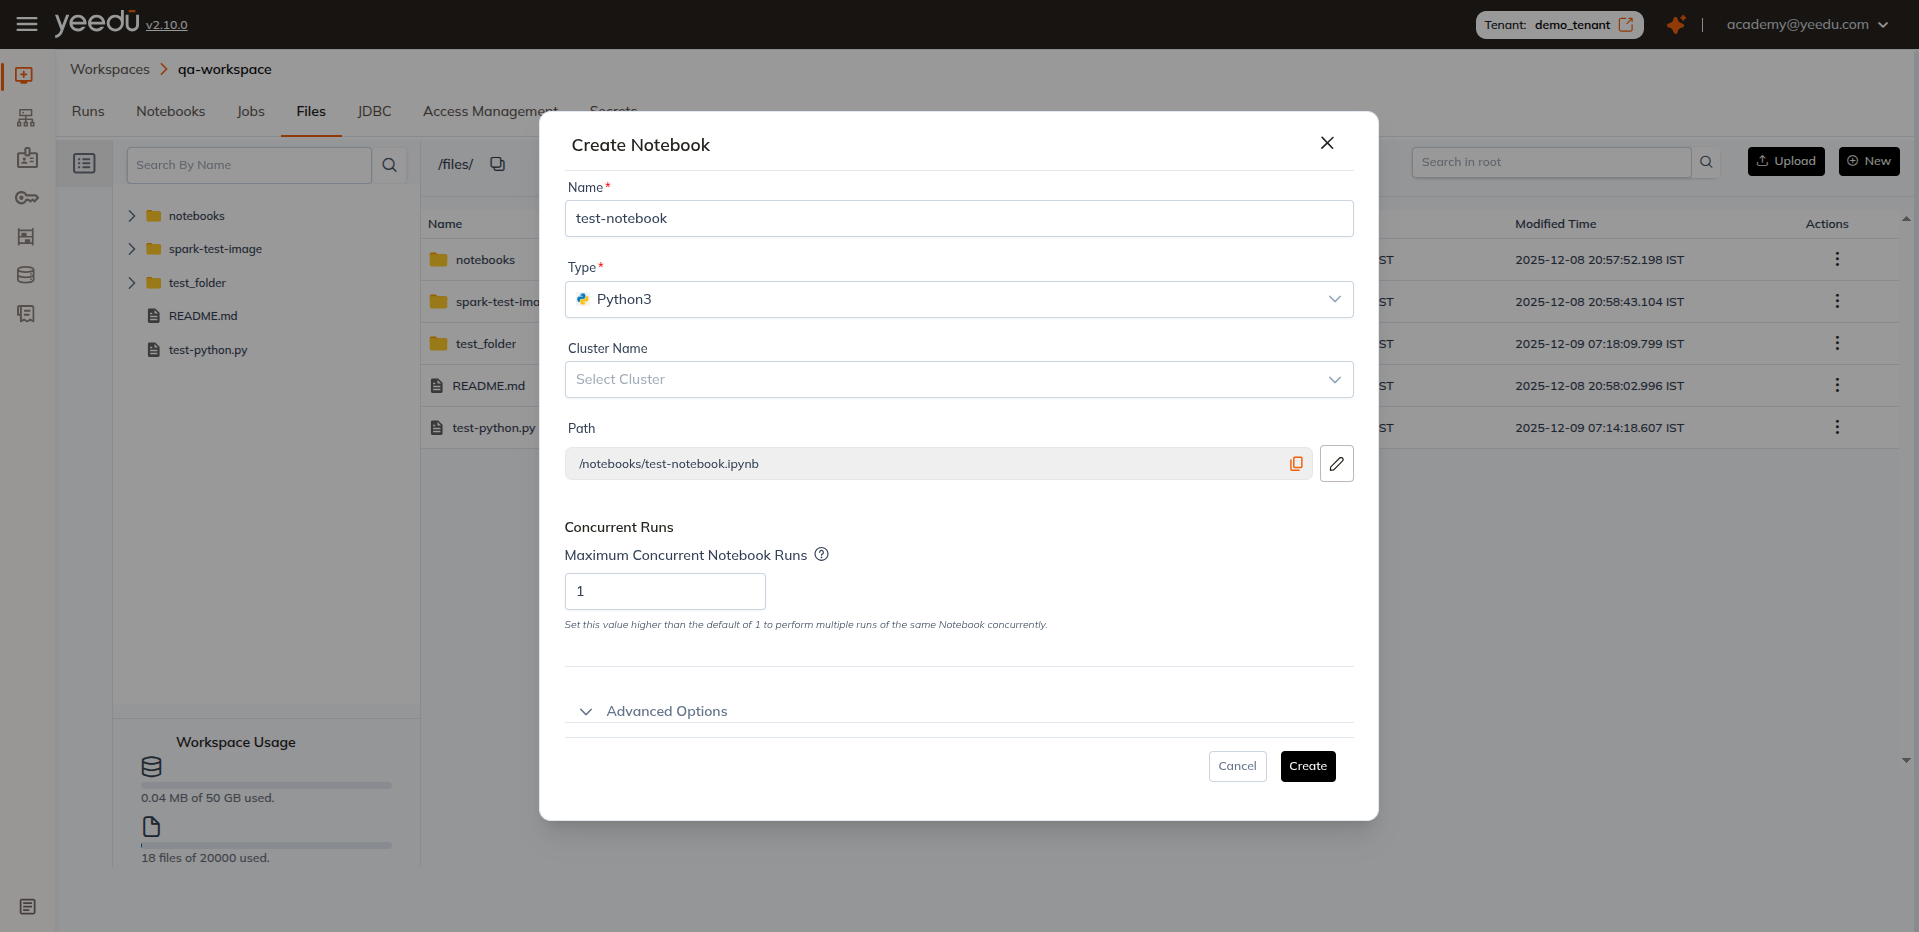
3. Create a Notebook
-
Choose Notebook as the type.
-
Fill the required configuration:
-
Name
-
Type (Python3, Scala, SQL)
-
Cluster Name (select the cluster where this notebook will run)
-
Path (location inside the workspace)
-
Maximum Concurrent Notebook Runs
- Increase this value if you want multiple runs of the same notebook to execute in parallel.
-
-
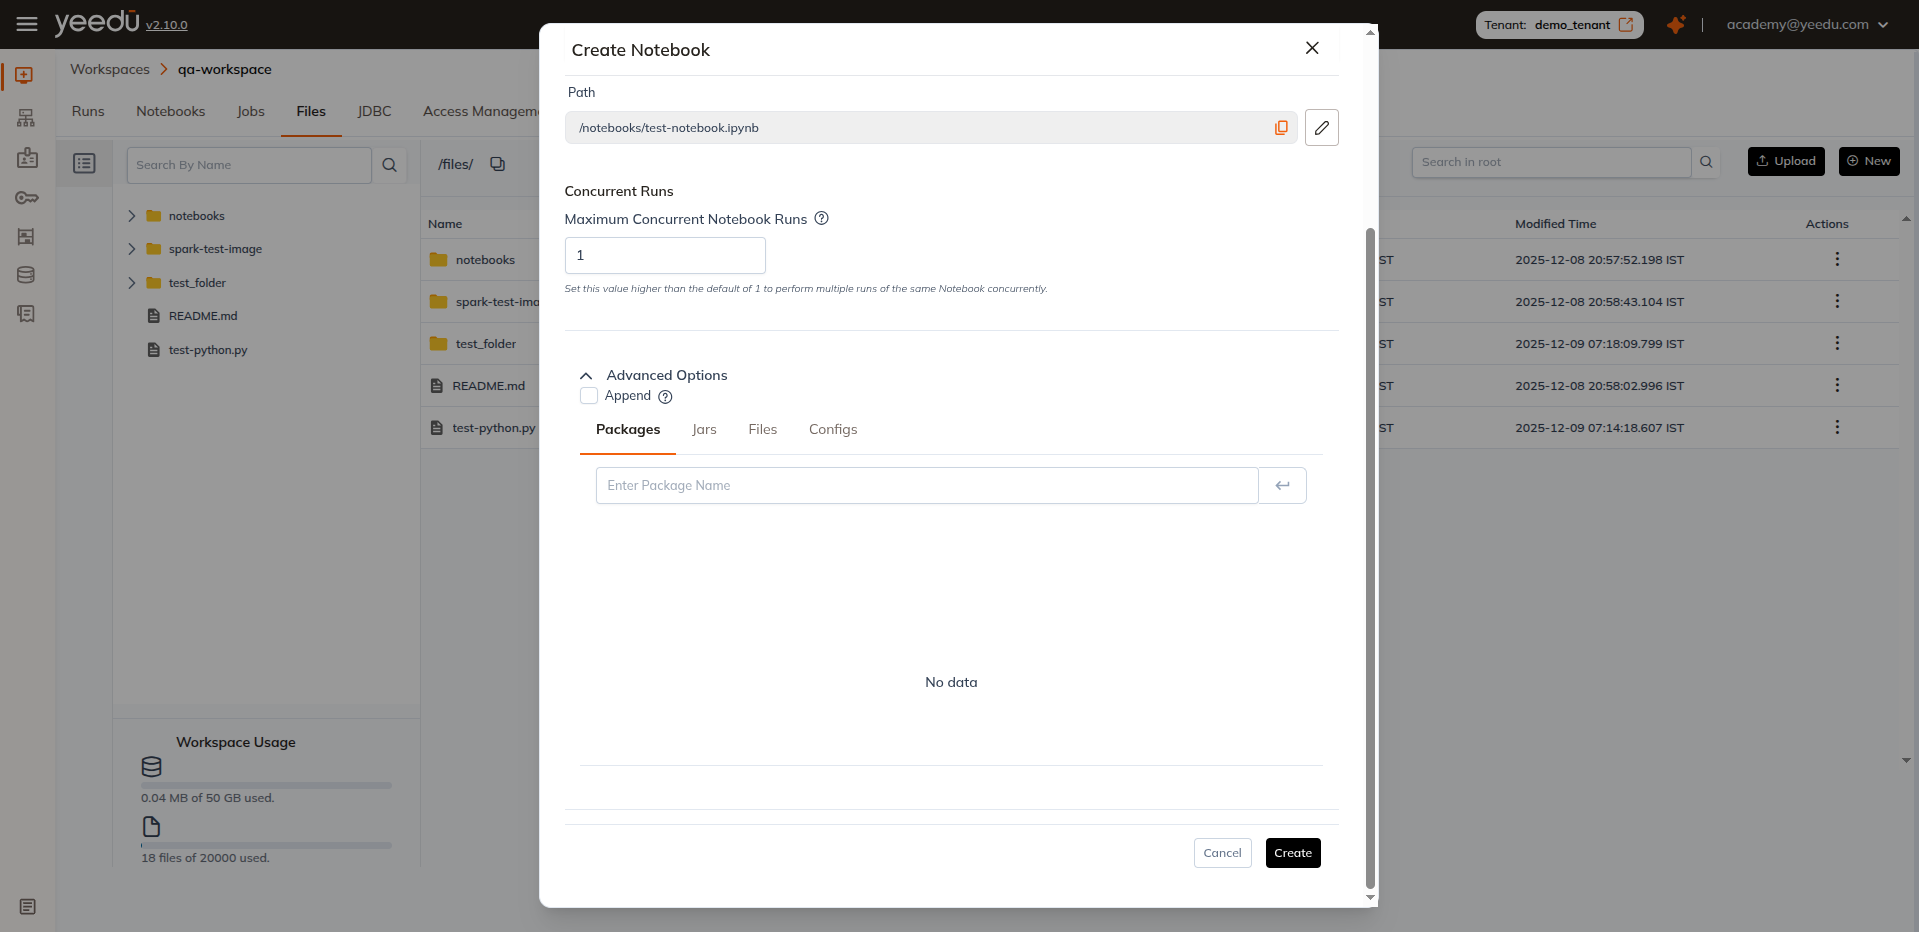
Advanced Options
- Append (checkbox) Determines whether job-level Spark configs append to or override cluster-level Spark configs.
- Packages
- Jars
- Files
- Configs
Editing a File
- Locate the file in the workspace.
- Click on the file name to open it.
- Make necessary edits and save your changes.
File Actions
Hover over any file or folder to access the Action Menu (⋮).
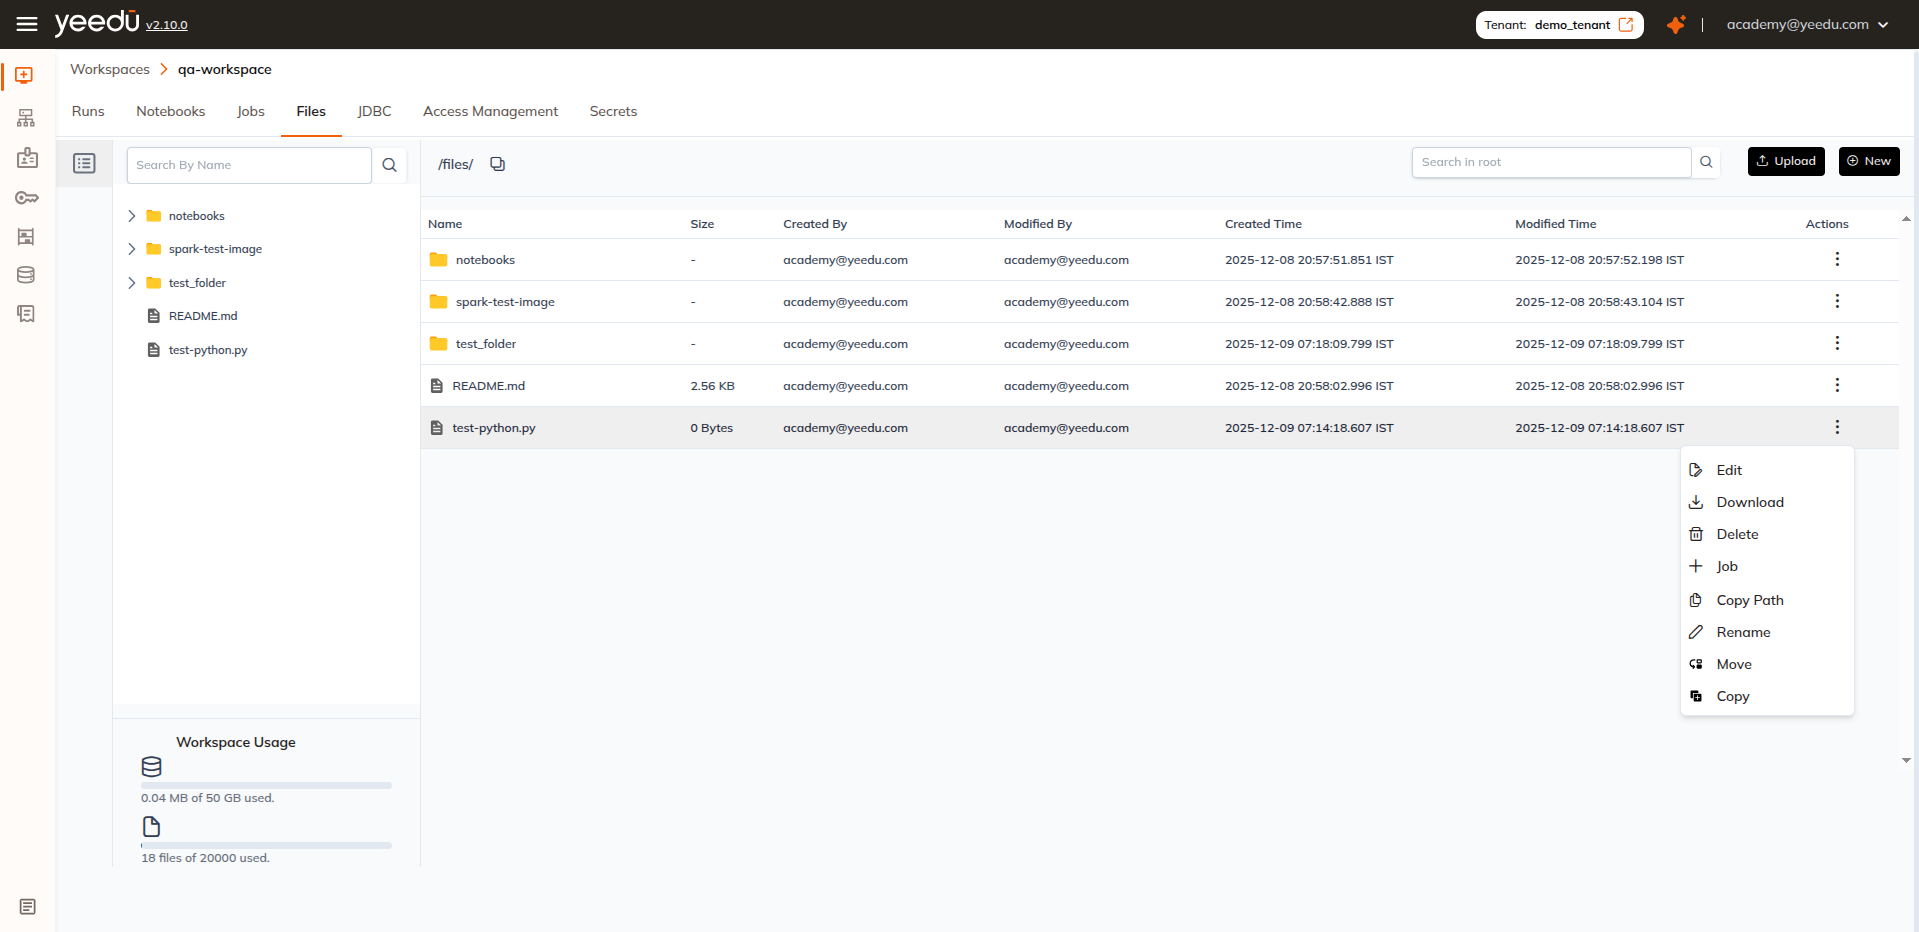
| Action | Description |
|---|---|
| Download | Download the file or folder to your local machine |
| Delete | Permanently remove the file or folder (with confirmation) |
| Rename | Edit the file or folder name inline |
| Move | Relocate the item to another folder within the workspace |
| Copy | Create a duplicate in the target location |
| Edit | Open and modify the file directly in the text editor |
| Job | To Create a job using the selected file |
| Copy Path | Copy the file or folder’s full workspace path to clipboard |
You can only perform these actions on files only if you have required permission to access.
Download a file
- Open the file action menu (⋮)
- Click Download
- File is saved locally in your default downloads folder
Download a folder
- Open the file action menu (⋮)
- Click Download
- File is saved locally in zip format.
Rename
- Select Rename from the action menu
- Input the new name
- Hit Enter or click ✓ to confirm
Move
- Click Move
- Choose the target folder using the provided navigation dialog
- Confirm the move
Copy
- Click Copy
- Select destination folder
- A duplicate of the file/folder is created
Here you go, Vishnu — clean, consistent, and aligned with the tone and flow of your existing action docs.
Edit
- Click Edit from the action menu
- The file opens in the text editor
- Make your updates and save changes using Save or Ctrl + S
Job
- Select Job from the action menu
- The job config dialog appears with the selected file pre-attached
- Configure job parameters and click Create
Copy Path
- Click Copy Path from the action menu
- The full workspace path is copied to your clipboard
- Paste it wherever you need it
Benefits of File Management in Workspaces
- Seamless Integration: Files can be directly used in job execution and notebook workflows.
- Enhanced Productivity: Quick file access and editing without external tools.
- Better Organization: Files are structured within workspaces for easier management.
The recommended resolution for Yeedu UI is 1920 × 1080.