Files in Workspaces
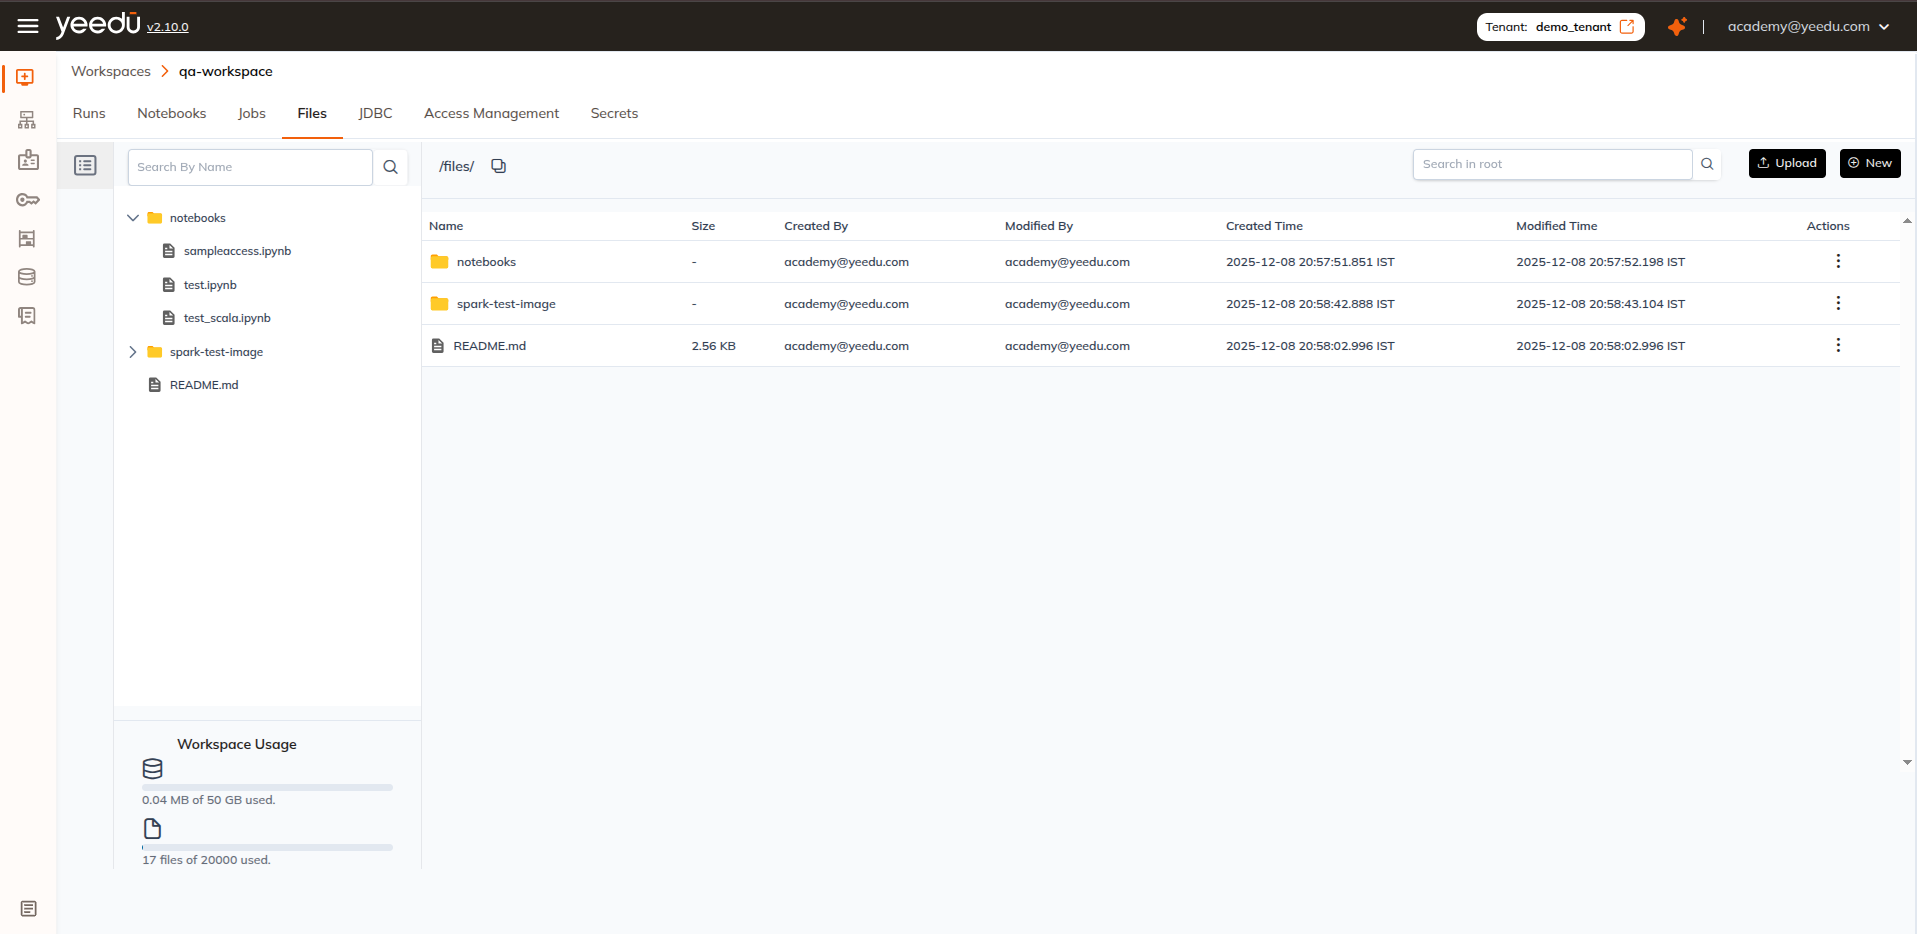
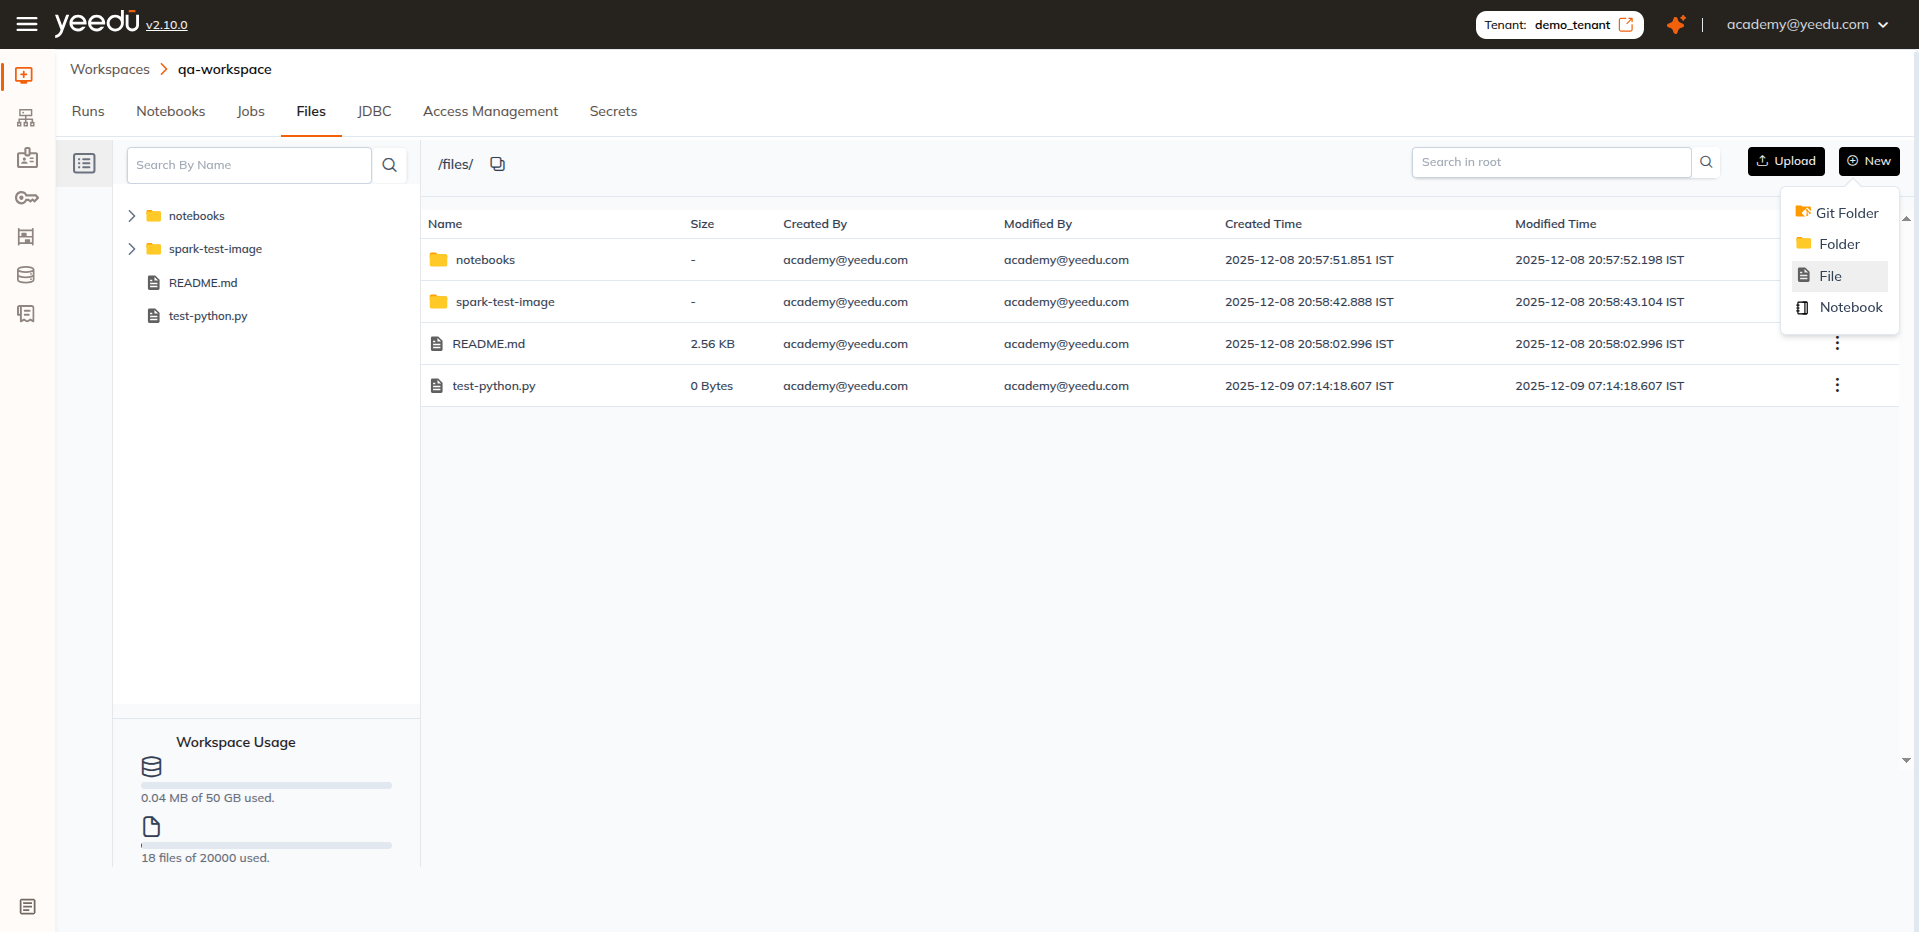
The Files tab of a Workspace is a file manager. From it you can upload files and folders, create files, folders, Git folders and Notebooks, edit file contents in the browser, rename, move, copy, download and delete items, and create a Job or Notebook from a file. It lives at /workspace/{workspace_id}/workspace-files/root. The left pane holds the folder tree and the Workspace Usage meter, and the grid on the right lists the contents of the folder you have open.
Navigating to Files in Workspaces
To access the Files in Workspaces feature, follow these steps:
- Open a Workspace from the Workspace Dashboard.
- Select the Files tab (
/workspace/{workspace_id}/workspace-files/root). - The file management interface is displayed, allowing you to interact with files and folders.
Page Layout
Left Pane: Folder Tree
| Element | Description |
|---|---|
| Search By Name | Filters the folder tree by name. |
| Folder tree | Expandable tree of every folder in the Workspace. Selecting a folder opens it in the main grid. |
| Workspace Usage | A usage meter pinned to the bottom of the pane. |
The Workspace Usage meter shows two progress bars:
| Meter | What it measures |
|---|---|
| Storage | Total bytes consumed by Workspace files against the Workspace storage allowance, for example 151.61 MB / 50 GB. |
| Files | Total number of files against the Workspace file-count allowance, for example 270 / 20000. |
The figures above are examples taken from one Workspace. The limits shown in your Workspace depend on your Yeedu deployment, so don't assume these numbers. Read the values from the meter itself.
Toolbar
| Element | Description |
|---|---|
| Path breadcrumb | Shows the current location, starting at /files/. A copy-path icon beside it copies the current path to the clipboard. |
| Search in {folder} | Searches within the folder currently open (for example Search in root). |
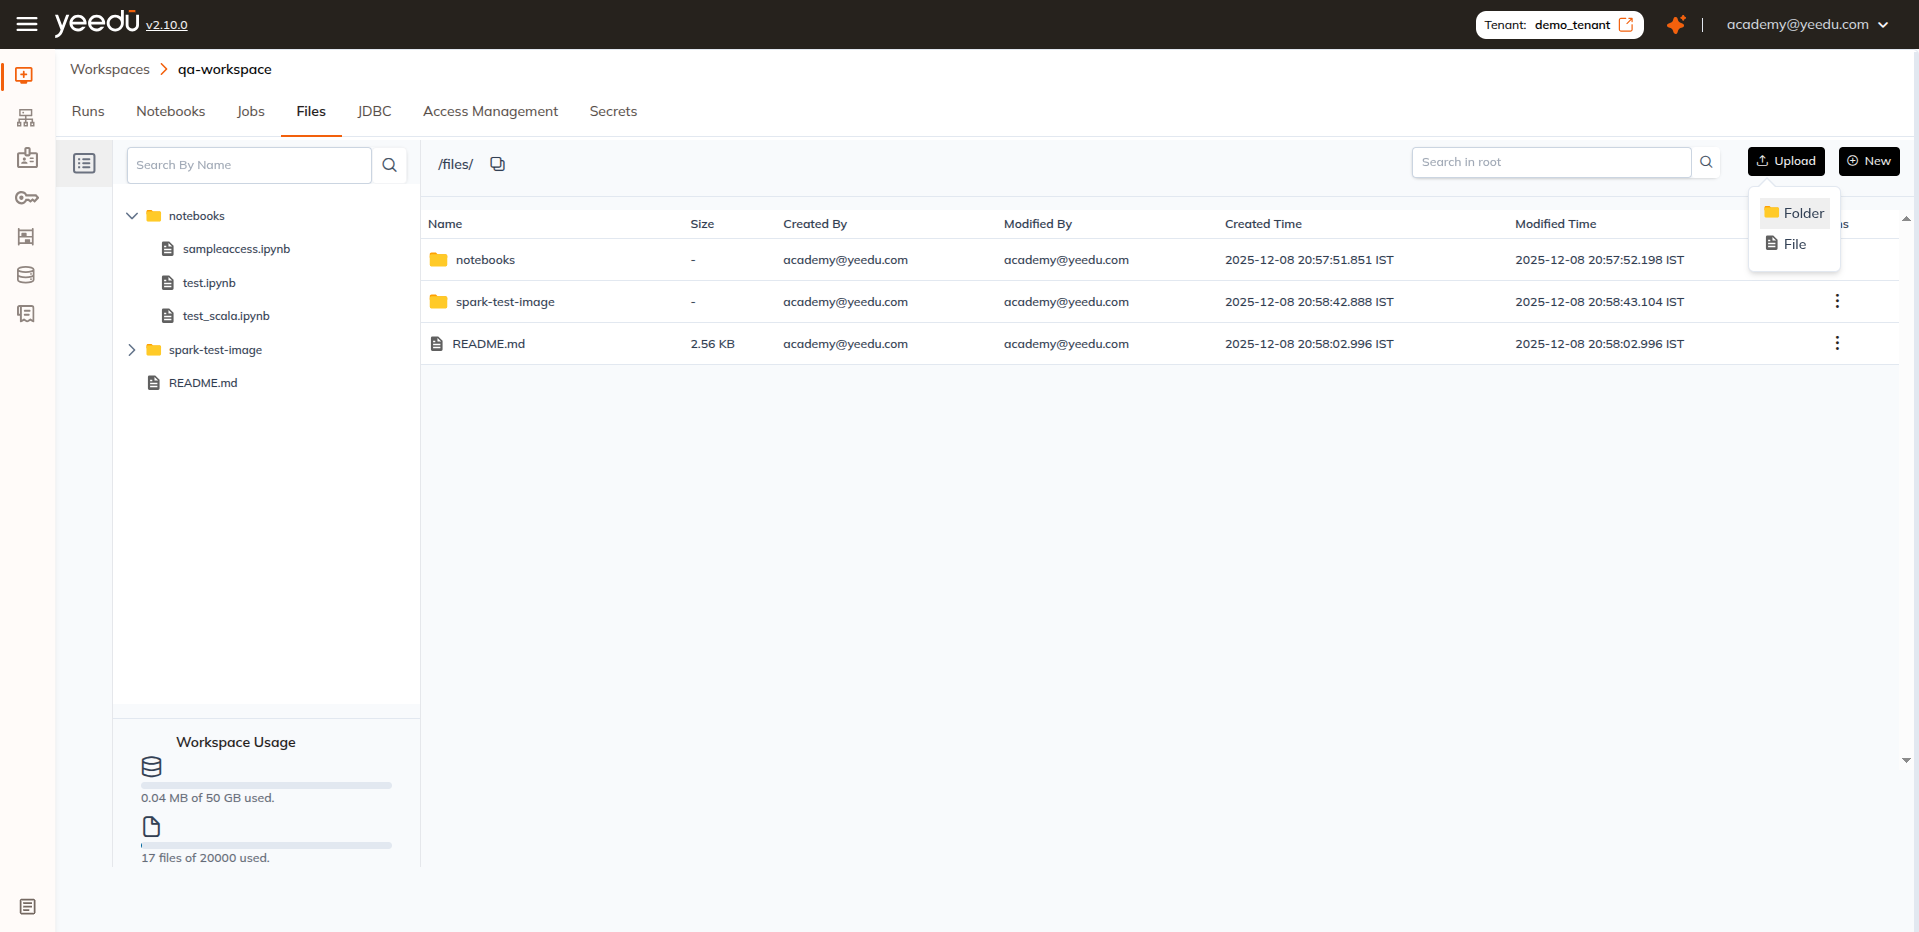
| ⬆ Upload | Opens a two-entry menu, Folder and File, for uploading from your local machine into the current folder. |
| ⊕ New | Opens the create menu: Git Folder, Folder, File, Notebook. |
Columns
| Column | Description |
|---|---|
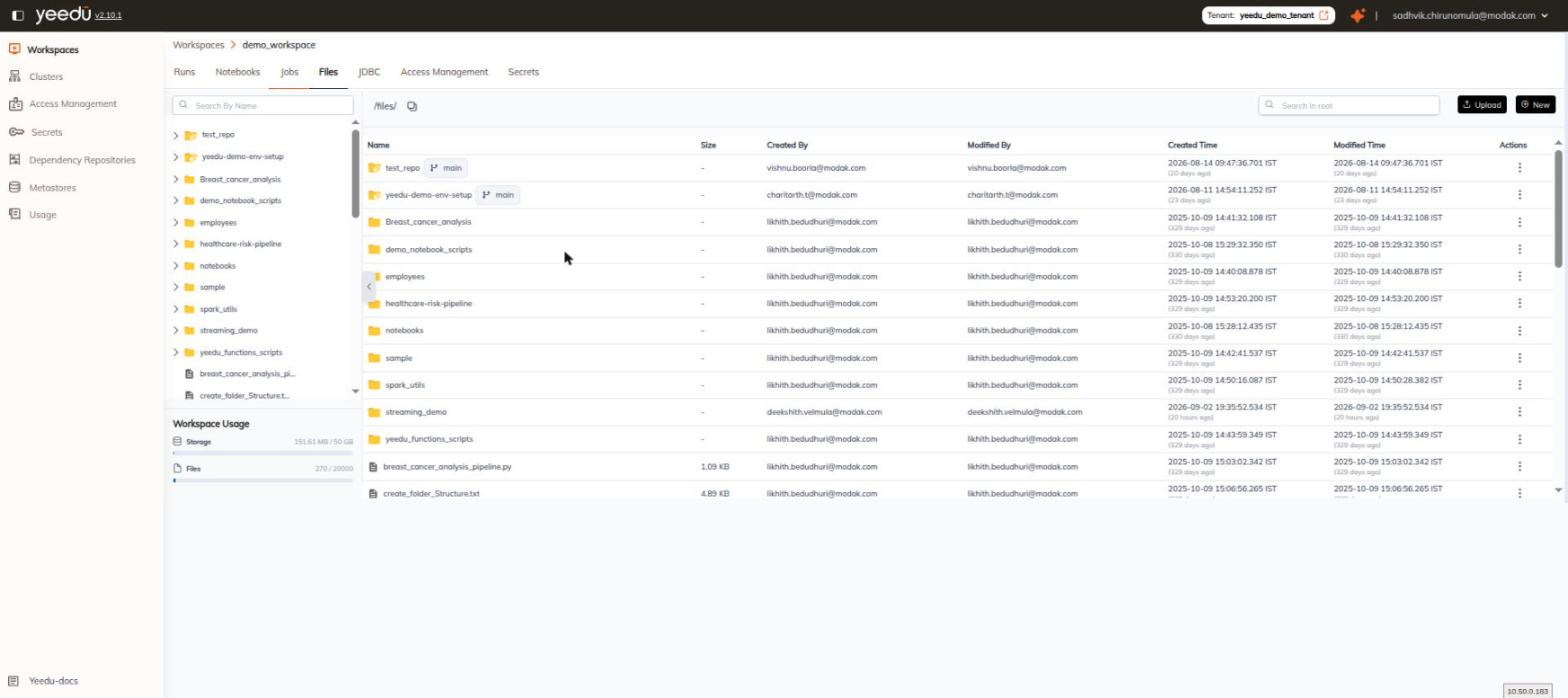
| Name | File or folder name. Folders tracked by Git are shown with a distinct git-folder icon and a branch pill (for example main) beside the name, so it's easy to tell Git-managed content apart from ordinary folders. |
| Size | Size of the file. |
| Created By | User who created the item. |
| Modified By | User who last modified the item. |
| Created Time | Date and time the item was created. |
| Modified Time | Date and time of the last modification. |
| Actions | Kebab menu (⋮) with the operations described in File Actions. |
Git-tracked folders in the grid
Folders backed by a cloned Git repository are rendered differently from ordinary Workspace folders, so you can tell at a glance what's under version control.
| Folder kind | How it's drawn |
|---|---|
| Regular folder | The normal folder icon, and nothing after the name. |
| Git-tracked folder | A marked (branch-annotated) folder icon, plus a branch chip after the name showing the tracked branch, for example main. |
File Management Operations
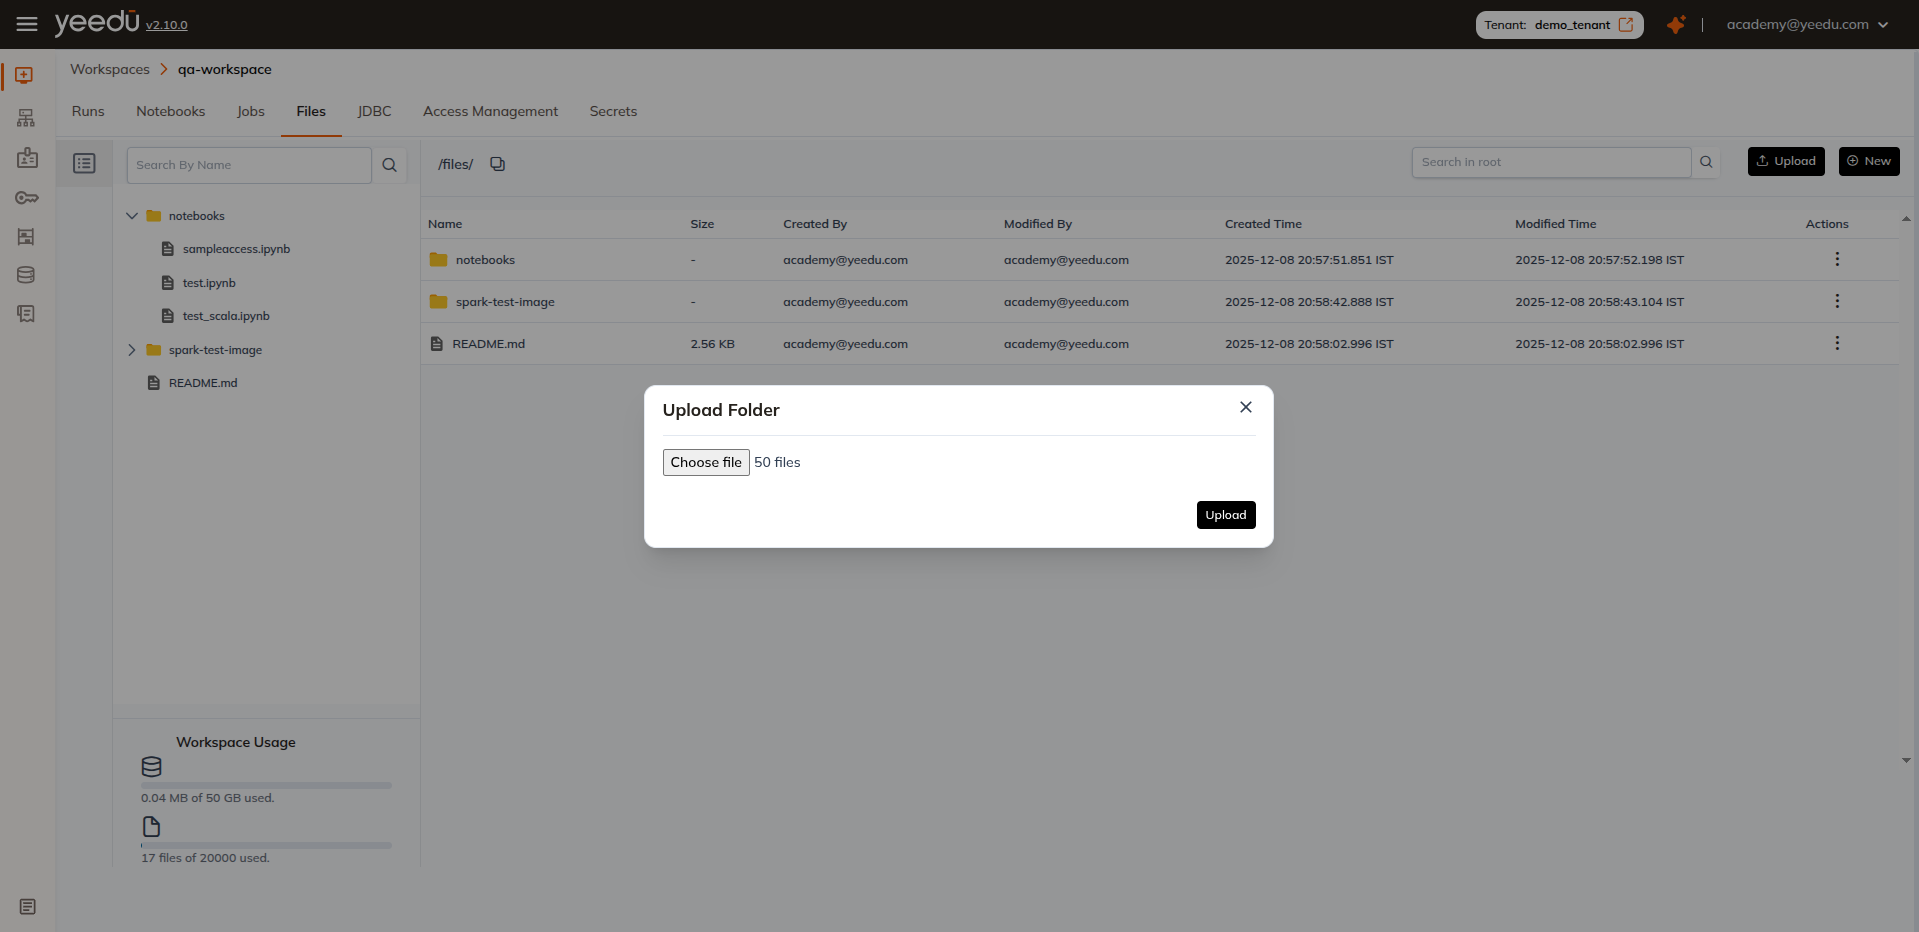
Uploading a File/Folder
- Click the Upload button in the top-right corner.
- Select the file from your system and click Open.
- The file will be uploaded to the selected workspace.
Creating a New File / Folder / Git Folder / Notebook
To create anything new in the workspace, click the ⊕ New button in the top-right corner of the Files toolbar. The menu offers exactly four entries, in this order:
| Menu entry | Creates |
|---|---|
| Git Folder | A folder synced from a remote Git repository. |
| Folder | An empty folder. |
| File | An empty file, opened in the browser-based editor. |
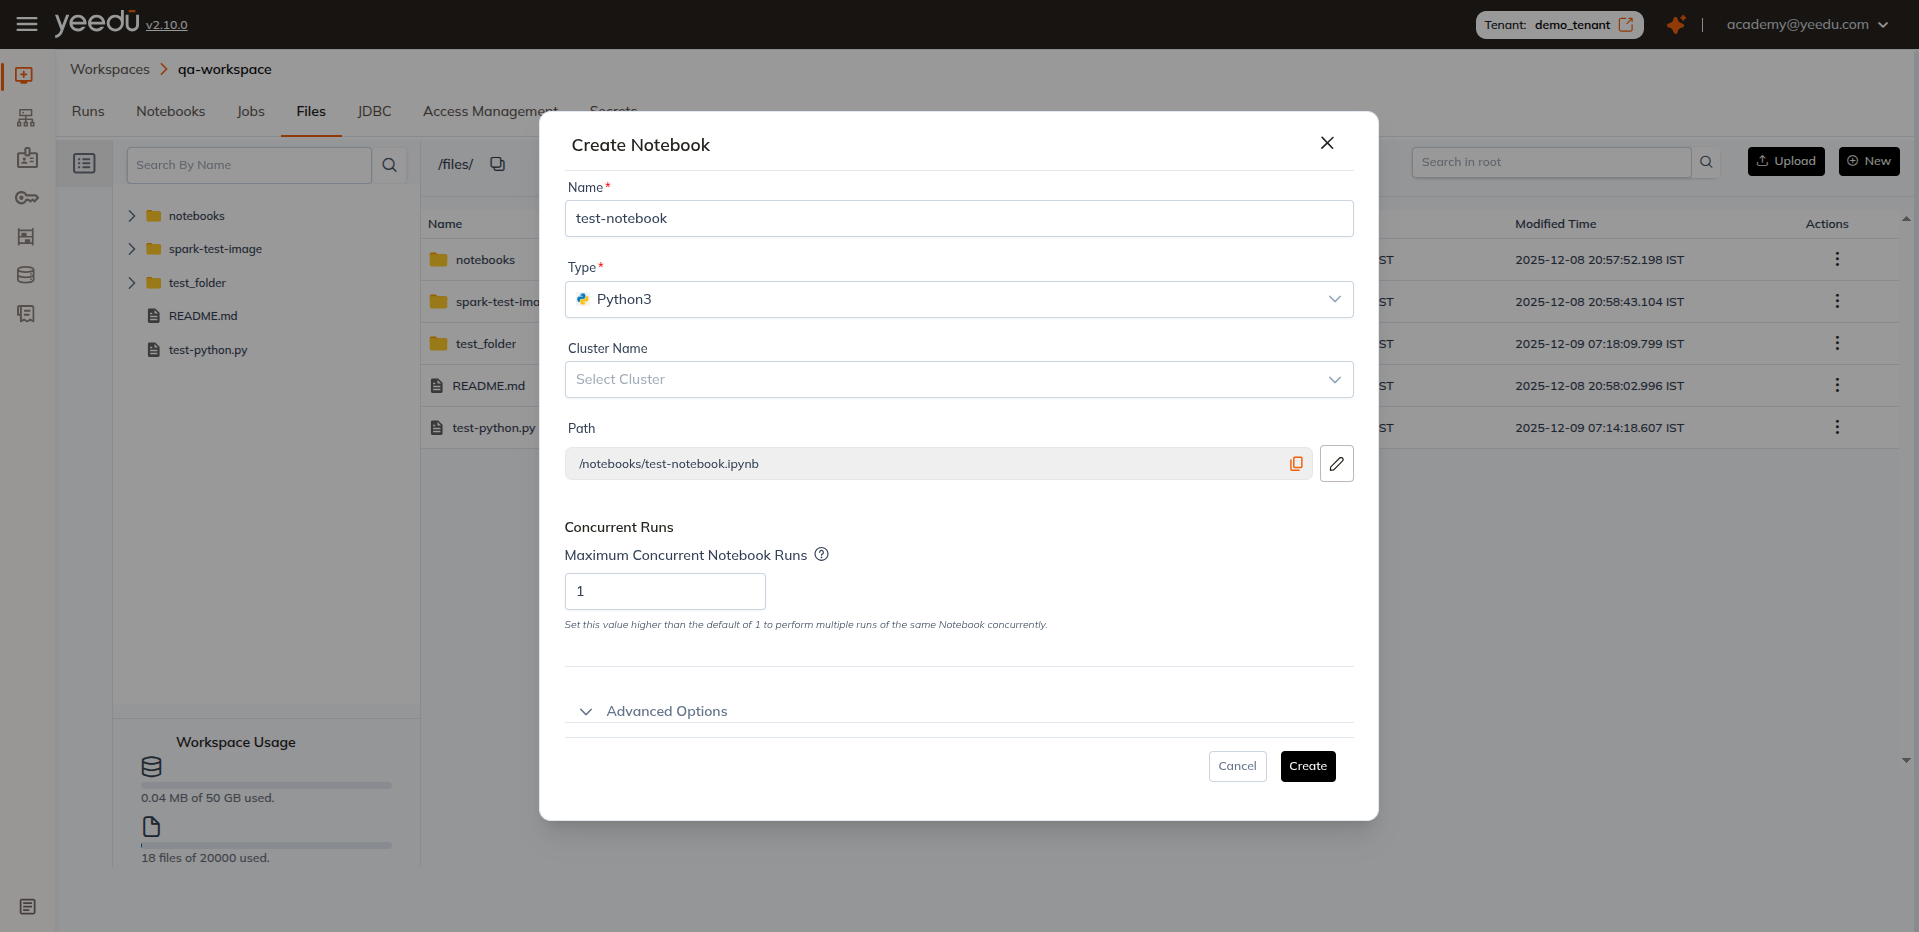
| Notebook | Opens the Create Notebook form. |
Whatever you create is placed in the folder that's currently open in the grid.
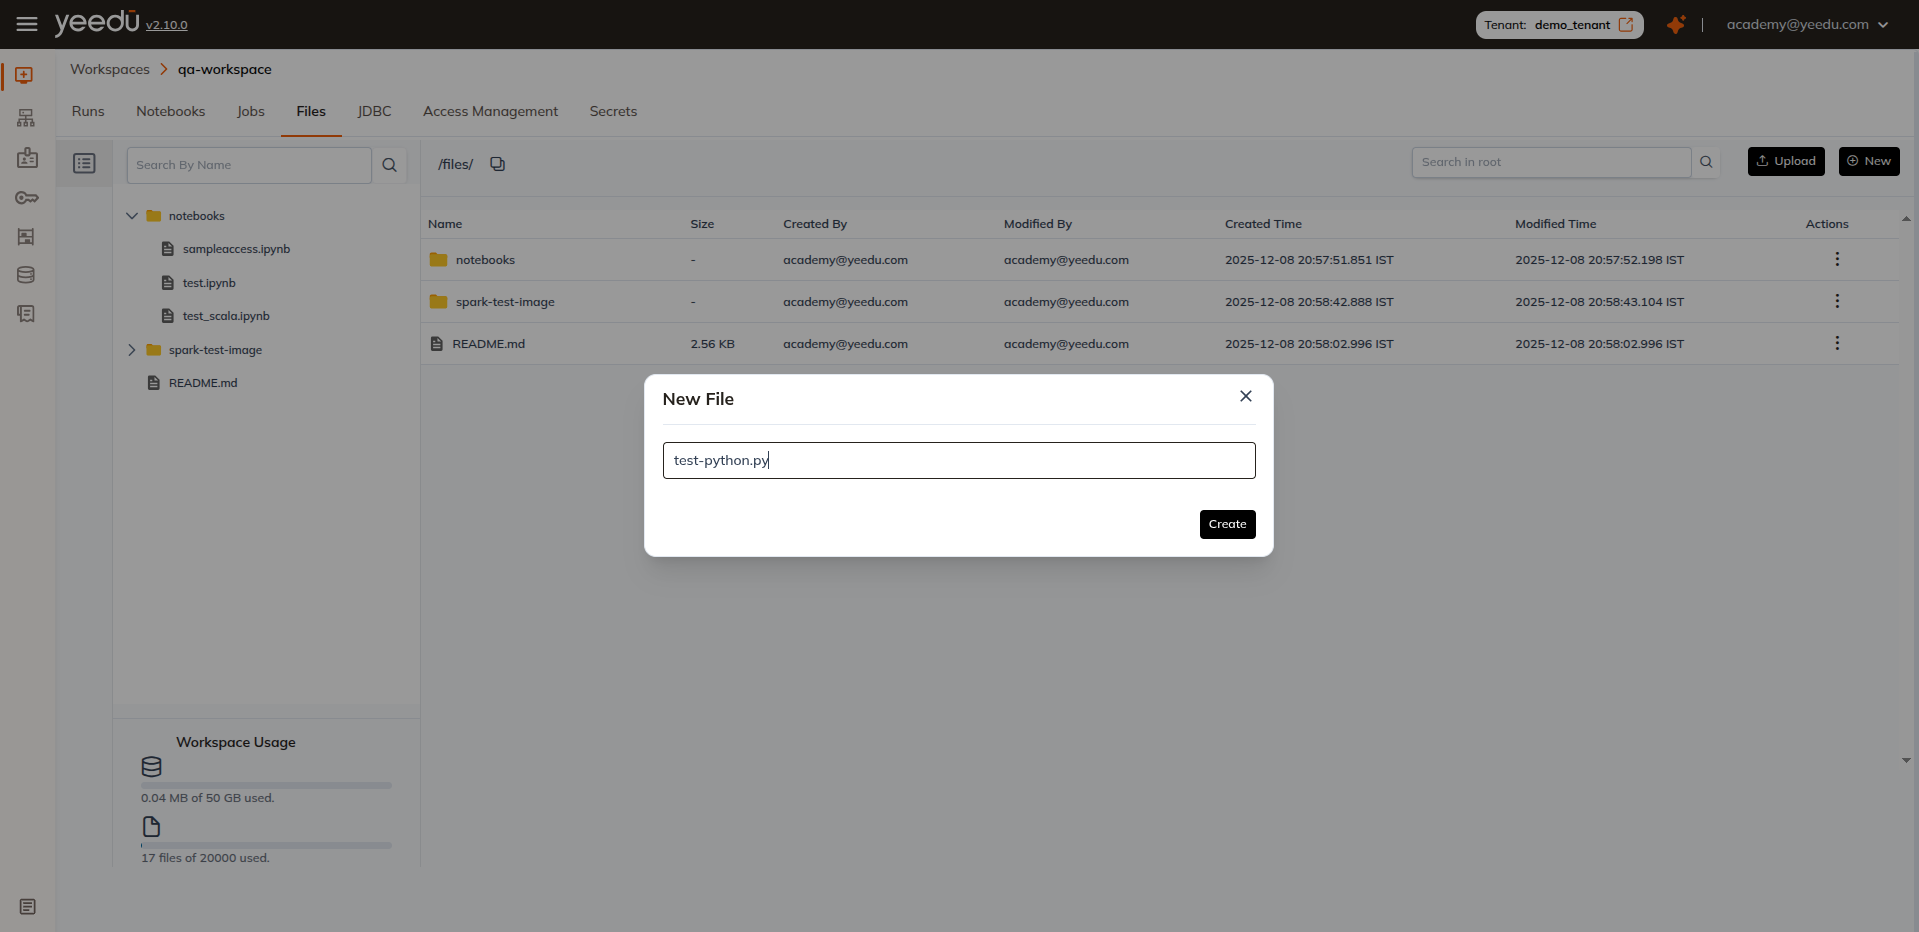
1. Create a File
- Choose File from the type selector.
- Enter a file name.
- Start editing in the workspace editor.
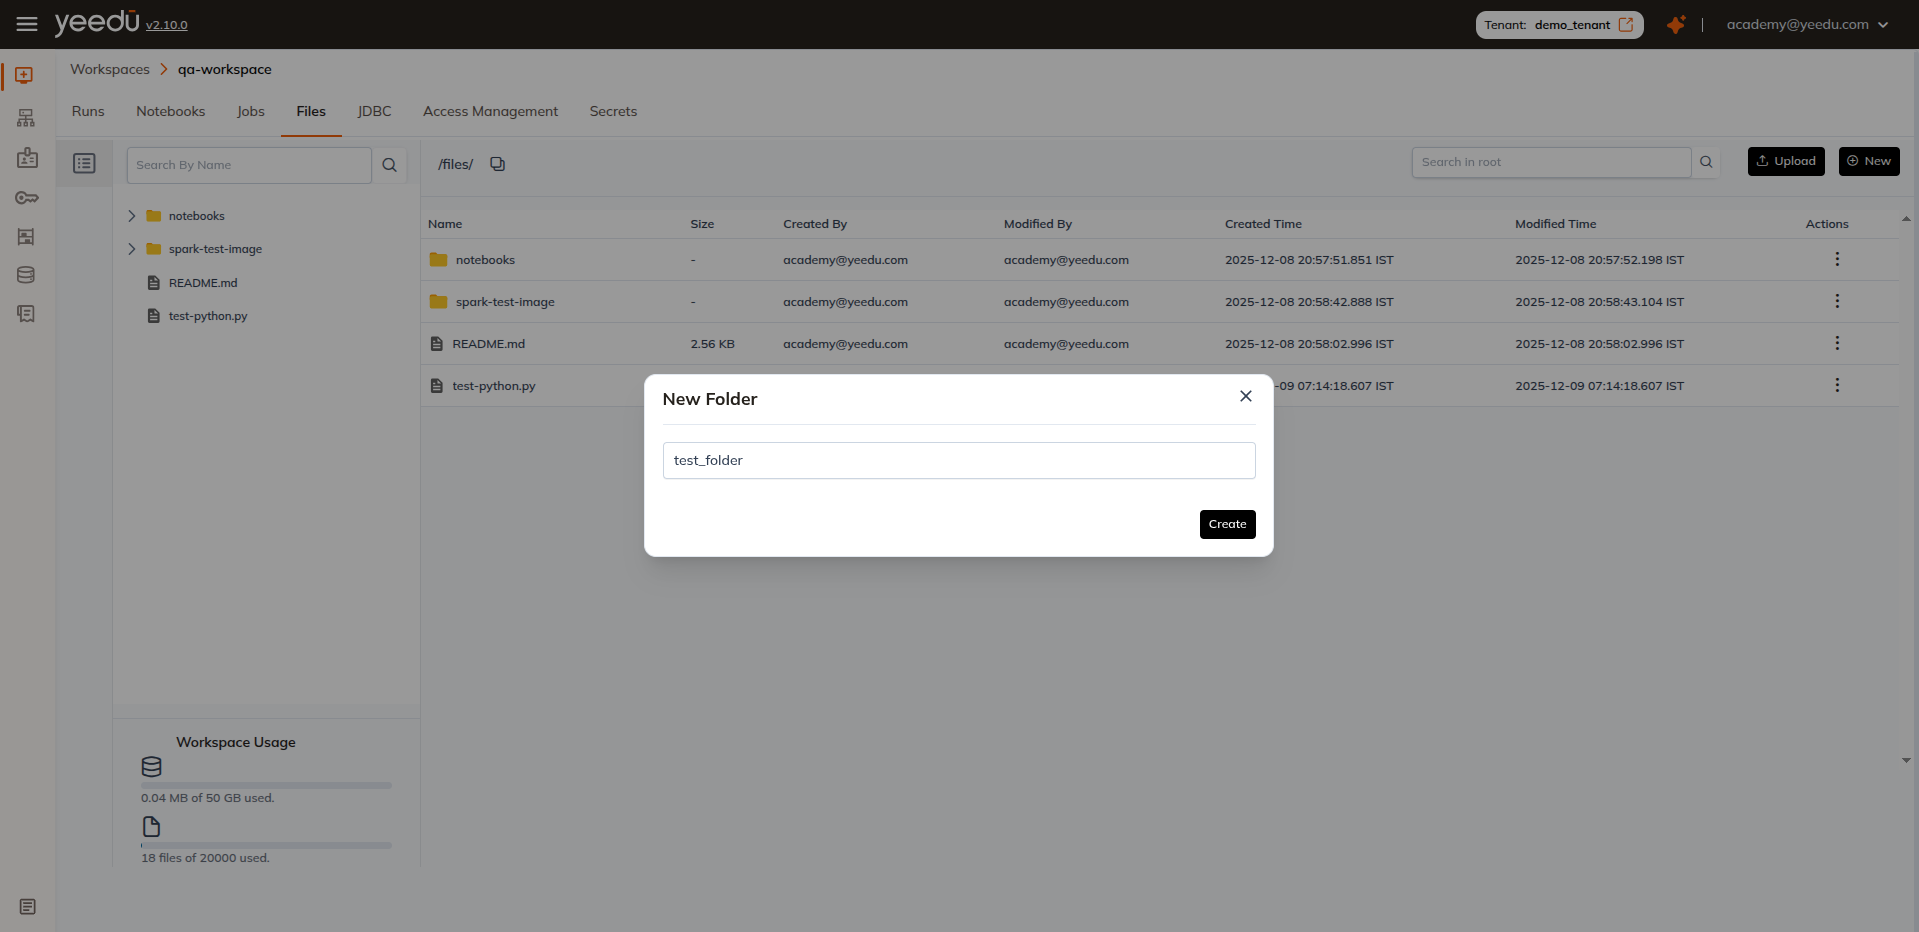
2. Create a Folder
- Choose Folder as the type.
- Enter a folder name.
- The folder is created instantly and ready for use.
3. Create a Git Folder
Choose Git Folder to clone a remote Git repository into the Workspace instead of uploading files by hand. We fetch the repository contents and create a Git-synced folder. It's shown in the file grid with a git-folder icon and a branch pill showing the tracked branch. Selecting Git Folder opens the Git Repository Information modal, where you supply the repository URL, provider, branch, folder name, and credential.
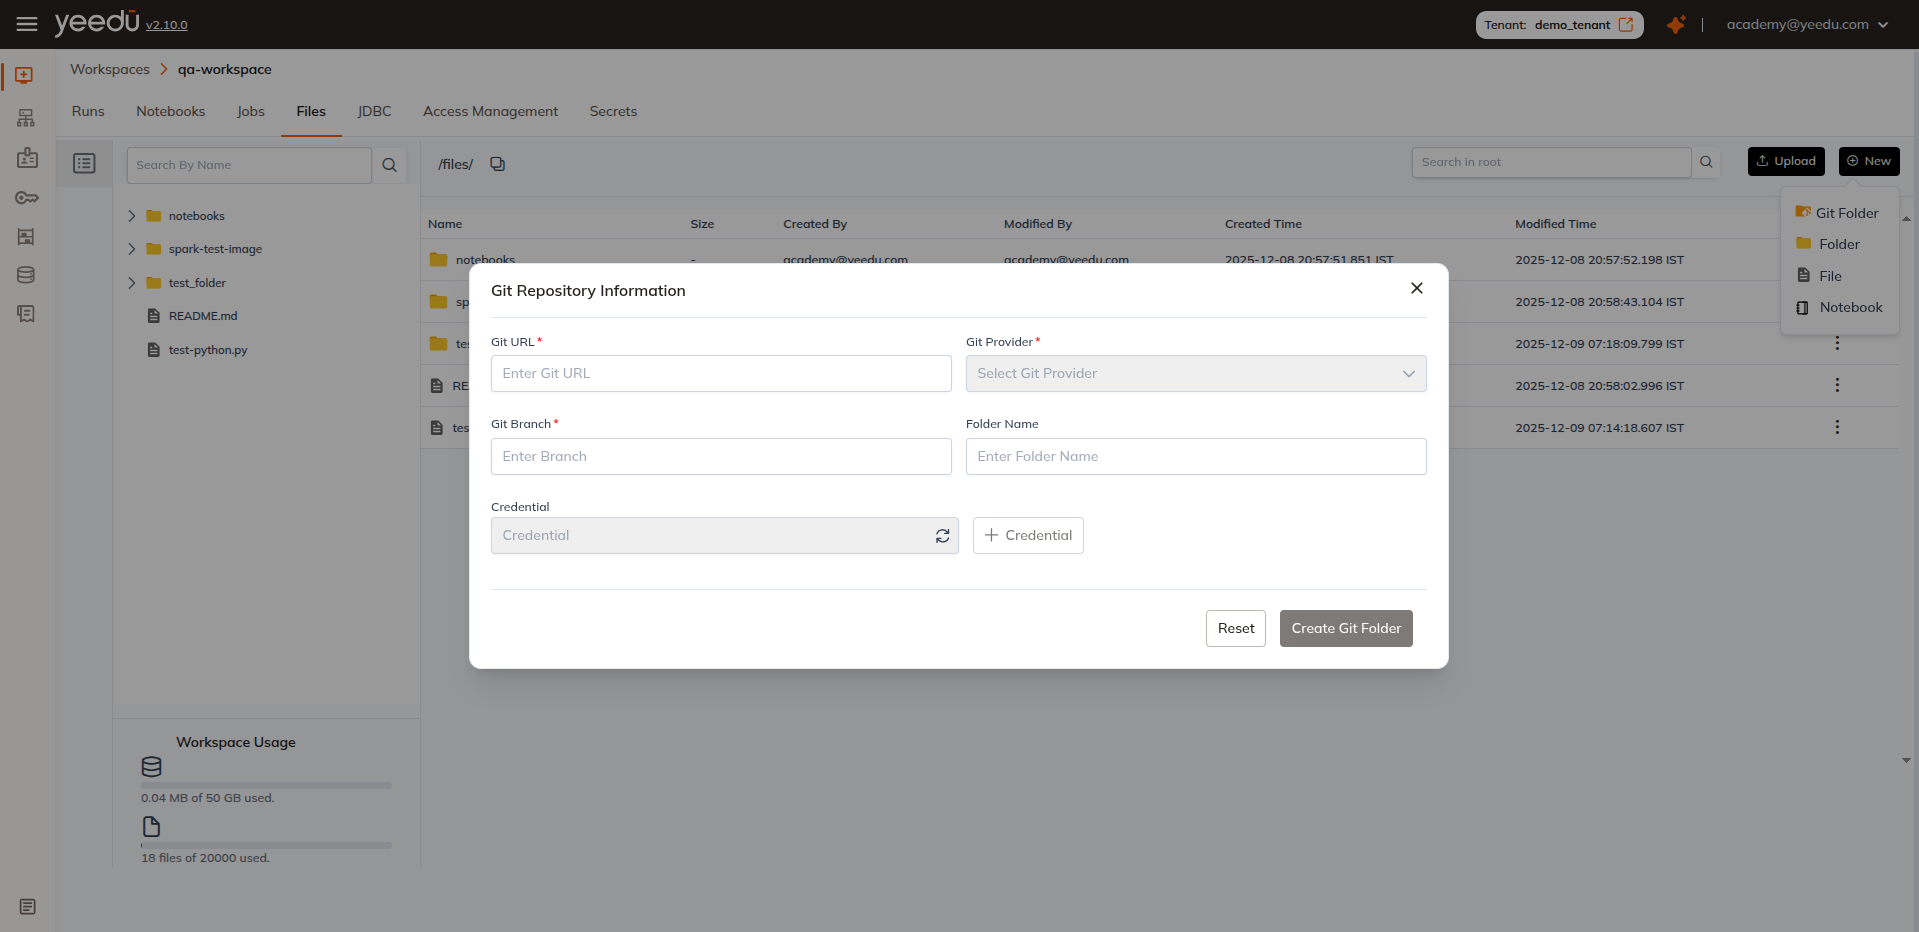
We document the Git Folder form, its provider and credential behaviour, and the Git operations available on a cloned folder in the Git Integration section. See Git Clone (Git Folder), Git Credentials (Linked Accounts), and Git Operations.
4. Create a Notebook
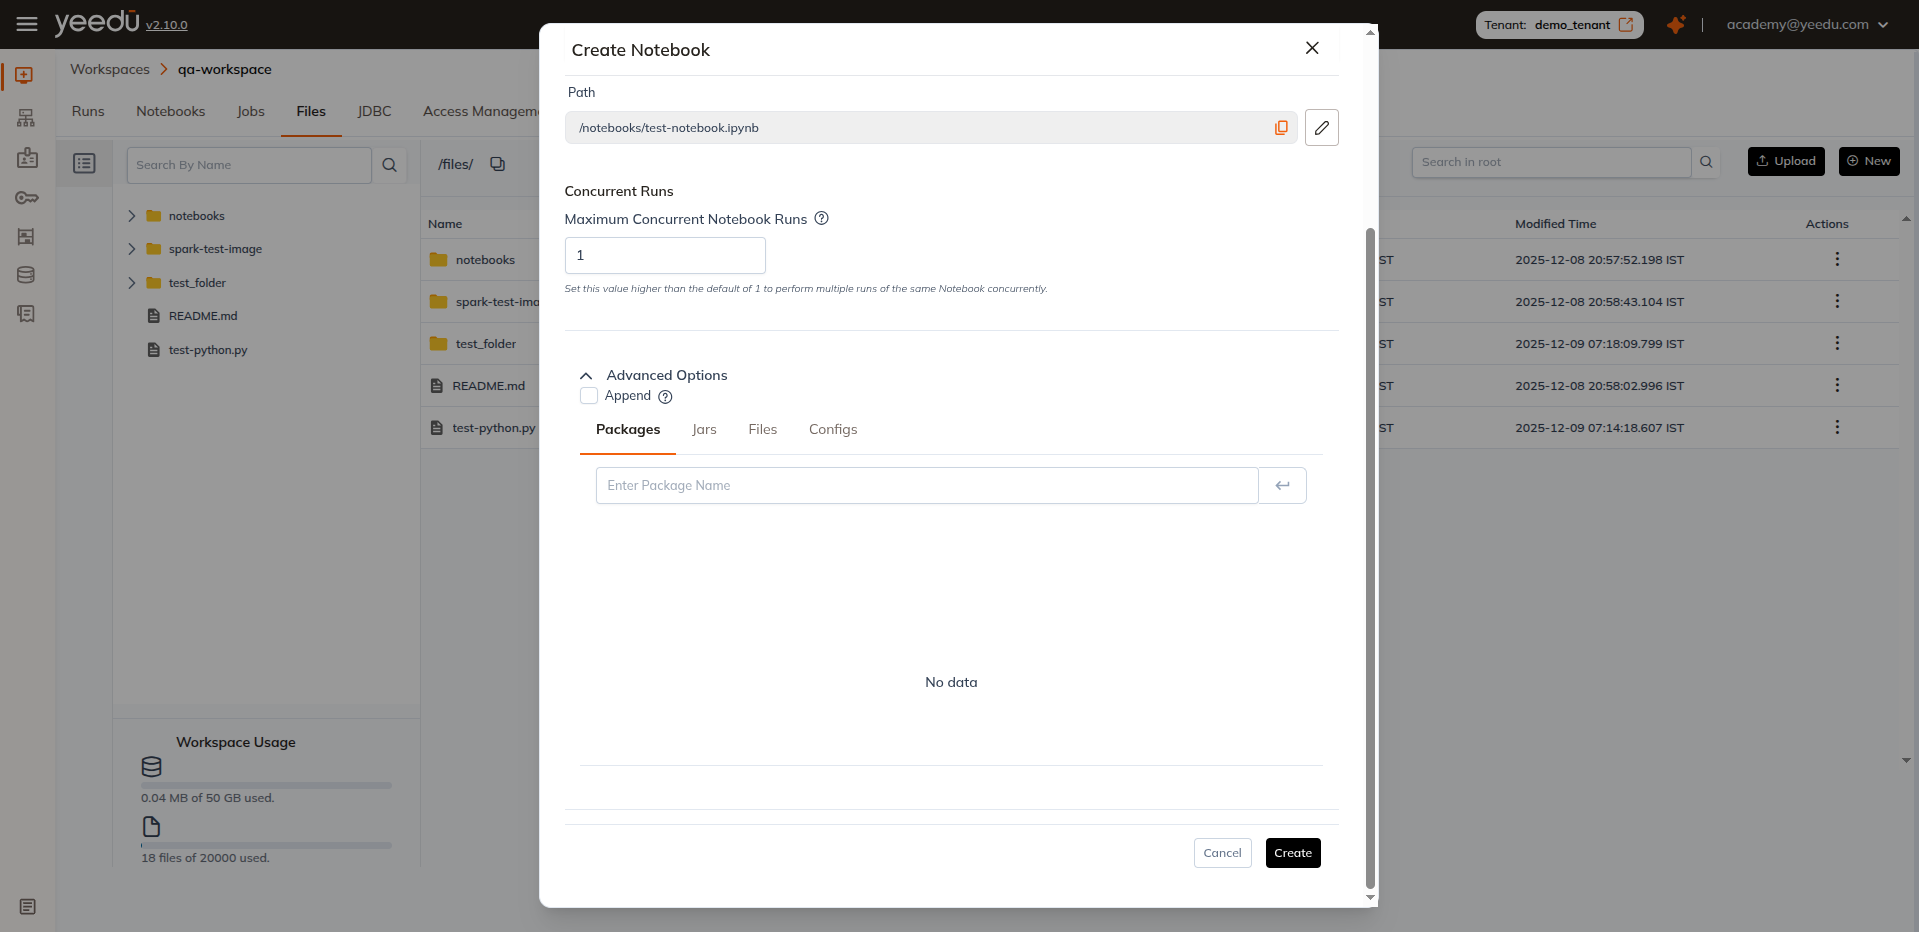
Choose Notebook to open the standard Create Notebook form, with the path pre-set to the current folder. Fill in:
- Name
- Type:
Python3(default),Scala, orSql - Cluster Name: the cluster the notebook runs on
- Path: location inside the Workspace
- Maximum Concurrent Notebook Runs: defaults to
1 - Advanced Options: the Append checkbox plus the Configs, Packages, Jars, and Files tabs
For the full field reference, see Create Notebook.
Editing a File
- Locate the file in the workspace.
- Click on the file name to open it.
- Make necessary edits and save your changes.
File Actions
Hover over any file or folder to access the Action Menu (⋮).
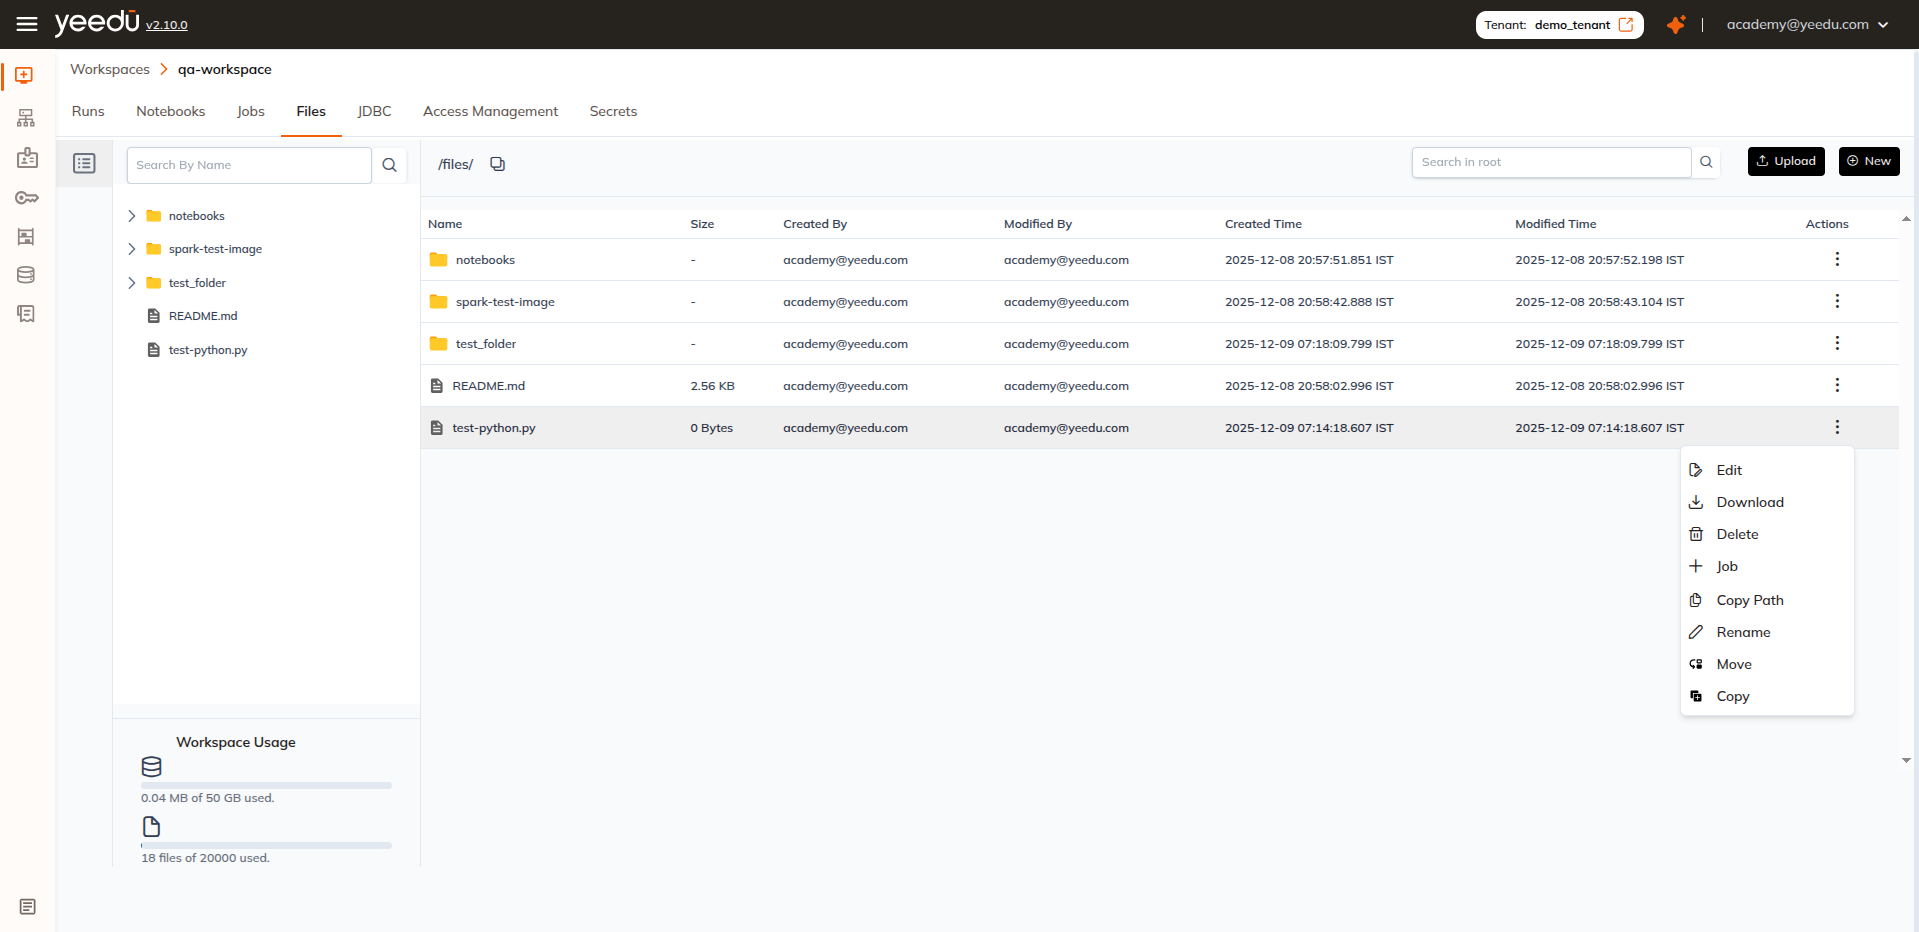
| Action | Description |
|---|---|
| Download | Download the file or folder to your local machine |
| Delete | Permanently remove the file or folder. This action is irreversible. Deleted files can't be recovered. |
| Rename | Edit the file or folder name inline |
| Move | Relocate the item to another folder within the workspace. References in Jobs or Notebooks are not auto-updated. Update paths manually after moving. |
| Copy | Create a duplicate in the target location |
| Edit | Open and modify the file directly in the text editor |
| Job | Create a new Job using the selected file as the source script. The file path is pre-populated in the Job configuration. |
| Copy Path | Copy the file or folder’s full workspace path to clipboard |
You can only perform these actions on files only if you have required permission to access.
Download a file
- Open the file action menu (⋮)
- Click Download
- File is saved locally in your default downloads folder
Download a folder
- Open the file action menu (⋮)
- Click Download
- File is saved locally in zip format.
Rename
- Select Rename from the action menu
- Input the new name
- Hit Enter or click ✓ to confirm
Move
- Click Move
- Choose the target folder using the provided navigation dialog
- Confirm the move
Copy
- Click Copy
- Select destination folder
- A duplicate of the file/folder is created
Edit
- Click Edit from the action menu
- The file opens in the text editor
- Make your updates and save changes using Save or Ctrl + S
Job
- Select Job from the action menu
- The job config dialog appears with the selected file pre-attached
- Configure job parameters and click Create
Copy Path
- Click Copy Path from the action menu
- The full workspace path is copied to your clipboard
- Paste it wherever you need it