Mount-Cluster Mapping
Overview
Mounts are attached to a cluster from the Mounts panel on the cluster configuration page. From there you can create a new mount, attach existing mounts, and detach previously attached ones. The panel only accepts edits while you're creating a cluster, or on an existing cluster whose status is DESTROYED or ERROR, and it also requires permission to modify the cluster configuration. Once a mount is attached, notebooks and jobs executing on that cluster reach the underlying storage at its mount point.
The Mounts panel
- Go to Clusters
- Open a cluster, or start creating one
- Expand the Mounts panel in the cluster configuration
When no mounts are attached, the panel displays No Mounts Selected alongside two buttons, New and Attach.
When mounts are attached, they're enumerated in a table with the columns Name | Storage Type | Source | Mount Point | Encryption Type | Actions, and the buttons positioned above the table are Create
and Attach.

When the panel can be edited
The Mounts panel is editable while creating a cluster, and on an existing cluster only when the
cluster status is DESTROYED or ERROR. In any other state we disable the buttons and the
detach action, and hovering the panel shows the warning "Mounts can't be edited while the cluster
is <status>."
We also disable the panel for users without sufficient permission to modify the cluster configuration.
Creating a mount from the cluster page
- Click New (or Create when mounts are already listed)
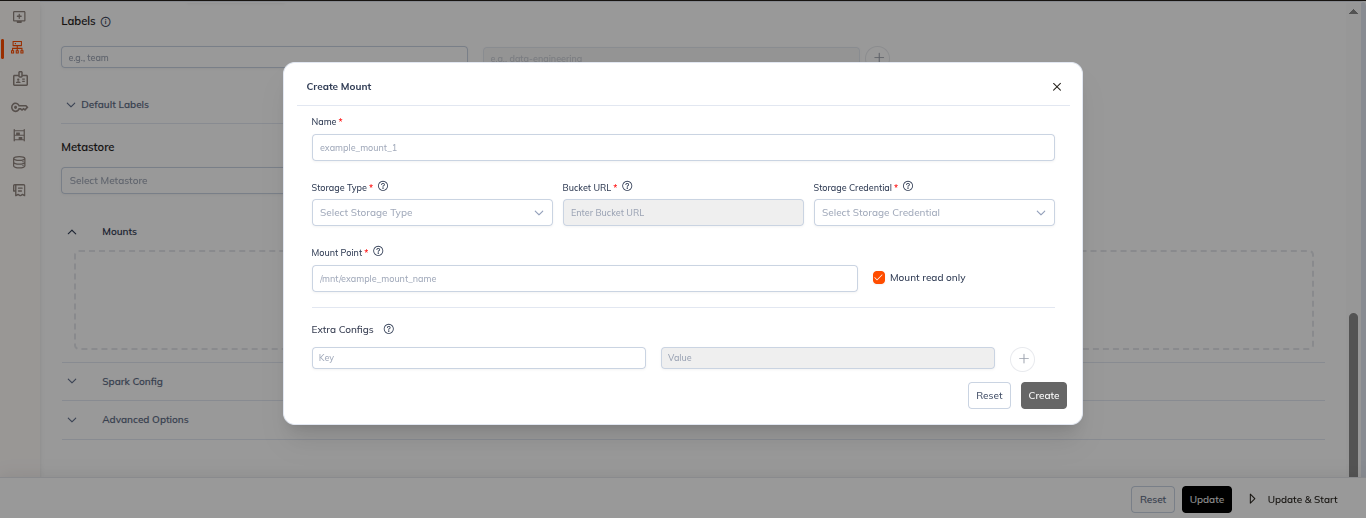
- A Create Mount dialog opens containing the identical form documented in Creating Mounts
- Fill in Name, Storage Type, Bucket URL / Storage Account URL, Storage Credential, Mount Point and any Extra Configs
- Click Create
Attaching existing mounts
- Click Attach
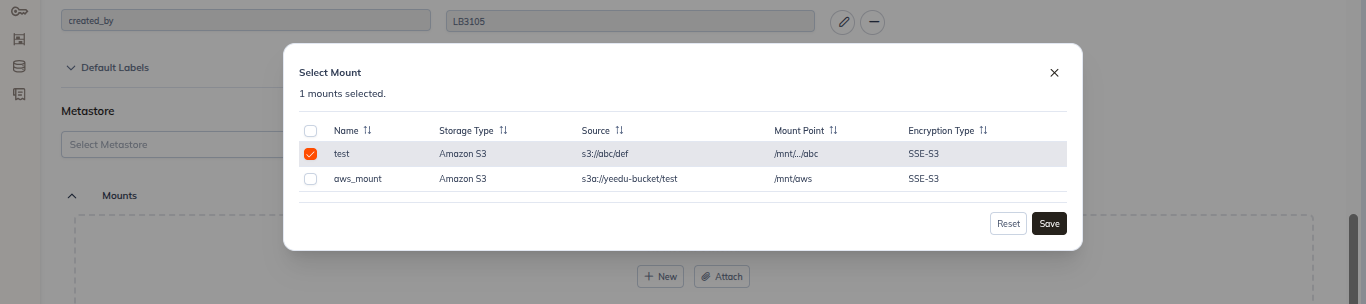
- The Select Mount dialog opens, listing the tenant's mounts with the columns
Name | Storage Type | Source | Mount Point | Encryption Typeand a selection checkbox on every individual row. A counter above the table readsN mounts selected. - Select one or more mounts
- Click Save. Reset reinstates the selection you started with.
If the tenant has no mounts, we show No mounts available to attach in the dialog with the text "You don't have any mounts yet. Create one to attach it to this cluster." and a Create button.
Detaching a mount
In the attached-mounts table, click the trash icon in the Actions column (tooltip "Detach Mount"). A confirmation appears: "Are you sure you want to detach this mount from the cluster?" Click Yes to detach or No to cancel.
Where the signed-in user lacks the necessary permissions, we disable the icon and the tooltip reads "No permission to detach mount".

Using mounts
Once a mount is attached to a cluster, the underlying storage is available at its mount point to notebooks and jobs executing on that cluster.