Dependency Repository
The Dependency repositories provides a centralized location for all dependencies, such as JARs, Python packages, configuration files, etc., which can be used across clusters.
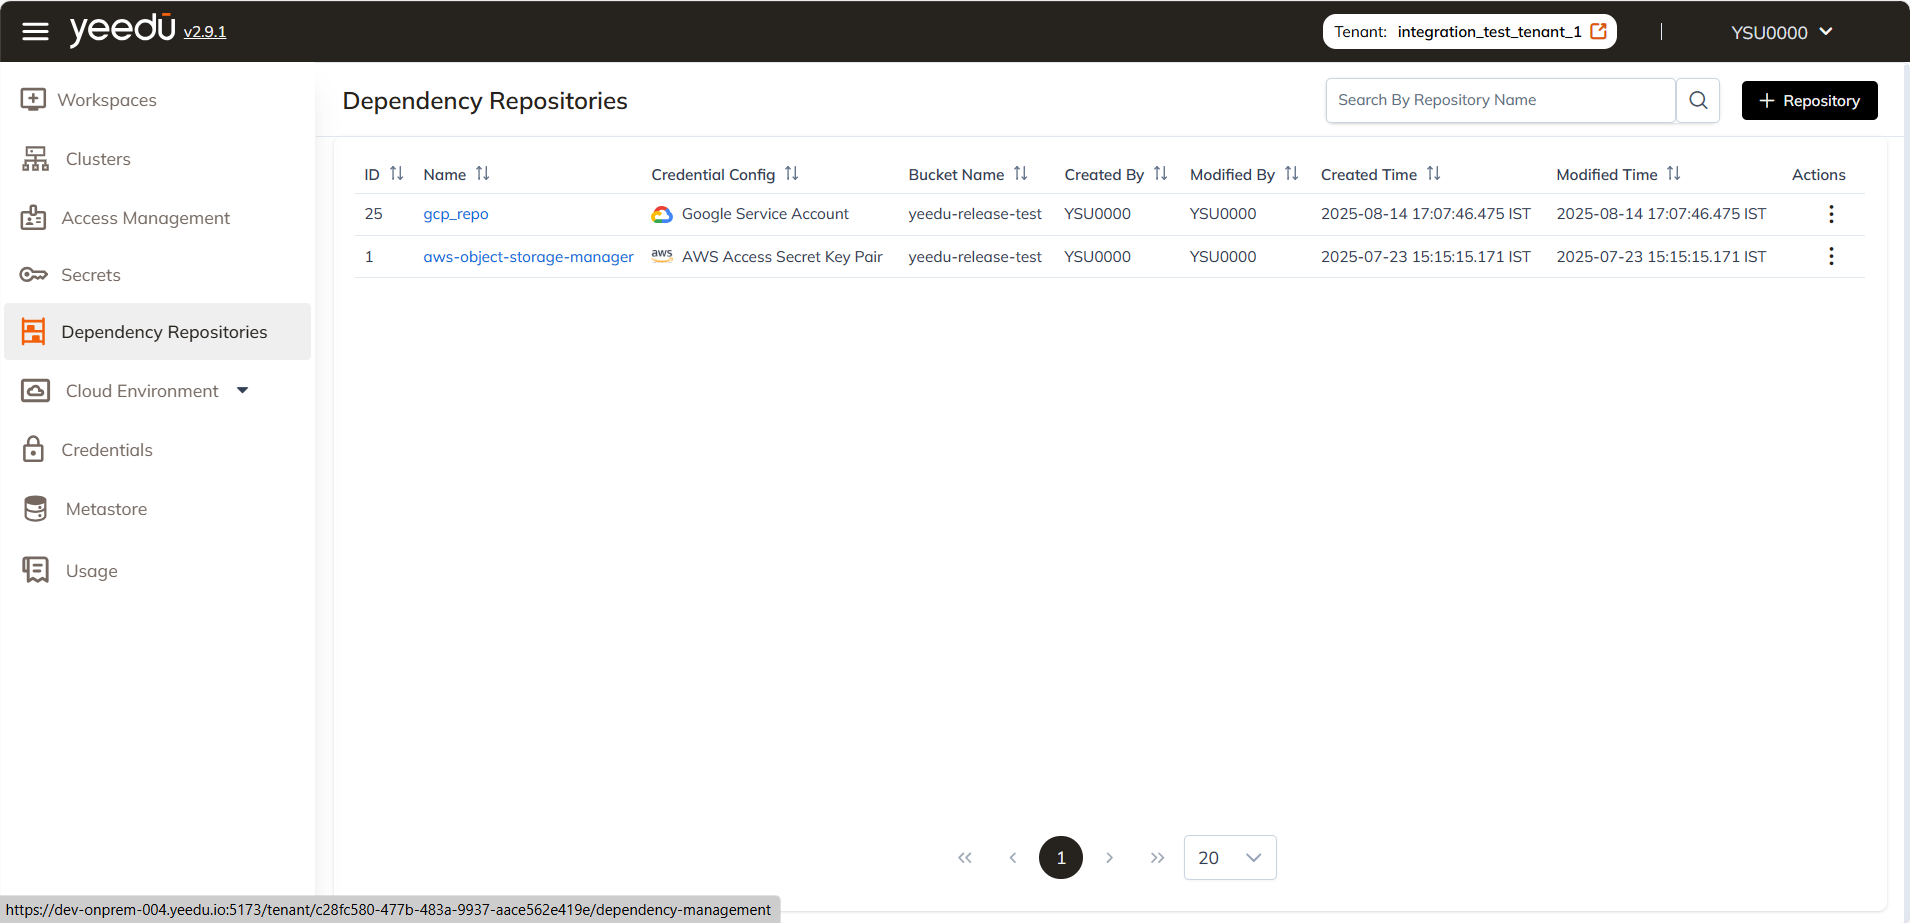
The Dependency Repository landing page displays the following options to the user:
- ID: Unique identifier linked to each repository.
- Repository Name: Name of the repository.
- Credential Config: Name of the credential with access to upload files to the repository.
- Bucket Name: Cloud storage bucket name where dependencies are uploaded.
- Created By: Name of the user who created the repository.
- Modified By: Name of the user who last modified the repository.
- Created Time: Timestamp when the repository was created.
- Modified Time: Timestamp when the repository was last modified.
- Action Tab: Option for users to delete the repository.
Manage
Create Dependency Repository
On the right side of the Repository dashboard, users can find the '+ Repository' button located above the Action tab. This button is utilized for creating a new Repository. Clicking on the '+ Repository' button will prompt a pop-up window to create a new Repository.
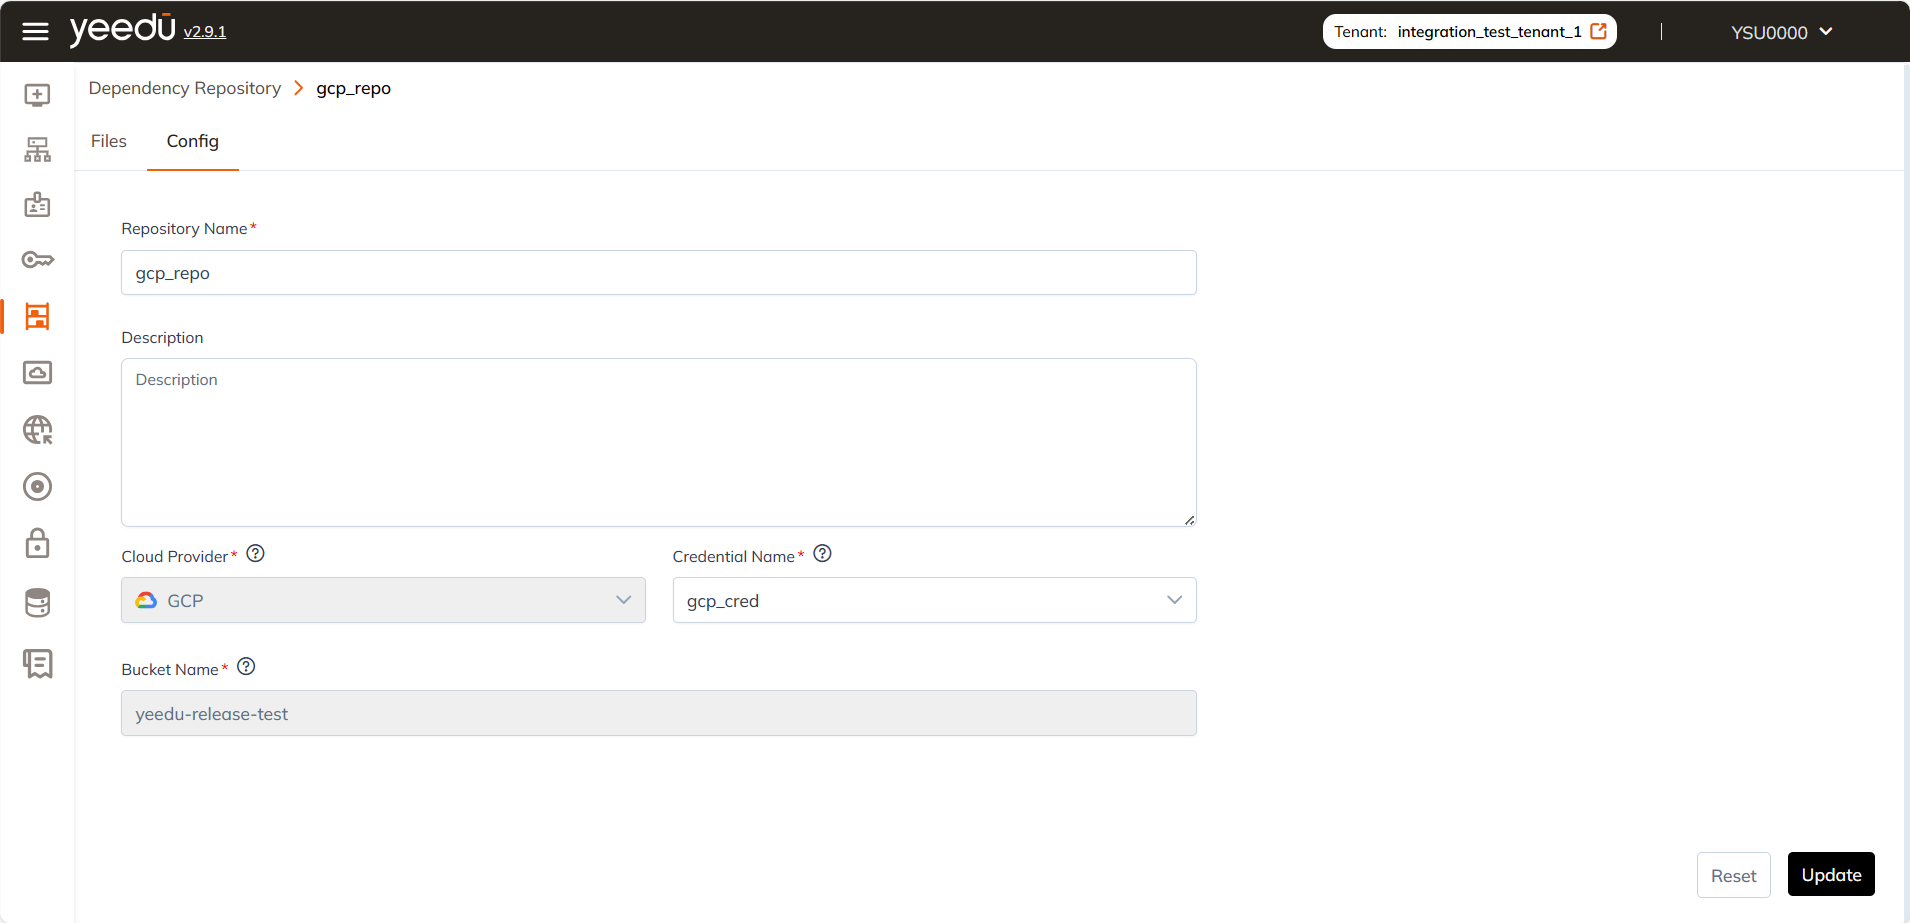
- Repository Name: Input the name of the repository, ensuring it meets the specified criteria:
- Maximum length of 64 characters
- Lowercase letters
- Permitted symbols: '-', '_', '@', and '.'
- Description: Provide a description of the repository.
- Cloud Provider: Specify the cloud provider hosting the repository.
- Credential Name: Enter the credentials required for accessing and uploading files to the repository.
- Bucket Name: Provide the Cloud Storage bucket name in the cloud where the dependencies are uploaded.
At the bottom of the page user will have 2 buttons:
- Reset: Clears the values in the fields, resetting them to blank.
- Create: Submits the details to create a new cloud environment; ensure all required fields (*) are filled before clicking.
View / Modify Dependency Repository
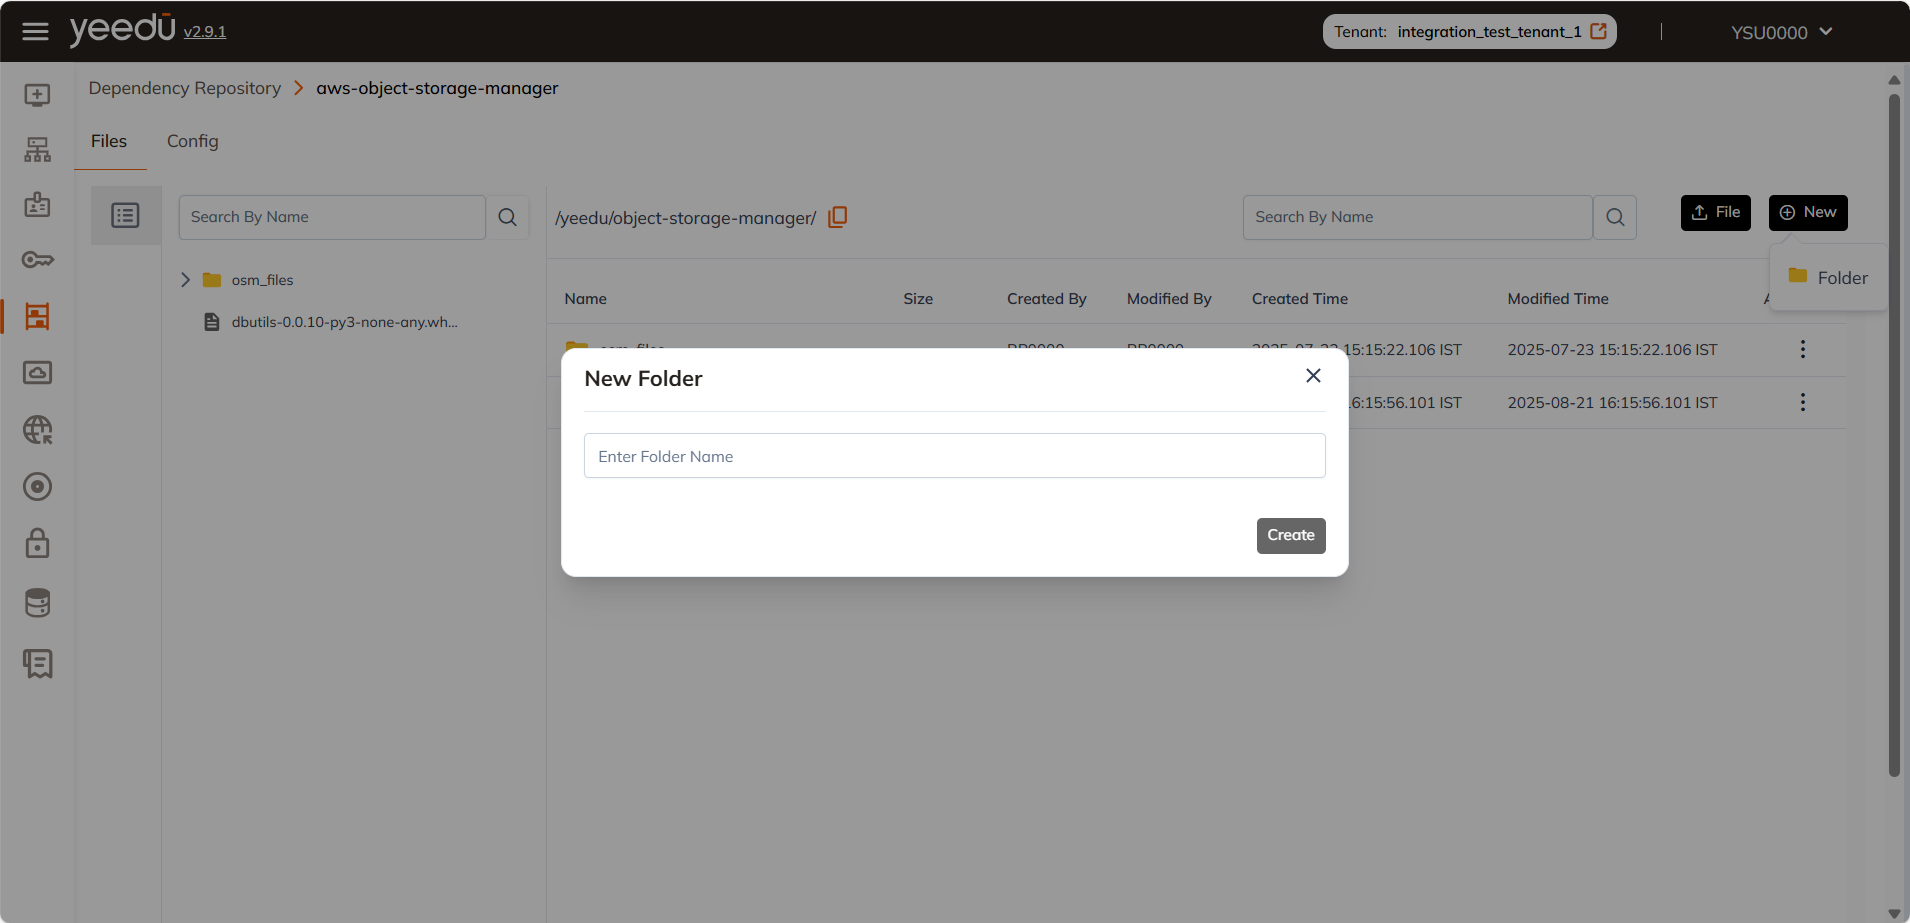
The Dependency Repository window consists of 2 tabs: Files and Config.
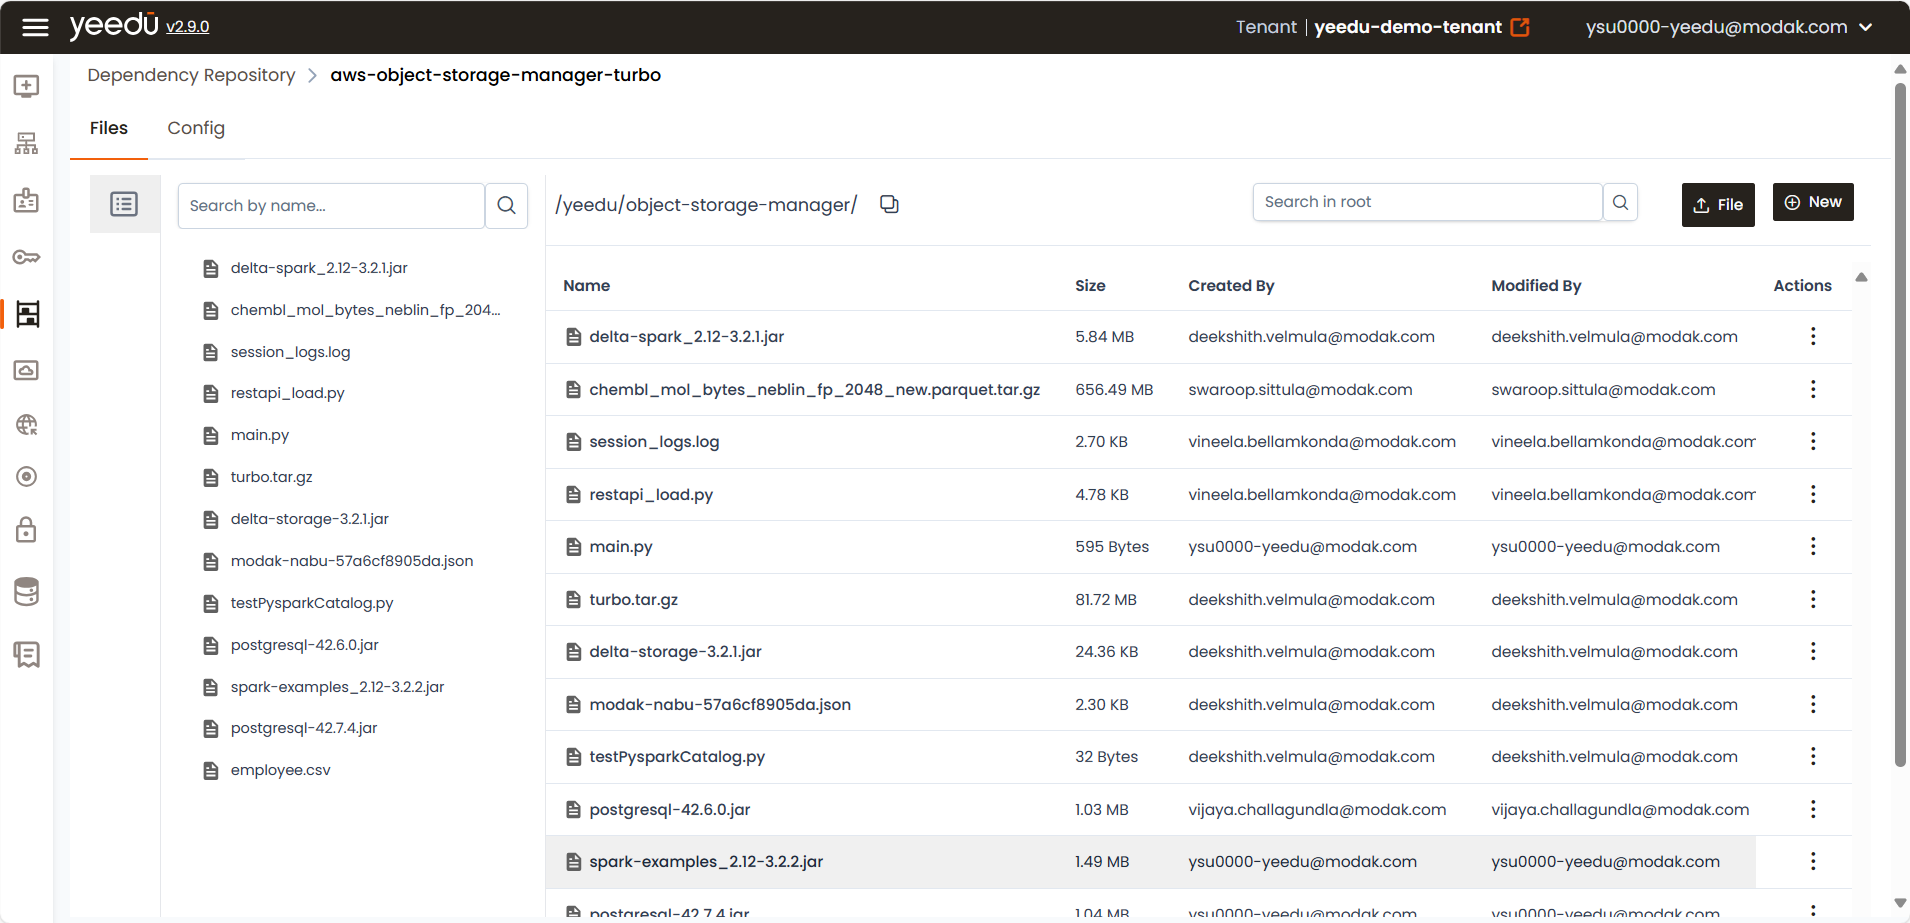
Files
The Files tab will display all the files present in the repository along with a few additional details.
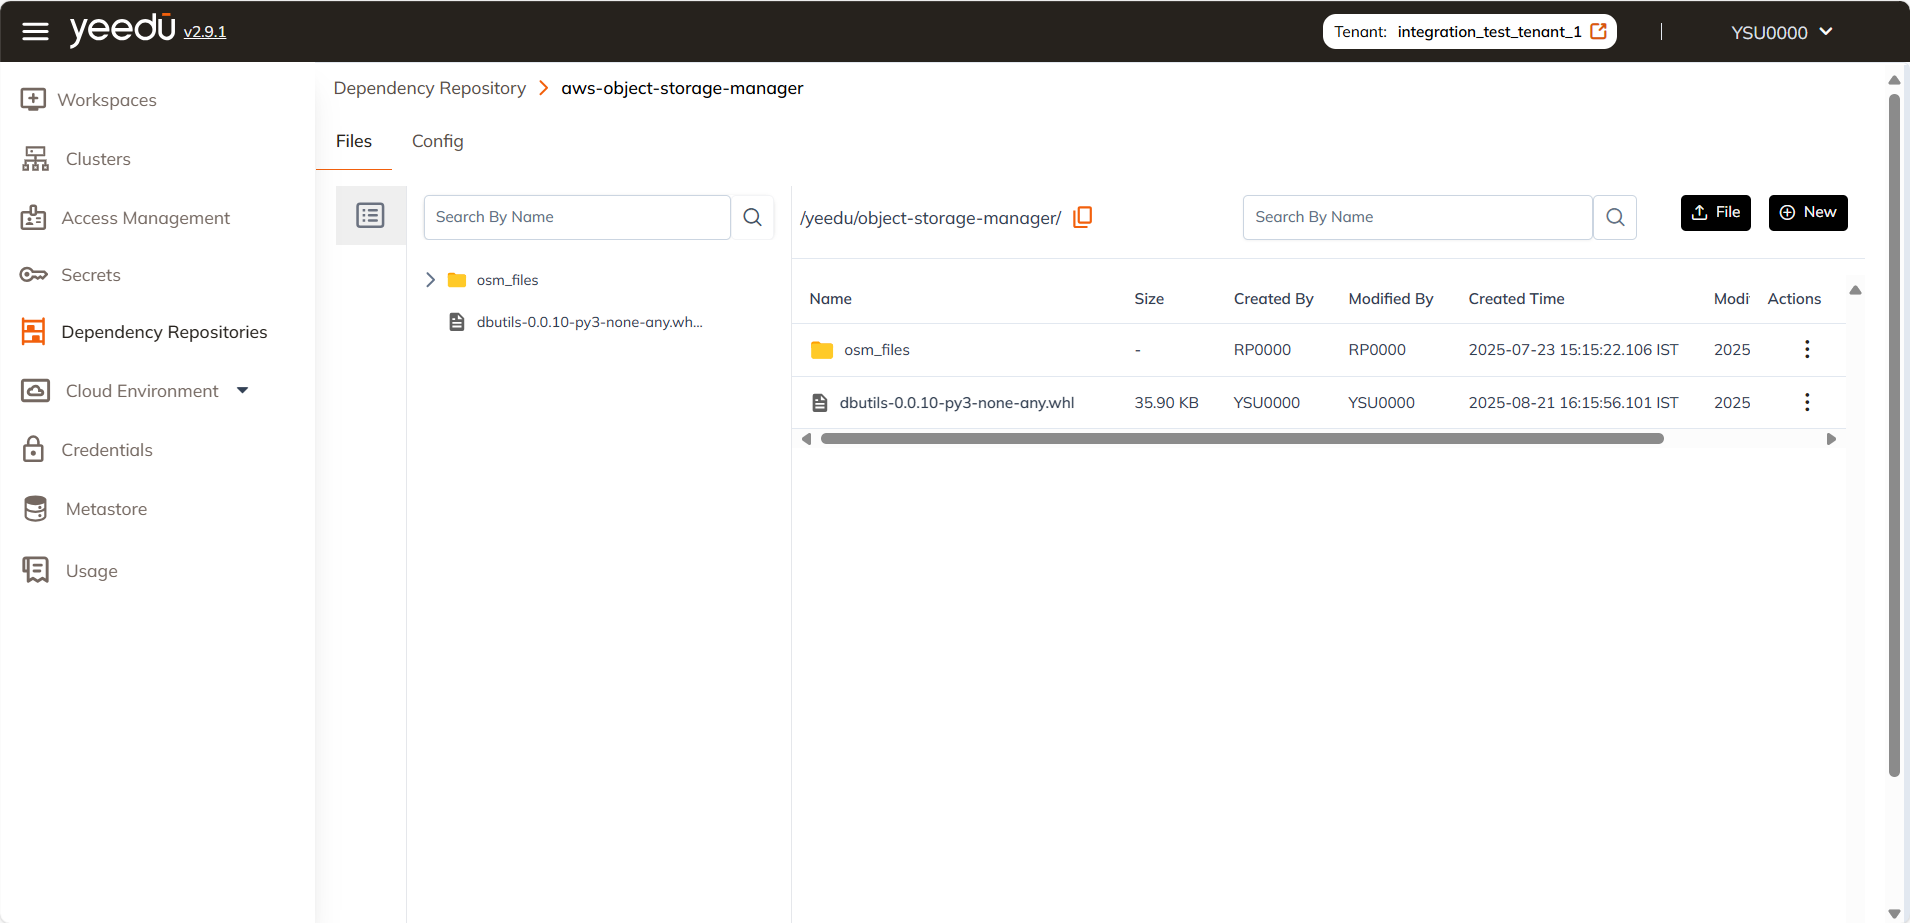
- File Name: Displays the names of all files present in the repository.
- File Size: Shows the size of all files present in the repository.
- File Type: Indicates the format of all files present in the repository.
- Path: Displays the storage path of the files.
- Created By: Shows the name of the user who uploaded the file.
- Modified By: Indicates the name of the user who last modified the file.
- Created Time: Displays the timestamp when the file was uploaded.
- Modified Time: Shows the timestamp when the file was last modified.
- Action: Allows users to delete the file from the repository.
On the right side of the Files tab, users can find the "File" (⬆️) button, positioned above the Actions column. This button allows users to upload a new file to the repository. Clicking on the "New" button allows users to create a new folder and upload files
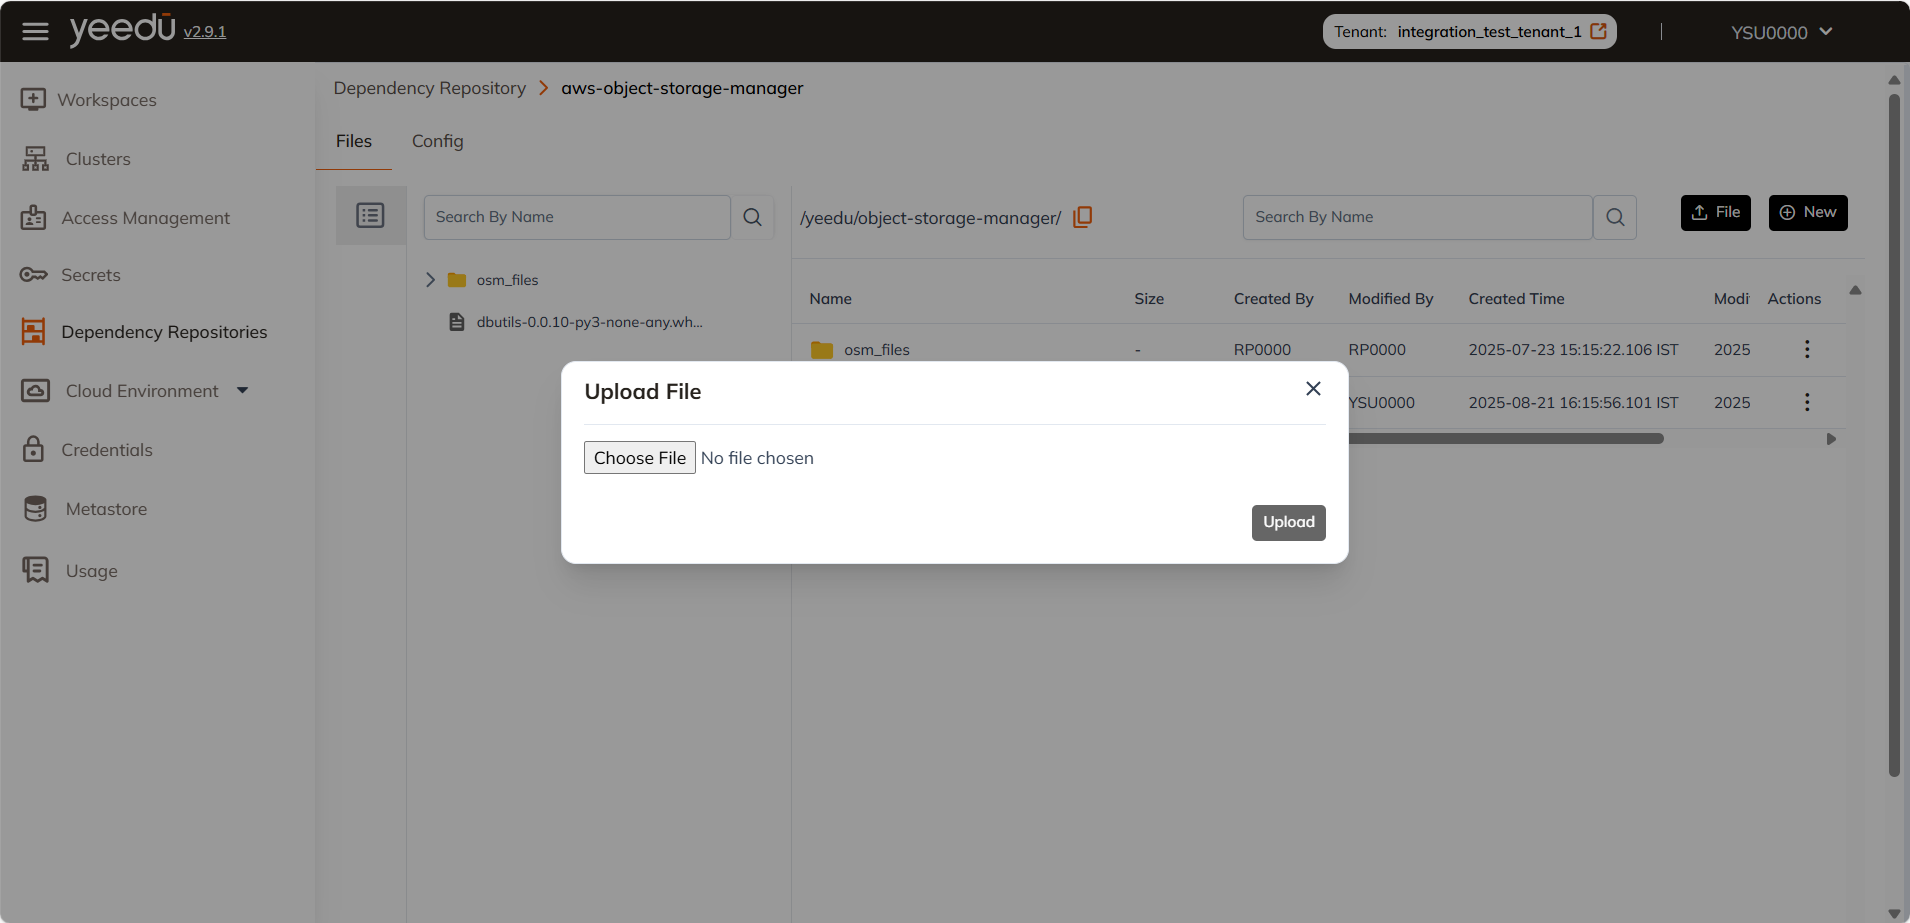
Users need to click on the ‘ Choose file’ button and select the file they want to upload in the repository. After that the user needs to click on the ‘Upload File’ button to upload the file.
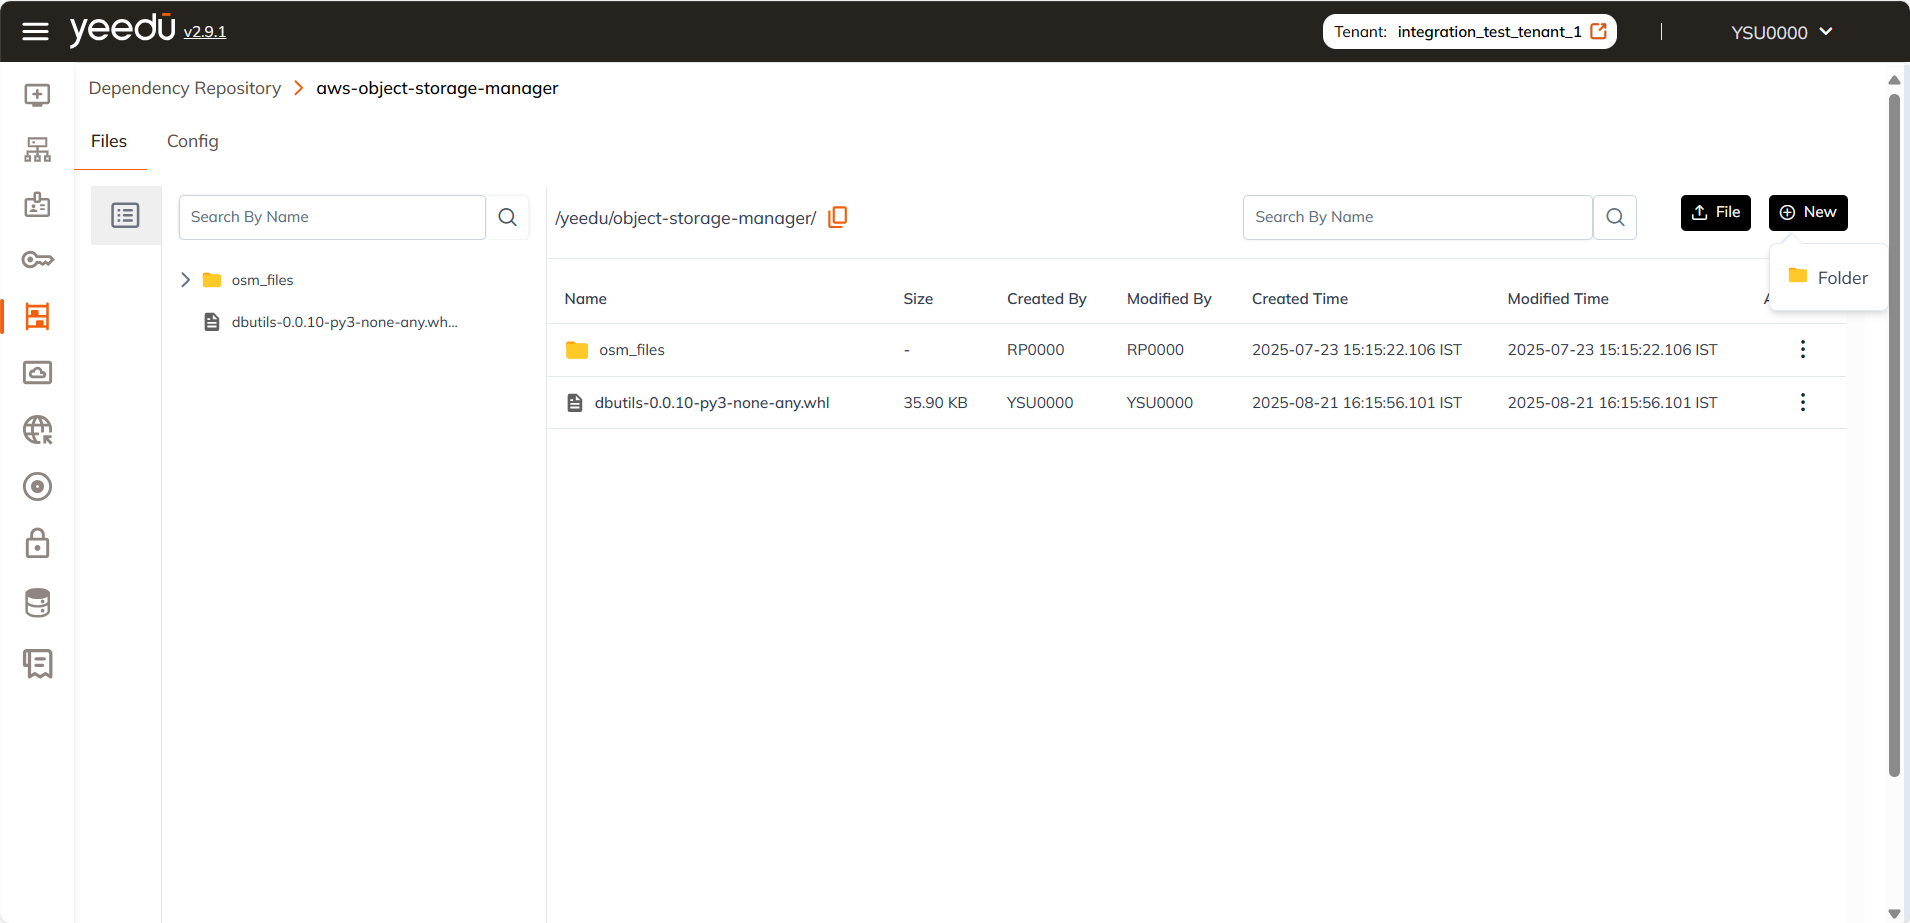
Clicking on the "New" button opens a dropdown menu with the option to create a new folder. Selecting "Folder" brings up a pop-up window where users can enter a folder name and click the "Create" button to add a new directory to the repository.
Config
The Config tab will allow the user to modify the repository.
The user can modify all the details about the repository except the cloud provider. If the user wishes to change the cloud provider , then the user needs to delete the repository and new repository with the desired cloud provider.
The recommended resolution for Yeedu UI is 1920 x 1080.