Workspace
Workspace offers a dynamic, shared environment designed to facilitate the development of jobs and notebooks. It enables teams to collaborate effectively by providing tools and features that streamline coding, debugging, and deploying applications. This integrated setting ensures that all team members can work concurrently on projects, share insights, and maintain a unified development workflow
Users can access Workspaces by selecting the 'Workspace' option in the Yeedu navigation panel.

Workspace Dashboard
The Workspace landing page presents the following options to the user:
- ID: Displays the unique workspace ID associated with each workspace.
- Workspace Name: Shows the list of all existing workspace names. Click on a workspace to view details.
- Jobs: Indicates the number of jobs present in the workspace.
- Notebooks: Displays the number of notebooks present in the workspace.
- Created By: Indicates the user who created the workspace.
- Modified By: Indicates the user who last modified the workspace.
- Created Time: Displays the date and time of the creation of the workspace.
- Modified Time: Displays the date and time of the last modification of the workspace.
- Actions: Allows performing two tasks:
- Edit: Enables users to make changes and modifications to the workspace.
- Inactive: Allows users to make the current active workspace inactive. In case of an inactive workspace, it will show an option to make it active.
Manage
Create Workspace
On the right side of the workspace dashboard, users can find the '+ Workspace' button located above the Action tab. This button is utilized for creating a new workspace. Clicking on the '+ Workspace' button will prompt a pop-up window to create a new workspace.
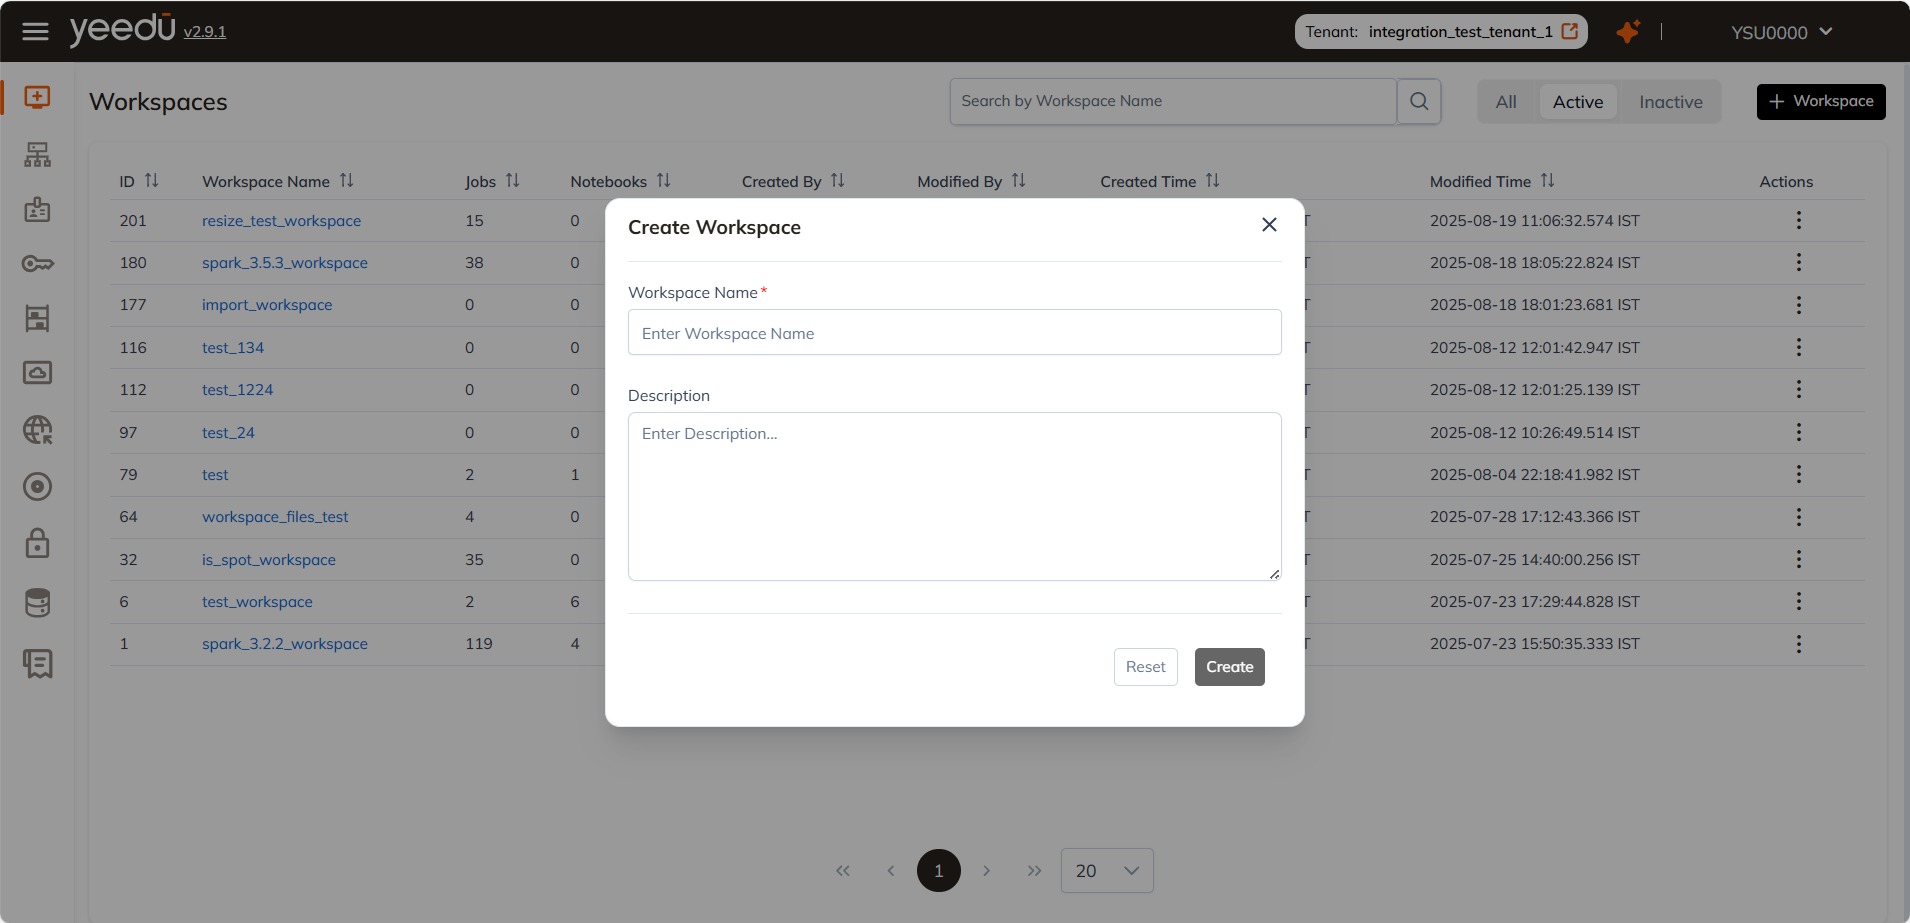
- Workspace Name: Input the name of the workspace in this field, ensuring it meets the following prerequisites:
- Maximum length: 64 characters
- Lowercase letters
- Permitted symbols: '-', '_', '@', and '.'
- Description: Optionally provide a description of the workspace in this field.
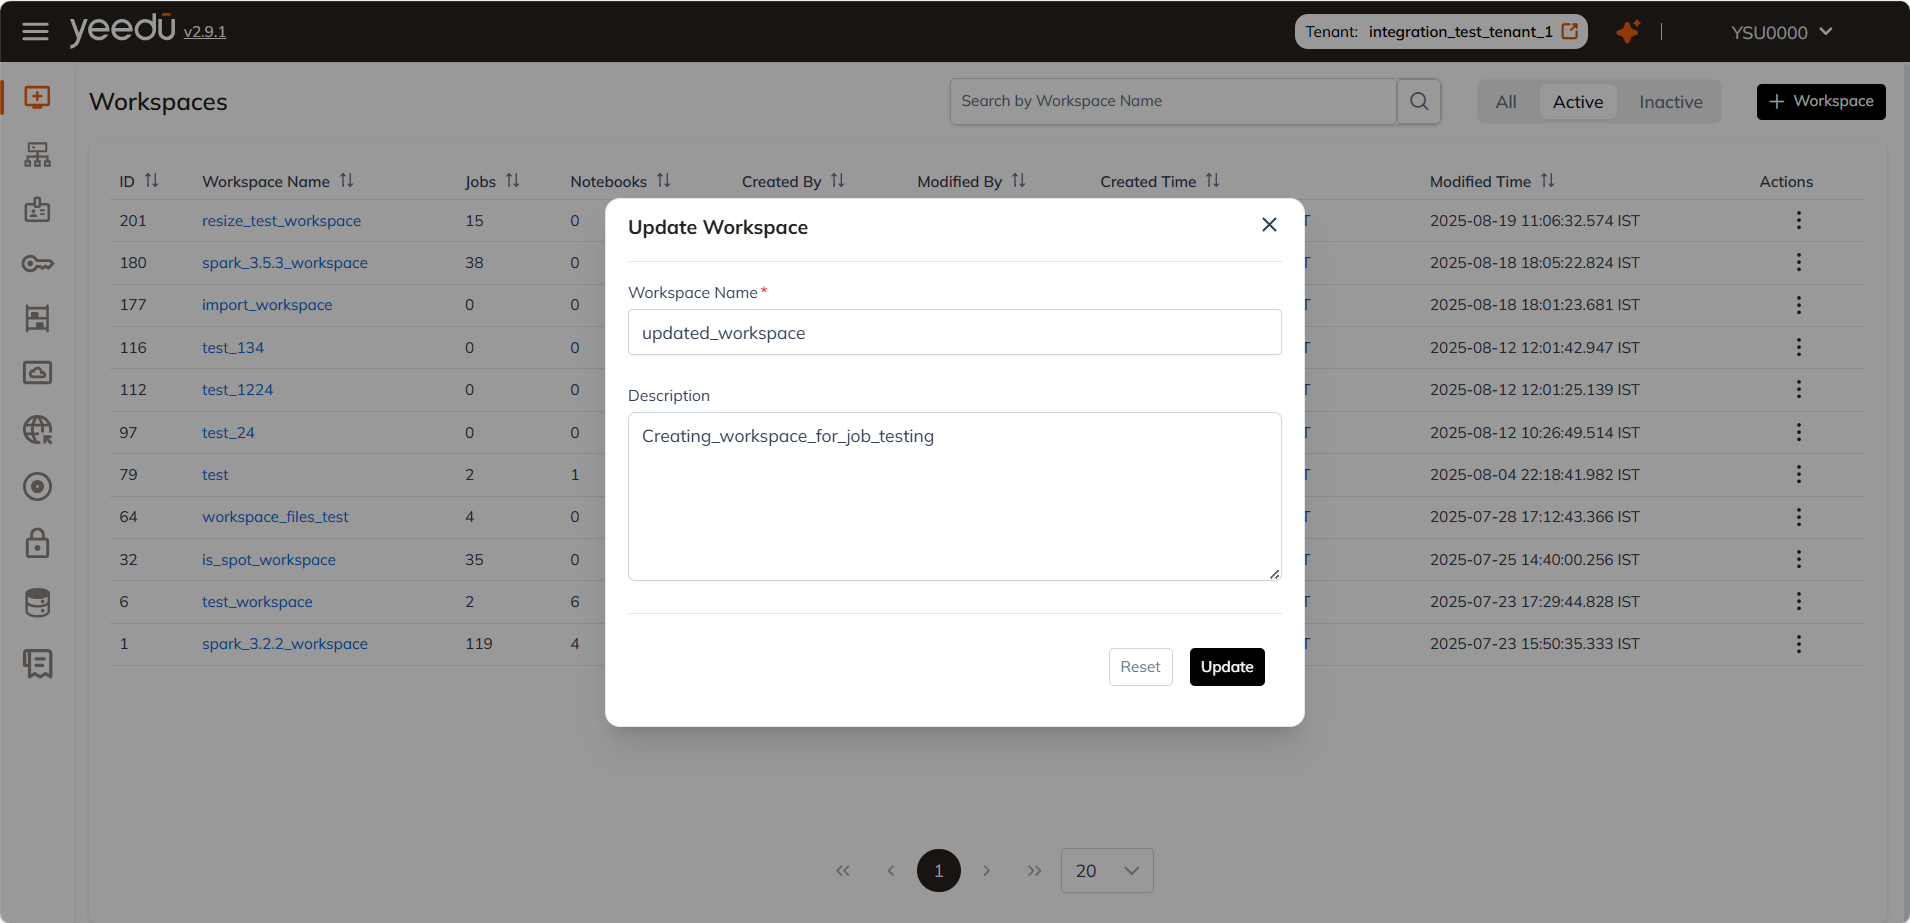
View / Edit Workspace
The 'Edit' button within the Action column enables users to modify the workspace name and include a description.
Workspace Permission Matrix
| Ability | Can Manage | Can Edit | Can Run | Can View |
|---|---|---|---|---|
| Workspace Access Management | ✔ | ✖ | ✖ | ✖ |
| Activate or Inactivate the Job, Notebook, Workspace | ✔ | ✔ | ✖ | ✖ |
| Create or Update Job or Notebook Configurations | ✔ | ✔ | ✖ | ✖ |
| Run or Stop the Job or Notebook | ✔ | ✔ | ✔ | ✖ |
| Read All Job or Notebook Configurations and Runs | ✔ | ✔ | ✔ | ✔ |
Files in Workspaces:
The Files in Workspaces feature enhances workspace functionality by enabling users to manage files efficiently. Users can now seamlessly upload, delete, edit, and create files directly from the UI, facilitating job execution and notebook workflows.
Navigating to Files in Workspaces
To access the Files in Workspaces feature, follow these steps:
- Navigate to the Workspaces tab.
- Click on Files in Workspaces.
- The file management interface will be displayed, allowing to interact with files and folders.
File Management Operations
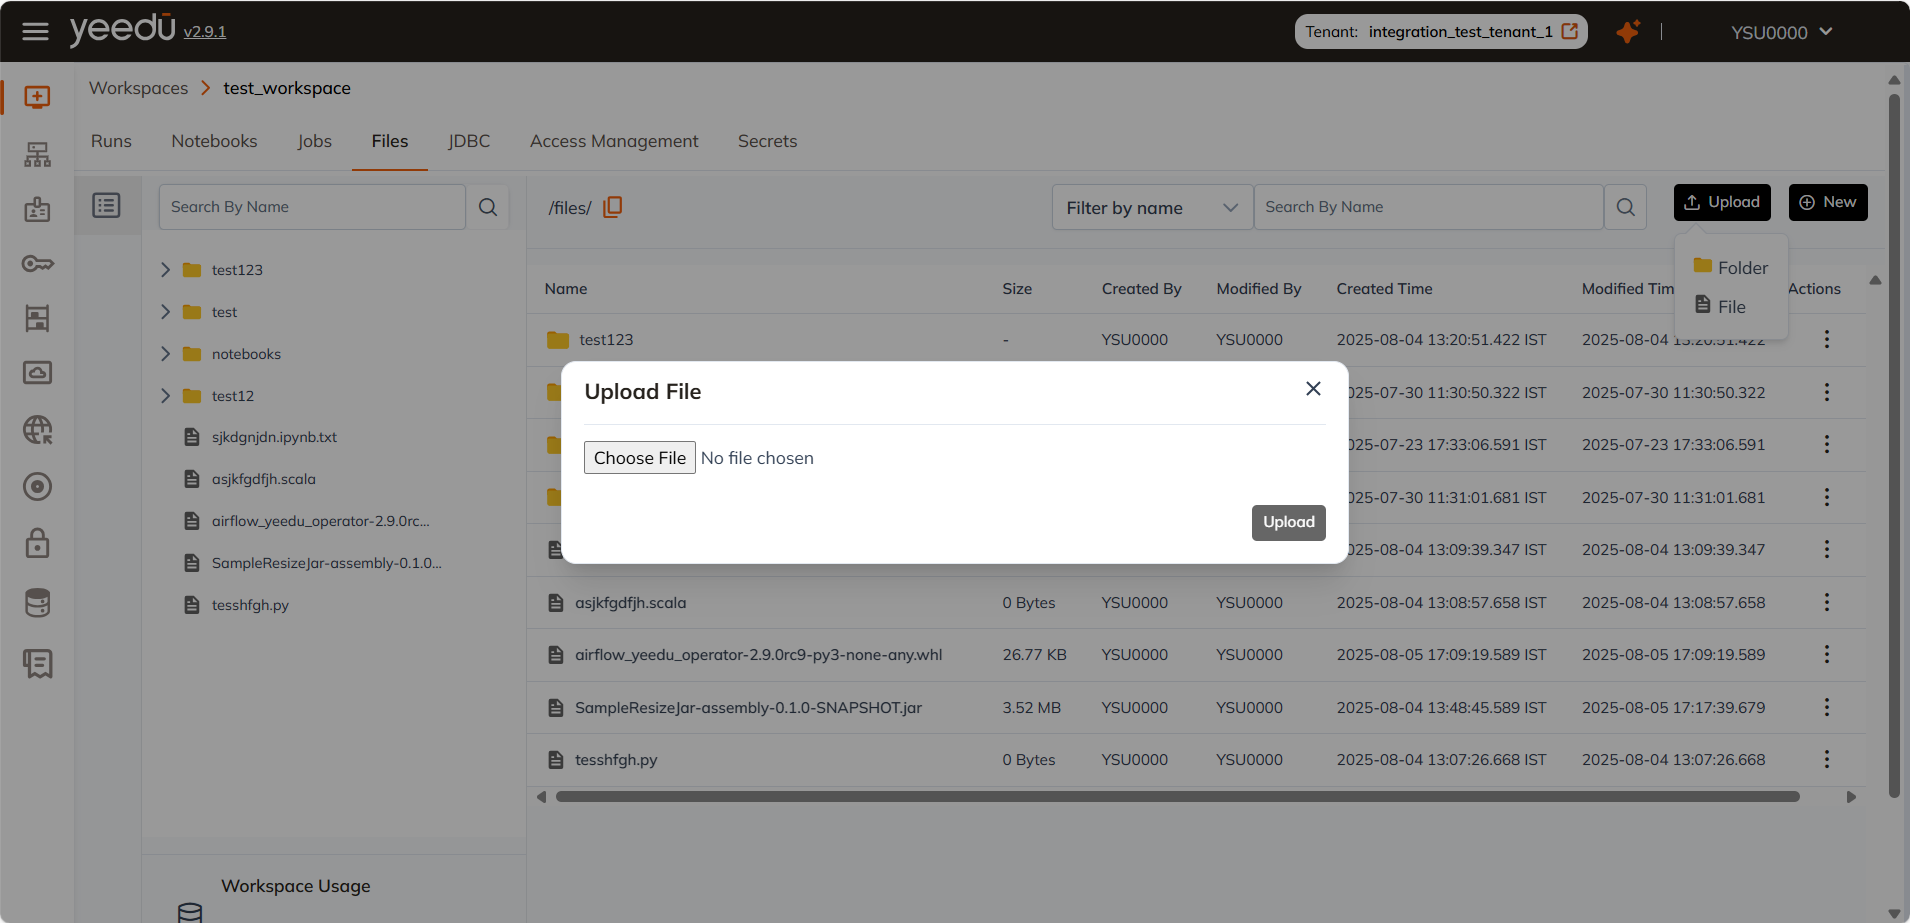
Uploading a File/Folder
- Click the Upload button in the top-right corner.
- Select the file from your system and click Open.
- The file will be uploaded to the selected workspace.
Creating a New File/Folder
- Click on the New button in the top-right corner.
- Choose the file type.
- Enter the file name and start editing.
- Save your changes.
Editing a File
- Locate the file in the workspace.
- Click on the file name to open it.
- Make necessary edits and save your changes.
File Actions
Hover over any file or folder to access the Action Menu (⋮).
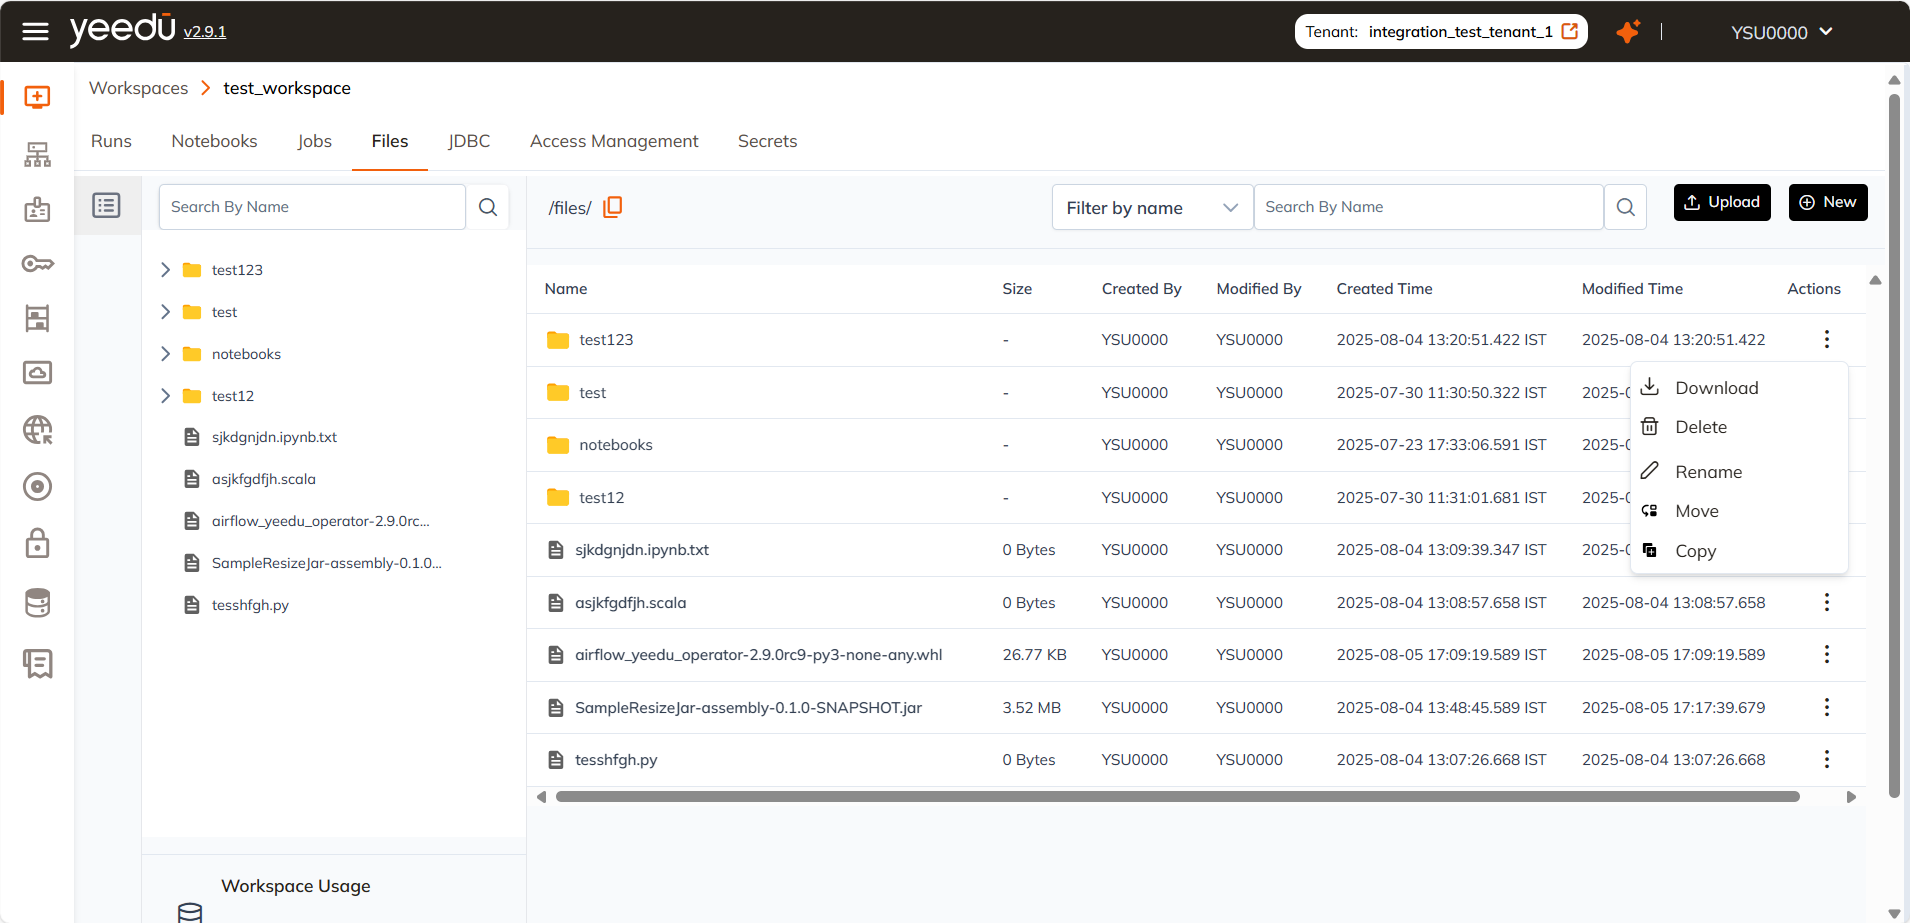
| Action | Description |
|---|---|
| Download | Download the file/folder to your local machine |
| Delete | Permanently remove the file or folder (with confirmation) |
| Rename | Edit the file or folder name inline |
| Move | Relocate item to another folder within the workspace |
| Copy | Create a duplicate in the target location |
You can only perform these actions on files only if you have required permission to access.
Download a file
- Open the file action menu (⋮)
- Click Download
- File is saved locally in your default downloads folder
Download a folder
- Open the file action menu (⋮)
- Click Download
- File is saved locally in zip format.
Rename
- Select Rename from the action menu
- Input the new name
- Hit Enter or click ✓ to confirm
Move
- Click Move
- Choose the target folder using the provided navigation dialog
- Confirm the move
Copy
- Click Copy
- Select destination folder
- A duplicate of the file/folder is created
Benefits of File Management in Workspaces
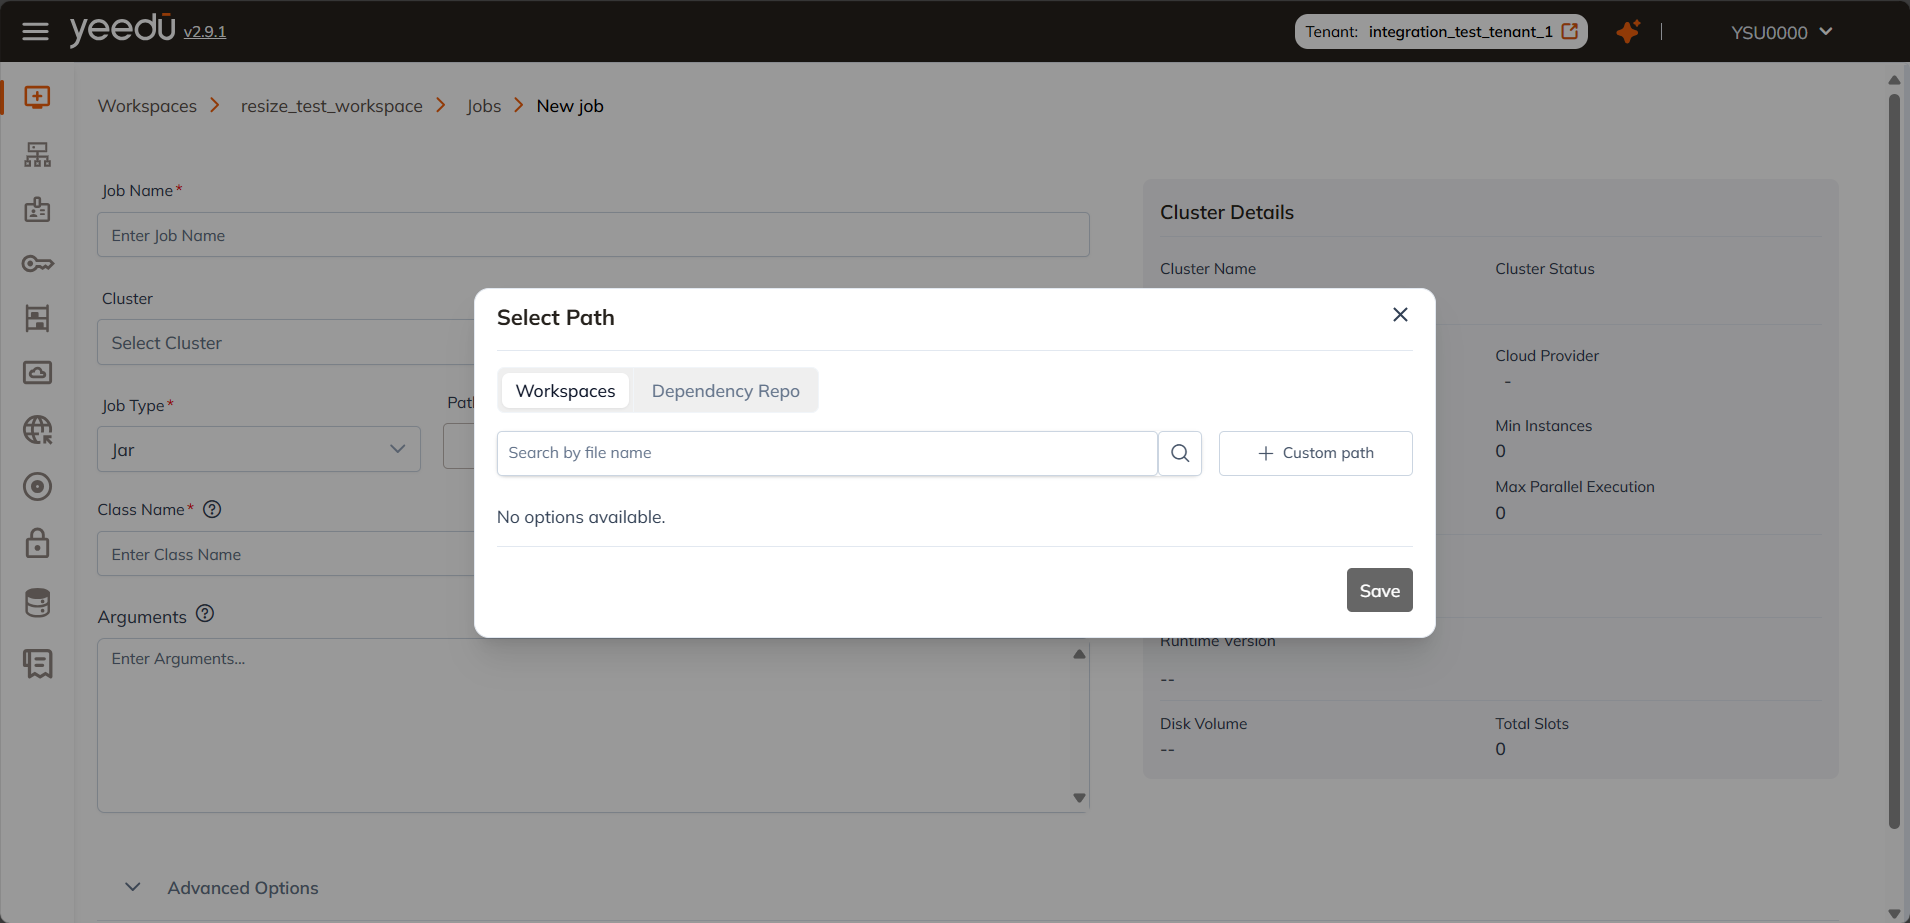
- Seamless Integration: Files can be directly used in job execution and notebook workflows.
- Enhanced Productivity: Quick file access and editing without external tools.
- Better Organization: Files are structured within workspaces for easier management.
The recommended resolution for Yeedu UI is 1920 x 1080.