Enable / Disable Workspace
A Workspace can be made Inactive (disabled) and later made Active again. Disabling doesn't delete anything. The action can be undone.
Workspace list filters
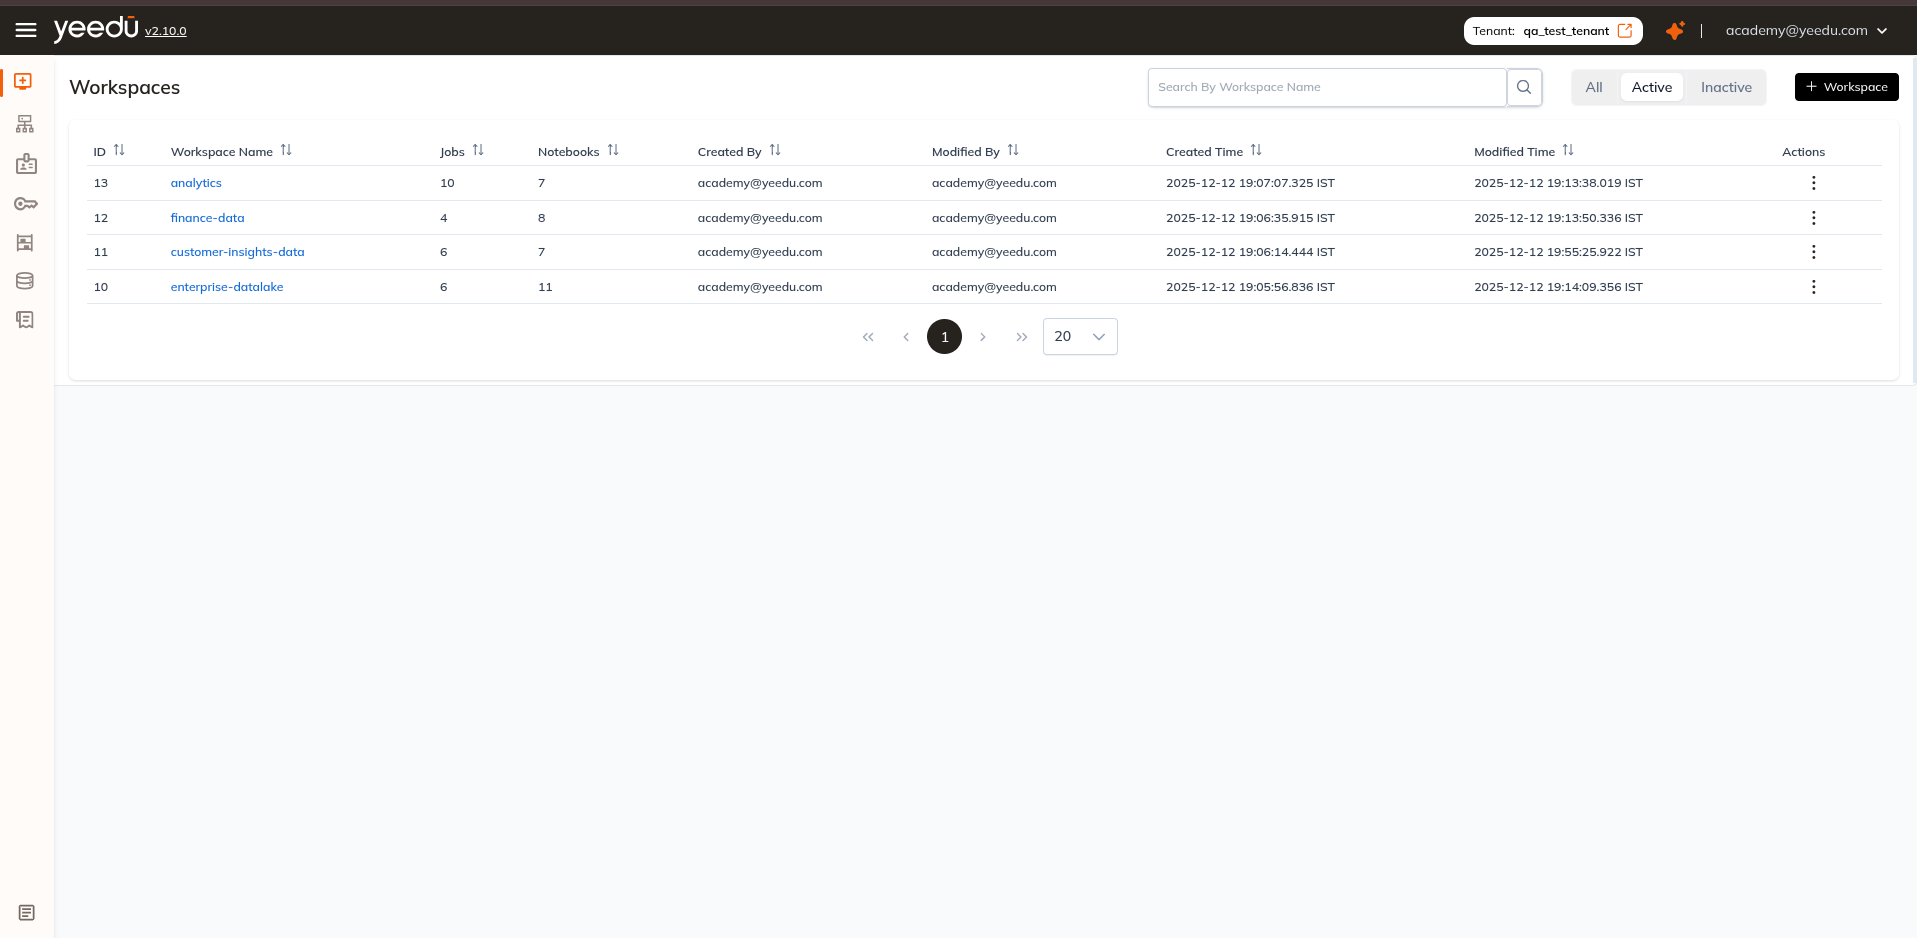
The Workspaces list carries three filter pills, each showing a count:
- All : all Workspaces (
tab=all). - Active : active Workspaces only (
tab=active, the default). - Inactive : disabled Workspaces only (
tab=inactive).
Disable (Inactivate) a Workspace
To disable a workspace:
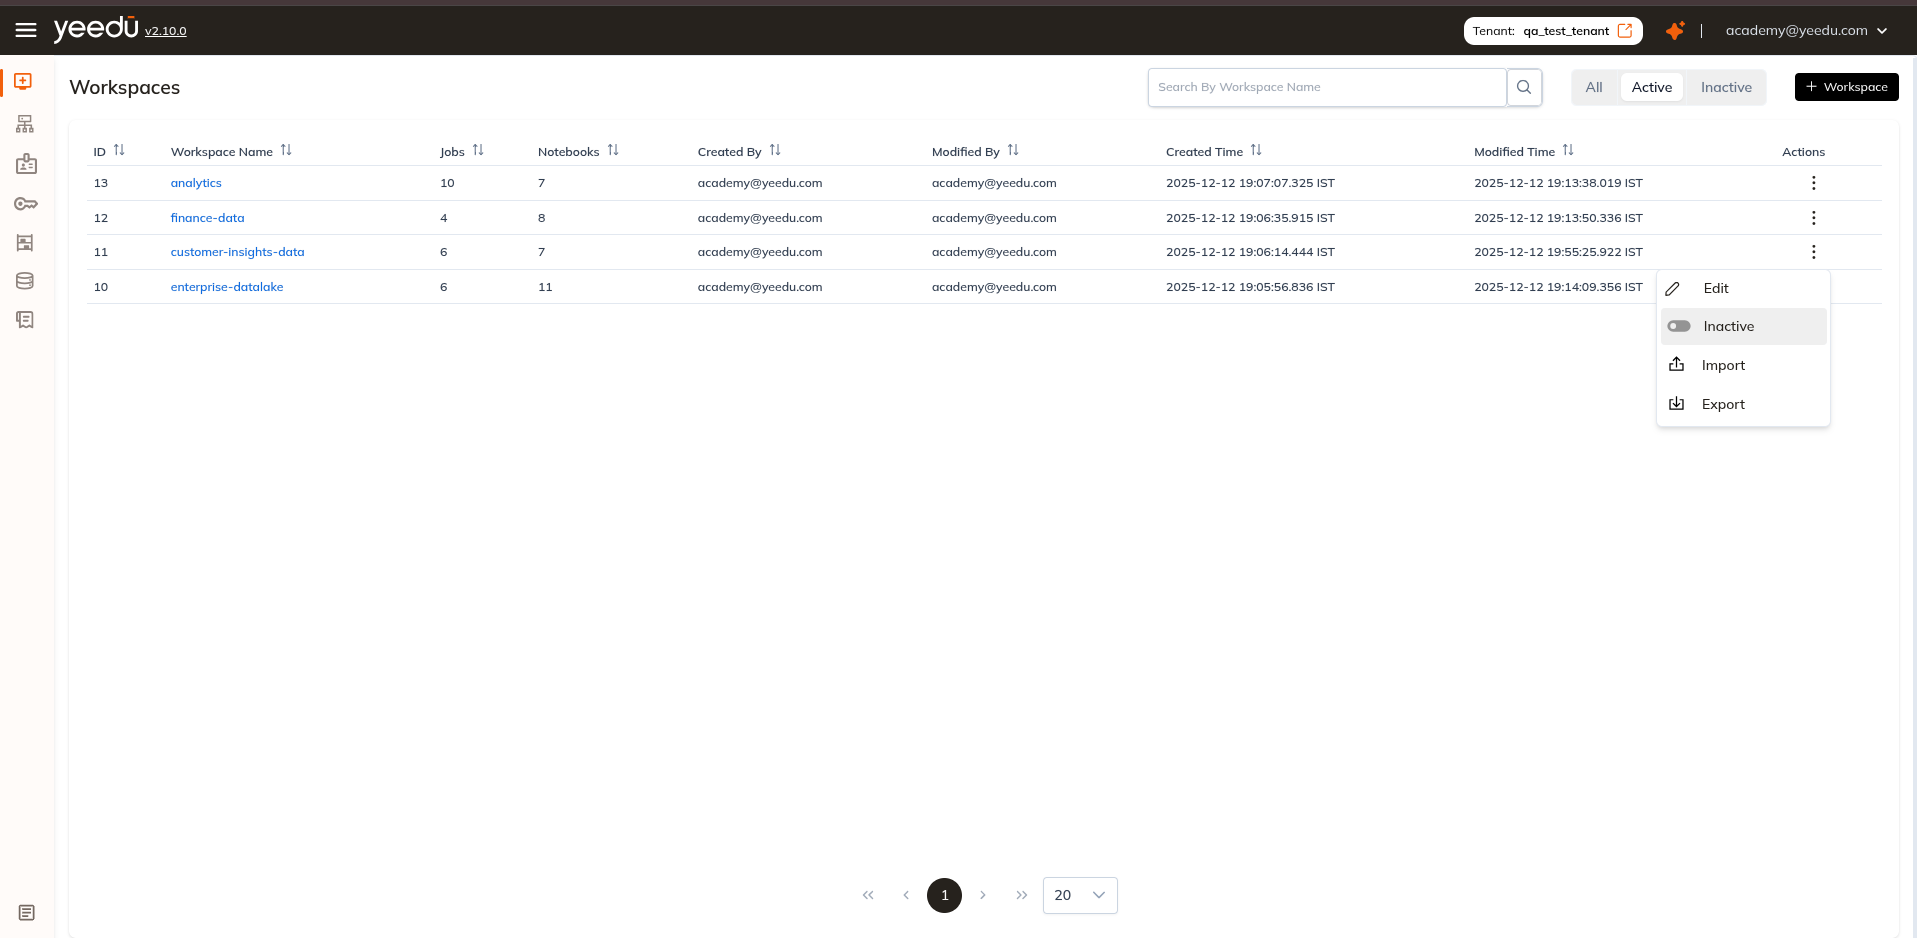
- On the Workspaces list, open the Actions (⋮) menu on the Workspace row.
- Select Inactive.
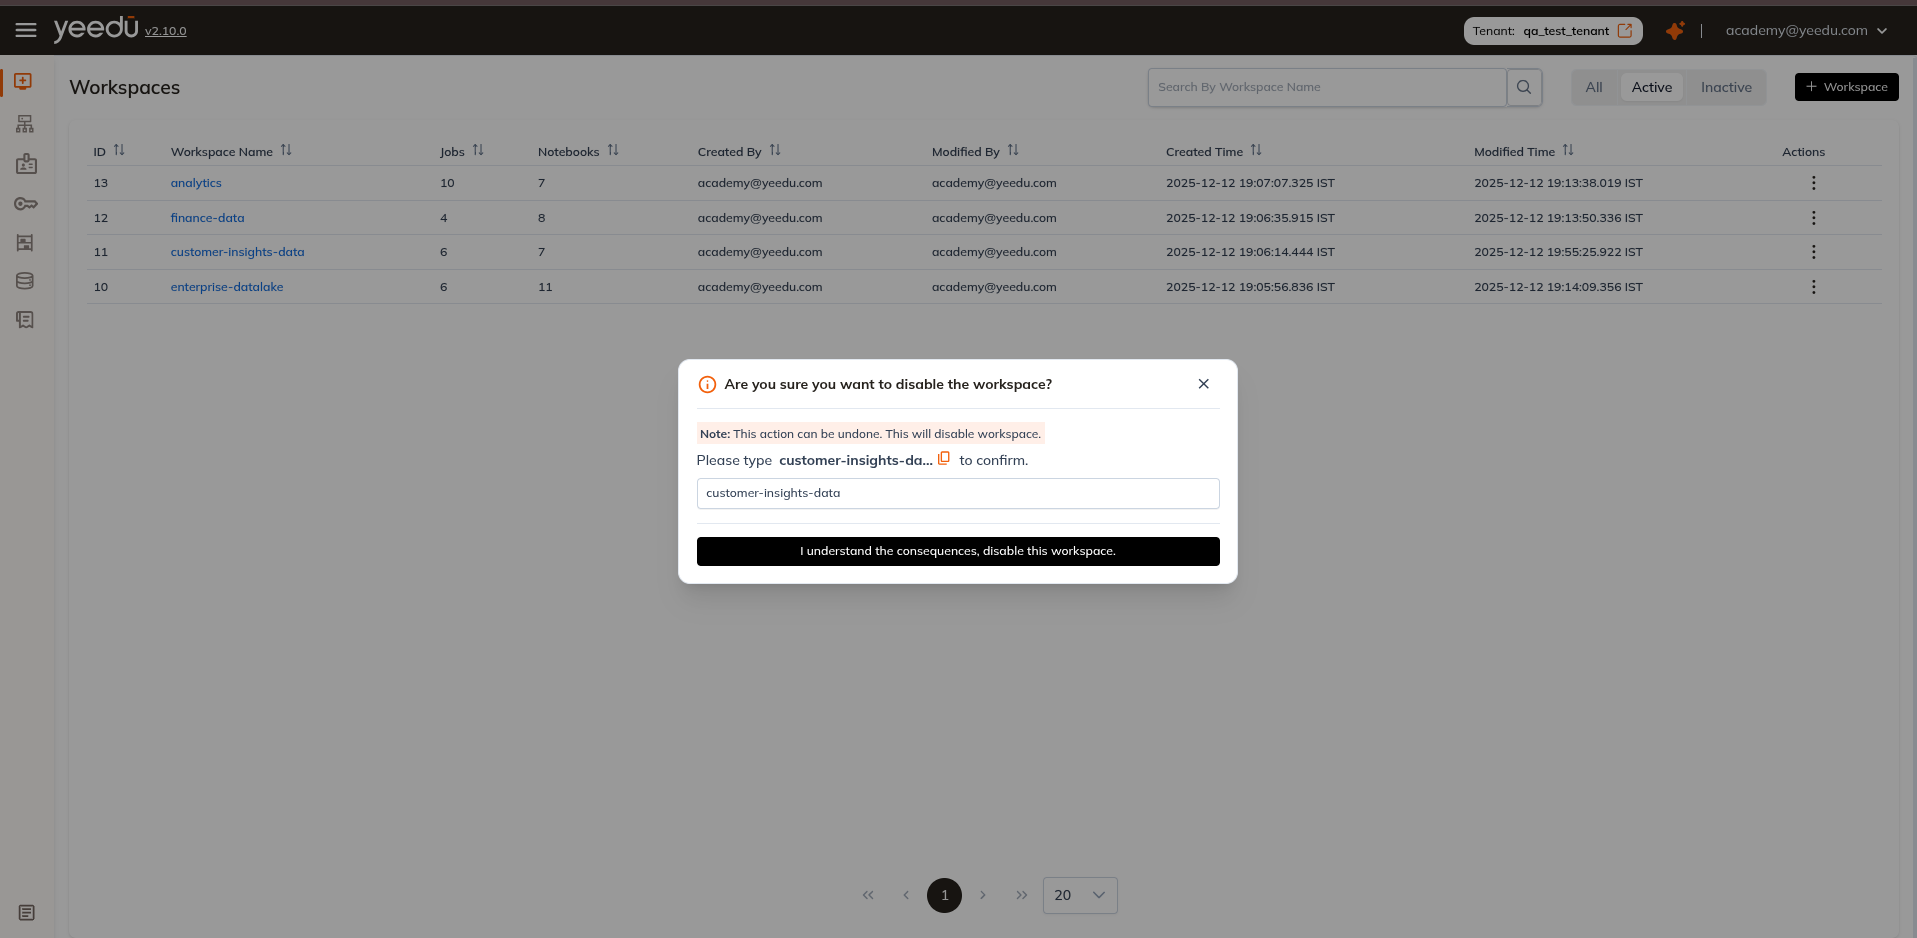
- A confirmation dialog appears:
Are you sure you want to disable the workspace?
Note: This action can be undone. This will disable workspace.
Please type '<workspace name>' to confirm. - Type the exact Workspace name. The confirm button, I understand the consequences, disable this workspace., stays disabled until the typed name matches.
The Workspace then moves to the Inactive filter.
Once a Workspace is inactive, its Actions menu no longer offers Edit or Inactive; it offers Active, Import and Export.
Disabling a Workspace doesn't delete data. The dialog states the action can be undone.
Enable (Activate) a Workspace
To reactivate a previously disabled workspace:
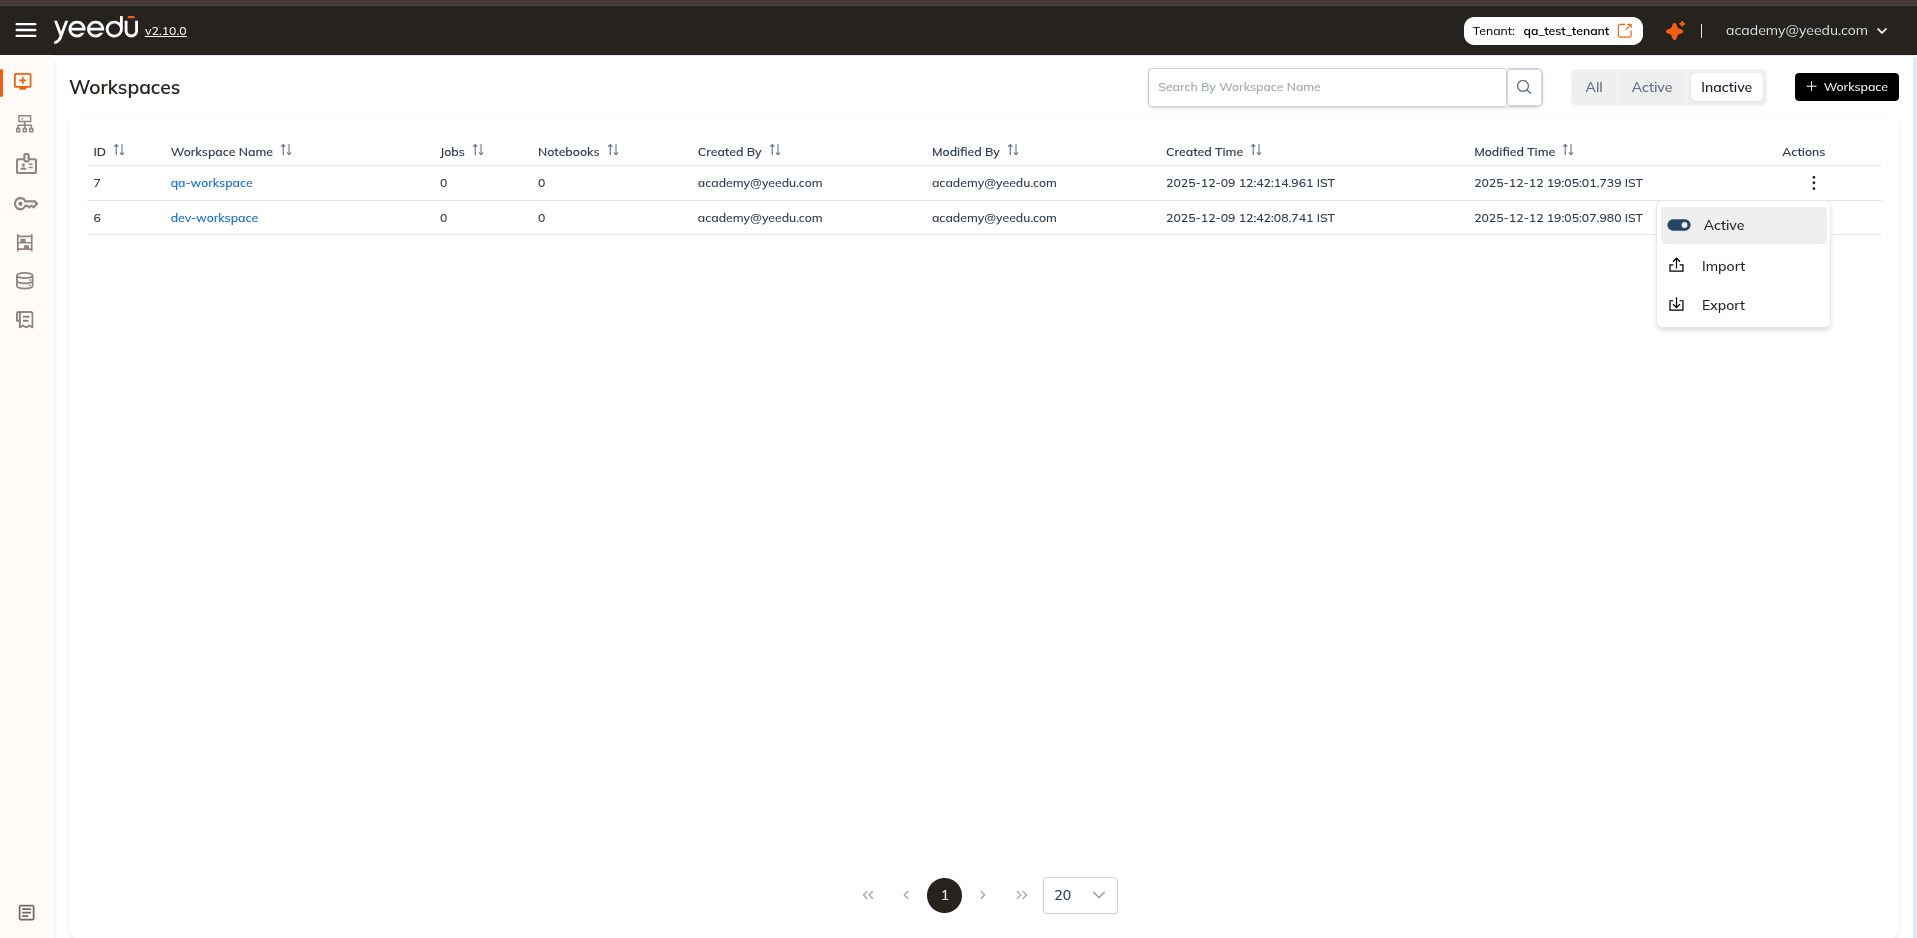
- Switch to the Inactive filter on the Workspaces list.
- Open the Actions (⋮) menu on the Workspace row.
- Select Active.
There's no confirmation dialog on this path. The Workspace is re-activated immediately and moves back under the Active filter.
Workspace Permission Matrix
| Ability | MANAGE | EDIT | RUN | VIEW |
|---|---|---|---|---|
| Workspace Access Management | ✔ | ✖ | ✖ | ✖ |
| Update the Workspace, or make it Active / Inactive | ✔ | ✖ | ✖ | ✖ |
| Import into the Workspace | ✔ | ✔ | ✖ | ✖ |
| Create or update Job and Notebook configurations | ✔ | ✔ | ✖ | ✖ |
| Make a Job or Notebook Active / Inactive | ✔ | ✔ | ✖ | ✖ |
| Run or stop a Job or Notebook | ✔ | ✔ | ✔ | ✖ |
| Read Job and Notebook configurations and run history | ✔ | ✔ | ✔ | ✔ |