Workspace JDBC, Access Management, and Secrets
We cover the last three tabs of a Workspace here: JDBC, Access Management, and Secrets.
JDBC
The JDBC tab lists the ready-to-paste Hive JDBC connection strings for the clusters in the Workspace, together with the credentials you authenticate with.
Route:
/workspace/<id>/jdbc?page=1&limit=20
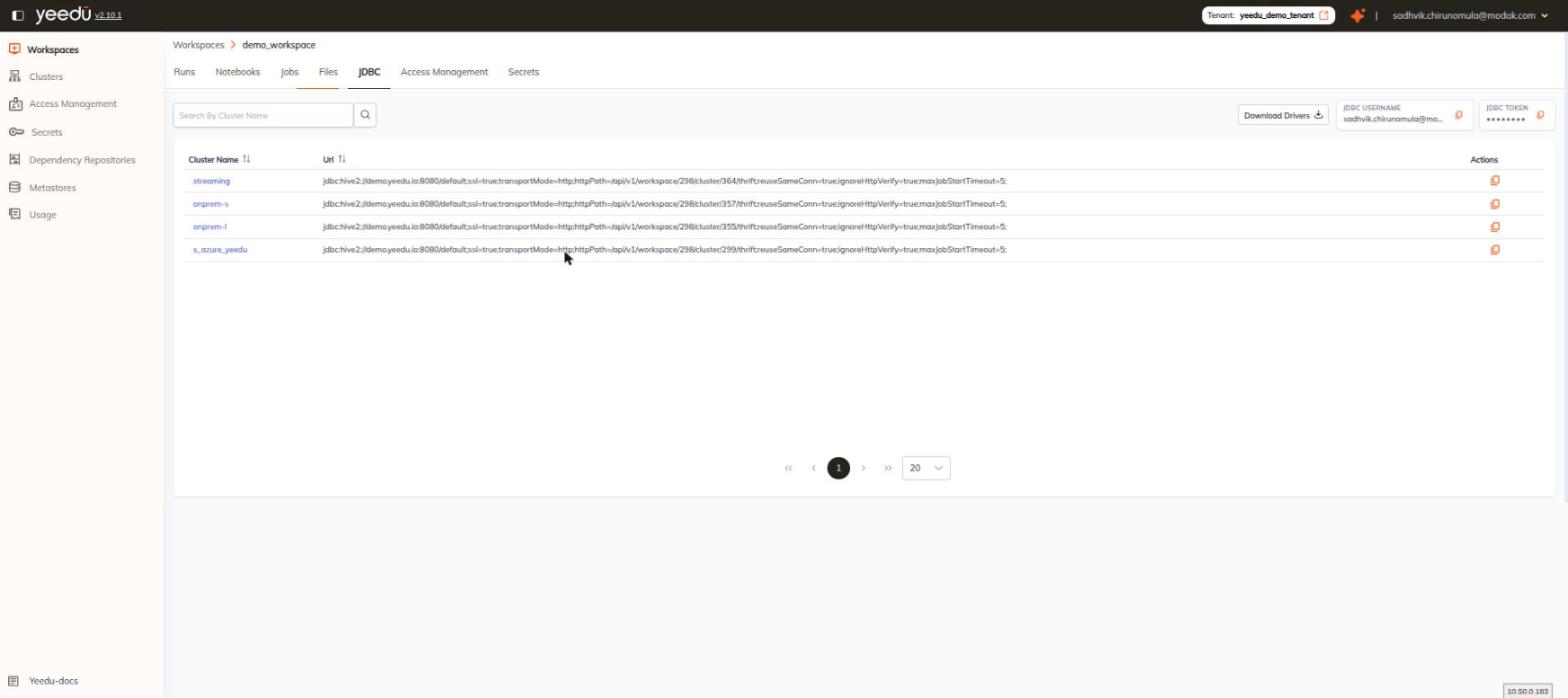
Toolbar
| Control | Description |
|---|---|
| Search By Cluster Name | Filters the table by cluster name. |
| Download Drivers | A download link for the standalone Hive JDBC driver JAR (hive-jdbc-3.1.3-standalone.jar) matching the Yeedu release. |
| JDBC USERNAME | A read-only card showing the signed-in user's email address, with a copy-to-clipboard icon. |
| JDBC TOKEN | A read-only card showing the token masked as dots, with reveal and copy icons. |
Use the value in the JDBC USERNAME card as the connection username and the value behind the JDBC TOKEN card as the password when your SQL client prompts for credentials.
Columns
| Column | Description |
|---|---|
| Cluster Name | Name of the cluster, rendered as a link to the cluster. Sortable. |
| Url | The full Hive JDBC connection string for that cluster. Sortable. |
| Actions | A single copy icon that copies that cluster's JDBC URL to the clipboard. |
URL shape
Each URL is a standard jdbc:hive2 string whose httpPath encodes both the Workspace and the cluster:
httpPath=/api/v1/workspace/<workspaceId>/cluster/<clusterId>/thrift
A complete URL looks like this:
jdbc:hive2://demo.yeedu.io:8080/default;ssl=true;transportMode=http;httpPath=/api/v1/workspace/298/cluster/364/thrift;reuseSameConn=true;ignoreHttpVerify=true;maxJobStartTimeout=5;
Because the cluster id is part of the path, the table shows one row per cluster in the Workspace. The list is paginated, with page controls and a page-size dropdown in the footer.
Access Management
The Access Management tab grants Workspace-level permissions to groups and to individual users.
Route:
/workspace/<id>/workspace-access-management?workspaceId=<id>
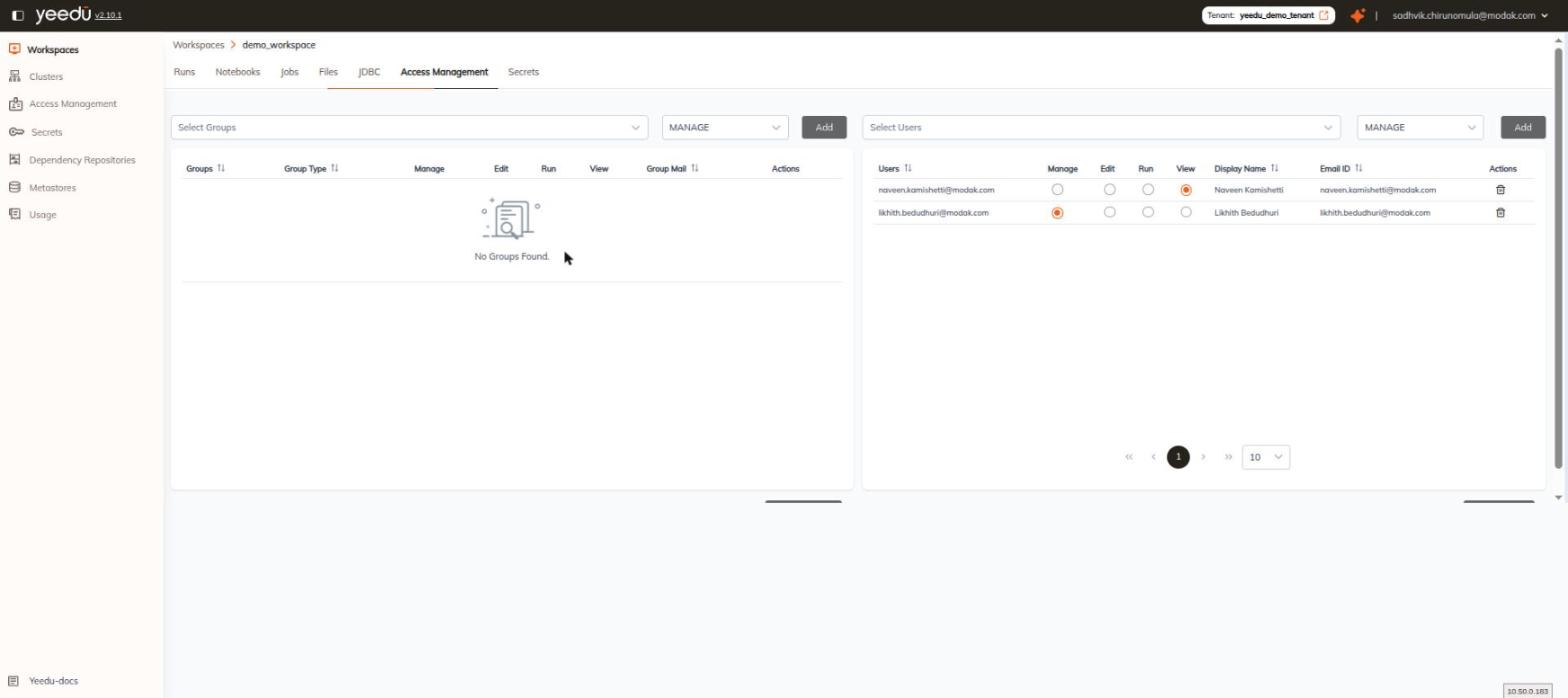
The tab is split into two side-by-side panels — Groups on the left and Users on the right. Each panel has its own add row and its own save button, so we save group and user grants independently.
Permission model
Each panel exposes four permission columns — Manage, Edit, Run, and View. They're rendered as radio buttons, so a principal holds exactly one level; the levels are mutually exclusive, not additive.
| Level | Meaning |
|---|---|
MANAGE | Everything EDIT allows, plus updating the Workspace itself, making it Active or Inactive, and managing its access. |
EDIT | Everything RUN allows, plus creating, updating, activating and inactivating Jobs and Notebooks, and importing into the Workspace. |
RUN | Everything VIEW allows, plus running and stopping Jobs and Notebooks. |
VIEW | Read Job and Notebook configurations and run history. |
This is the same permission enumeration we use for tenant-level access management.
Groups panel
The add row consists of a Select Groups dropdown, a permission dropdown that defaults to MANAGE, and an Add button. Pick a group, choose its permission level, and click Add to place it in the table below.
| Column | Description |
|---|---|
| Groups | Name of the group. Sortable. |
| Group Type | Type of the group. Sortable. |
| Manage | Radio button granting MANAGE. |
| Edit | Radio button granting EDIT. |
| Run | Radio button granting RUN. |
| View | Radio button granting VIEW. |
| Group Mail | Mail address associated with the group. Sortable. |
| Actions | Delete icon that removes the group's access. |
When no groups have been granted access the table shows No Groups Found. Click Update Groups at the foot of the panel to save your changes.
Users panel
The add row consists of a Select Users dropdown, a permission dropdown that defaults to MANAGE, and an Add button.
| Column | Description |
|---|---|
| Users | Username of the user. Sortable. |
| Manage | Radio button granting MANAGE. |
| Edit | Radio button granting EDIT. |
| Run | Radio button granting RUN. |
| View | Radio button granting VIEW. |
| Display Name | Display name of the user. Sortable. |
| Email ID | Email address of the user. |
| Actions | Delete icon that removes the user's access. |
The Users panel is paginated, with page controls and a page-size dropdown in the footer. Click Update Users at the foot of the panel to save your changes.
Adding, changing, or deleting a row only takes effect once you click Update Groups or Update Users for that panel.
Secrets
The Secrets tab is the Workspace-scoped secrets list, pre-filtered to the current Workspace.
Route:
/workspace/<id>/secrets
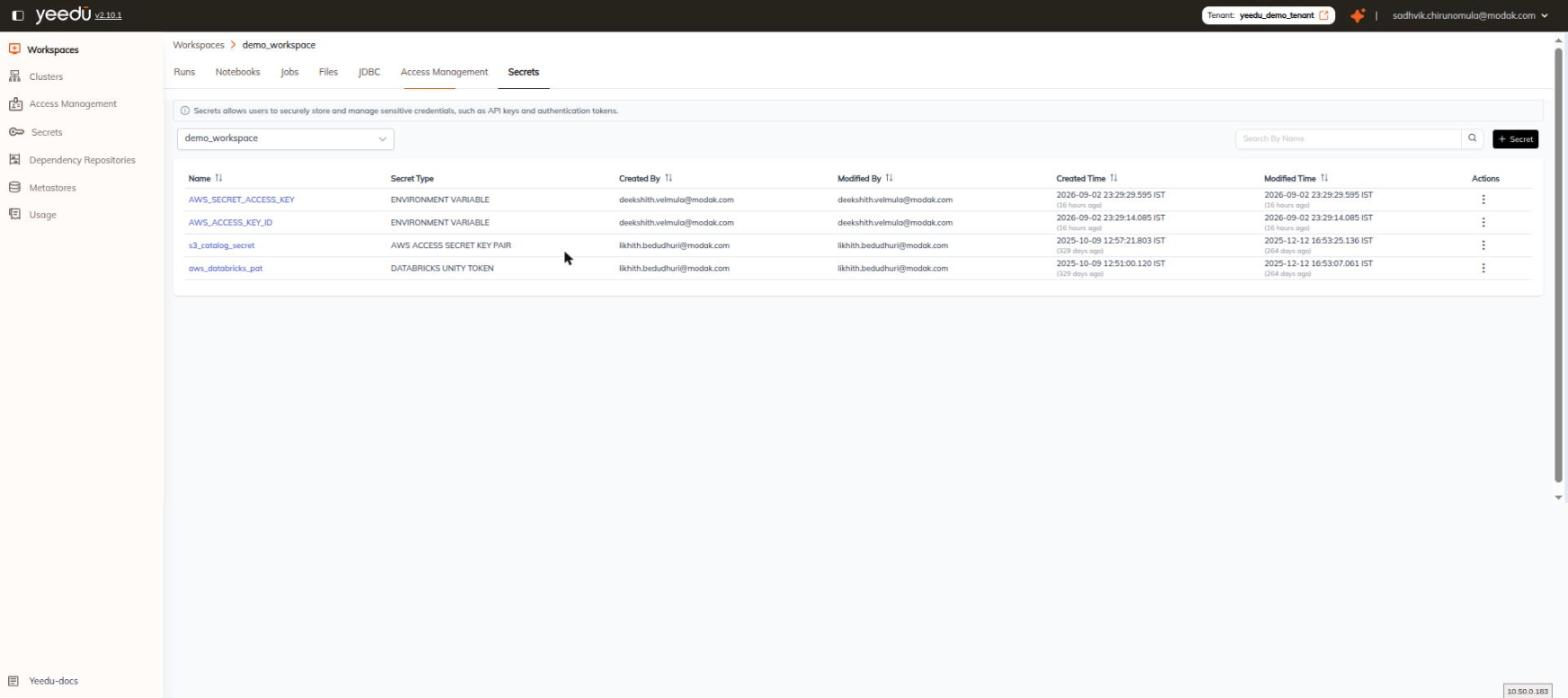
It's the same component as Secrets ▸ Workspace at tenant level, with the Workspace selector pinned to the Workspace you're in. It has the same info bar, the same Search By Name box, and a + Secret button at the top right of the toolbar. The row Actions kebab carries exactly two entries, Edit and Delete, the same two it carries on the tenant-level list, and the seven columns below are the same seven as well.
| Column | Description |
|---|---|
| Name | Name of the secret. Sortable. |
| Secret Type | The secret's type, rendered verbatim — for example ENVIRONMENT VARIABLE, AWS ACCESS SECRET KEY PAIR, or DATABRICKS UNITY TOKEN. |
| Created By | User who created the secret. Sortable. |
| Modified By | User who last modified the secret. Sortable. |
| Created Time | Creation timestamp. Sortable. |
| Modified Time | Last-modification timestamp. Sortable. |
| Actions | Kebab menu with exactly two entries — Edit and Delete. |